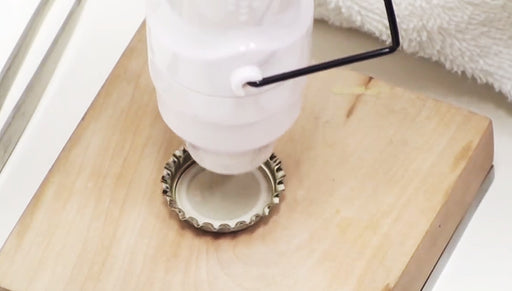
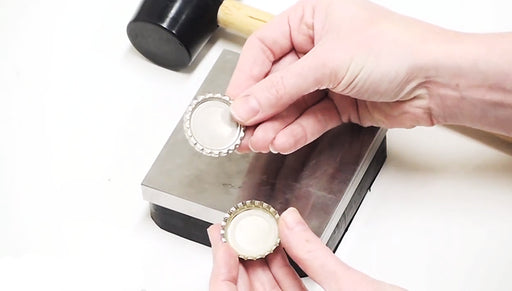
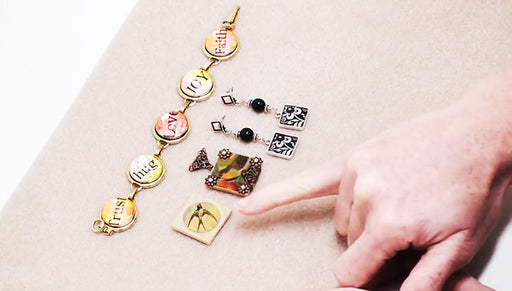
How to Prepare Images in Pendants for Resin Using Mod Podge

SKU VID-0314
Designer: Julie Bean
Learn how to prepare your images and graphics inside collage pendants and bezel settings for filling with resin. Step by step directions on how to adhere your images using glue and seal them with Mod Podge so that once you fill your pendants with resin, they will turn out beautiful and clear every time.
Audio Transcript
Note: This audio transcript is auto-generated and may not be completely accurate.
Thanks for joining us again at Beadaholique.com Today I want to show you how to prepare images in your bezel settings which you will then fill with resin. You have a wide array of various bezel shapes available to you on the market. A lot of them are very fun shapes like hearts and bottle caps and you also have more traditional shapes like rectangles, squares. Some are one sided, stays flat on the other side and some are actually two sided. Once you've chosen your bezel setting you know will need to find an image to put into it. There's a lot of wonderful collage sheets available for you and what's nice is if you are using a Patera finding such as this one it is actually specifically sized collage images to fit exactly into your bezel shape. They're actually gone one step further and there's a hole punch which is the exact size to punch out that image which will then fit into your setting. So you can go that route or you can go ahead and print something off the computer, use an old photograph. Really the sky's the limit. Any paper good is gonna work to fit into your setting. So what I want to do is I want to use this little bottle cap. A little trick with bottle caps is that the interior diameter is almost the size of the United States quarter. So that's a really great guideline. So I actually just trace this quarter. So I'm mistake a collage sheet and you can tell there's actually not an image that is the exact same size of my bottle cap. I'm going to take this little lady right here and cut her out. Set aside the rest of my sheet. You can tell she is not a circle shape. I'm going to cut the top so I have a guideline to work with. Then I'm going to line, it's a little hard to see this on camera but I can faintly see through the paper. I want her head centered. I'm going to put my quarter on there. Now take a pencil. It's very important to use a pencil. I'll show you in a moment why. I'm just going to cut it out. Now I'm going to see how it fits into my setting. It fits just about perfect. So now you're going to need to glue her into place. I have Nunn Design glue right here. You can use any thyme of whit glue that you want. A good white glue is what you're looking for. Now you can use a paintbrush or you can use your fingers. Personally I like using my fingers. So I've got a pad of paper right here. Flip her over and what's important when you're coating the backside with glue is you really want to make sure you go to all the edges and that's really why I like use my finger. I just feel like I have a little bit more control but you can use a paint brush. Just wash it out after you've used it. You can reuse is again. I'm just going to set her down. I'm gonna go around the edge with my finger and press her into place. I'm trying to get out any air bubbles. I'm also trying to just make sure that she's tightly bonded with the setting. I'm going to let her dry for about ten minutes. I just want to make sure that the glue totally dry before going to the next step. My setting is now dry. Now I need to do a top coat. So I have a couple of choices. I can use a sealant. Now Nunn Design Sealant is a great option because it works well with inkjet printers. So it won't cause your ink to run. I'm sure you've had experiences where you've put a sealer on top of a printed piece of paper off of your printer and the colors have bled and runs. So this is going to actually prevent that from happening. So this is a really good option if you're going to ahead and use something that you've printed yourself at home. Another option you have is Mod Podge. This is a really good option as well for a top coat. For this particular project I'm going to go ahead and use Mod Podge. I'm going to poor a little bit on my paper. This time I am going to use a paint brush and I'm going to show you why. So when you're gonna coat your image you want to go a round the edges. You wanna make sure that those edges are sealed because otherwise your resin is going to seep underneath your paper and cause discoloration. So I always go around the edges first and then into the middle. If you do a little bit a cross pattern, it'll help to reduce the amounts streaks you have. I actually feel like I have a little too much on my paint brush there so I just wiped it off. So I'm going to let that dry and I'll come back and I'm gonna do a second coat and perhaps even a third coat and I'll show you why. So over here I have some examples of resin filled bottle cap settings have already done. With a little girl here, this is a Renoir painting. It was just printed off of a computer. You can tell it's rather thin paper and you can see how bright she is to begin with in her original form. In this first one I actually didn't put a sealant on top. So I glued the paper into the bottle cap and then I put the resin directly on top of it. There was not another layer like Mod Podge or sealant. Look at how dark she became. Now she is perfectly even in her coloration which is really important. So that is one option to you. Now remember I said you want to go ahead and use a pencil. If you look closely around her edge you can tell that I actually used a pen to trace the quarter and then that blue pen I used actually seeped through to the top. So that's why you wanna use a pencil. Now in the second one I put one layer of sealant over and look how muddled she is. You can tell the her face is kinda blotchy. So when you are going to use a sealant or Mod Podge you want to do at least two perhaps even three coats. So here's another example. Here is an image from the paris collage sheet. You can tell that is quite a bit darker than the original image. You can see the colorization has dark in quite a bit. You can also see the blue pen coming through but it's very even. So this is a great antiqued look. So it is an option. It's not something you just discredit right away and think oh I'm always going to seal it because it's kinda nice sometimes to have that real vintage look. Now here I used one coat of Mod Podge and you can tell it is blotchy and on this one I actually used two coats. This is a much more even finish. There's still one little spot where the resin darkened the paper. So I would actually recommend doing three coats. Here's a couple other examples. Here was an image I did and I sealed with sealant. You can you see that it did streak through a little bit. It works with this particular collage that i did but it's not ideal and that was one coat. Now here's a little lady that's very similar to the one we just cut out and did and she was actually coated with two coats. You can tell one tiny tiny little spot but overall it is pretty even. Here's another example of two coats and there's no spotting at all. Before we conclude I want to just give you one more tip. Never fill your bezels with resin till your sealants, your Mod Podge glue is totally dry. You see how there's a little white film and that's of course because my Mod Podge is not dry yet. If I was to put resin on top of this right now and that would actually be sealed in there and would remain permanently white. It might even cloud the resin. So you want to make sure it's completely dry. Be patient. You'll be a lot happier with the results in the end. We do show you in another Beadaholique.com instructional video how to mix your resin, pour it and finish it. Thanks for joining us. Go to Beadaholique.com for all of your beading supplies needs!

You recently viewed

Clear recently viewed