|
E6000 Industrial Strength Glue Adhesive (2 Oz) SKU: XTL-1052 $9.95 |
Hi This is Becky Nunn, a guest designer for Beadaholique.com and in this episode I'm gonna be talking about how to make a ring using resin that we have colorized with opaque pigments into a ring shank. What you'll need for this video you need to have a ring shank On this particular ring we're gonna be adding a couple little embellishments onto the top. You'll also need two mixing cups, you need to have watched How to Add Opaque Pigments to 2-Part Resin. You also need E6000 glue, a couple of stir sticks that I just cut in half and a toothpick for creating a flat surface that is completely level I used my mixing cup and my two little stir sticks to create a flat place where my ring shank could sit. With my resin that I've already put opaque pigment in I just go ahead and drizzle that into my bezel depending on how long you let your resin sit it starts getting thicker and thicker. My resin has been sitting a little bit but you can still see that it's good for filling up my ring shank since I'll be doing a couple of pieces onto the top of this I want it to be nice and flat and level so I'm making sure that I don't over pour my piece. As it dries you'll want to be continuing to come back and take a look at it to make sure that you don't have any air bubbles but even those air bubbles that you saw form, they just rise to the surface and they pop. If they aren't popping you'll want to use your or your toothpick to get them out. Once you've poured your resin in, you're going to want to put a little top over your ring to prevent any kind of dust from getting into the piece. After 24 hours your ring should be set and it'll be hard and dry to the touch I put a little bit of the E6000 glue onto my sheet and using a toothpick, I'm just applying a small amount onto the back of my embellishment. Depending on how stable your finger is you might want to use a pair of tweezers. I'm just gonna go for it see how we do. I'm going to apply my crown onto the surface of ring and now I'm gonna apply the star. I like doing it this way because I can control exactly how much glue I'm putting in there so I don't have a lot of access squeezing out of the sides and if I do I can pick it up my toothpick. How cool is that. So once my E6000 is glued on I'll have a great ring to wear. This is Becky Nunn with Nunn Design guest designer for Beadaholique.com showing how to make fun rings with colorizing pigments into two-part resin. Go to www.beadaholique.com to purchase beading supplies and to get design ideas!
Related Videos


How to Create a Faux French Enamel Look by Becky Nunn
In this video tutorial for Beadaholique, guest designer Becky Nunn of Nunn Design shows how to create a faux French enamel look for jewelry. She us...
View full details

How to Add Opaque Pigments to 2-Part Resin by Becky Nunn
In this video tutorial for Beadaholique, guest designer Becky Nunn of Nunn Design shows how to add opaque pigments to 2-part resin. You can create ...
View full details

How to Make the Vintage Embroidery Jewelry Set by Vintaj
In this video tutorial for Beadaholique, Mackie Mullane, designer and educational instructor with Vintaj, teaches how to make the Vintage Embroider...
View full detailsYou recently viewed
Clear recently viewed

How to Make Colorful Rings with 2-Part Resin and Pigment by Becky Nunn
In this video tutorial for Beadaholique, guest designer Becky Nunn of Nunn Design shows how to create colorful rings using 2-part resin and pigment...
View full details Sold out
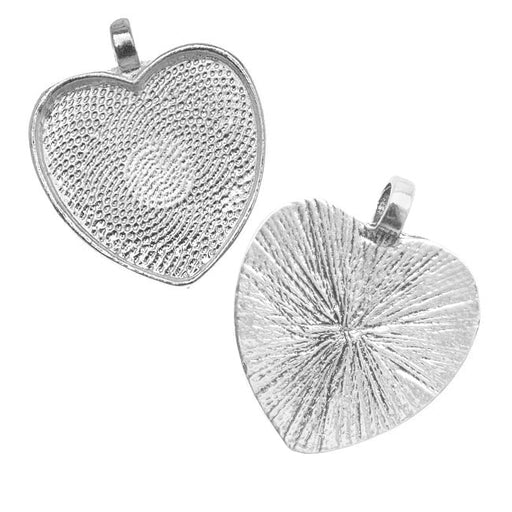
Bezel Pendant, Heart 25mm Inner Area, Silver Plated (1 Piece)
Heart shaped base for collage, Steampunk, cabochon, and resin dome projects. Bright silver plated onto lead-free base metal. Completely customiz...
View full details Sold out
True2 Czech Fire Polished Glass, Faceted Round Beads 2mm, Jet (50 Pieces)
From The Beadsmith collection come the faceted True2 fire polished beads. The edges and surface are then given a softer, polished look by placing ...
View full details
Magnetic Clasps, with Loops 7mm Diameter, Antiqued Brass Plated (1 Set)
These magnetic clasps have a flat disc shape with a closed loop on each end. Finish: Antiqued Brass Plated Measurements: 10mm long (including th...
View full details