How to Make an Austrian Crystal Pearl Bracelet Featuring Elegant Elements Clasps

SKU VID-1421
Designer: Julie Bean
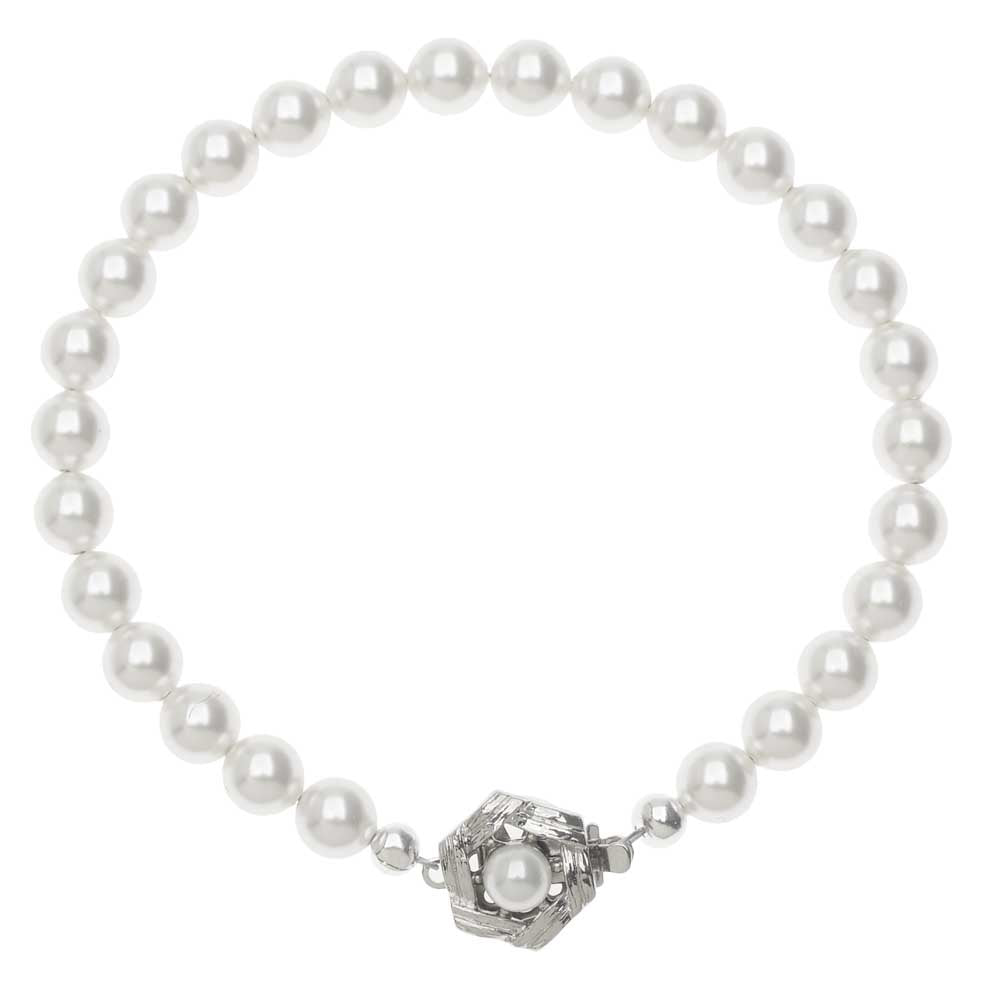
In this video learn how to make a strung pearl bracelet featuring Austrian crystal faux pearls and an Elegant Elements clasp. You will learn how to string the beads, crimp crimp beads, add a clasp, and finish of the design with crimp bead covers. The same skills you learned while making the single strand bracelet can be applied to multiple strand designs featuring larger scale Elegant Elements clasps.

The brand name for the crystals shown in this video is no longer available. High quality Austrian crystals are now available under the PRESTIGE™ Crystal Components line.

Audio Transcript
Note: This audio transcript is auto-generated and may not be completely accurate.
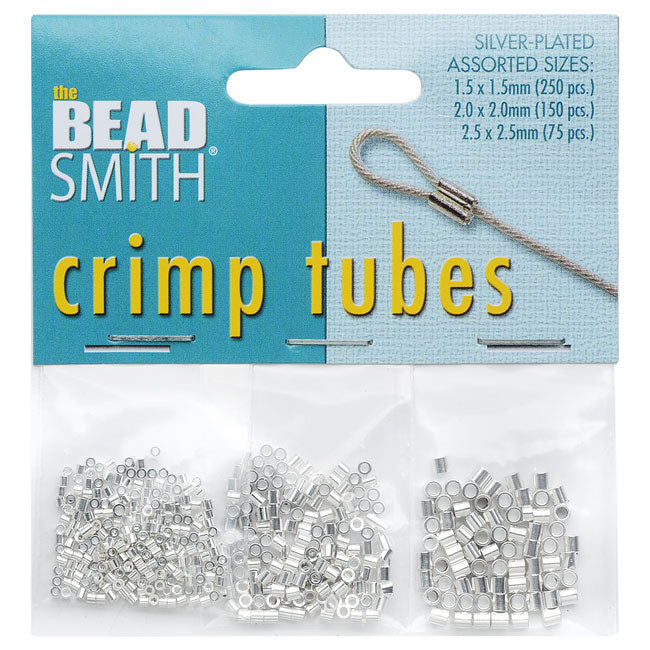
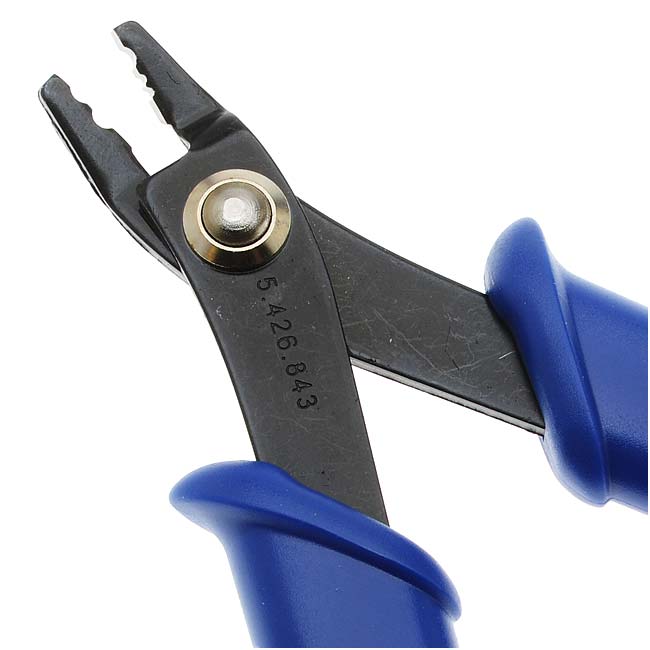
Hi, this is Julie with beadaholique.com and for my project here i'm going to be using this beautiful little petite elegant element's clasp with that white pearl in the center and before I do that though you can see I've got some other stuff on my table here and these are some recent additions to the elegant elements collection at betta Holly where you can find all these to purchase so I'm just gonna quickly show you some of these gorgeous gorgeous clasp I want to show the scale in my hand because some of these are quite large and just beautiful so you see that it just pulls out like that really nice closure and a lot of these are multi strand clasps so you see here we've got one two three four five loops you could do a five strand necklace or bracelet if I had that I'd almost use that as a focal bracelet or put it on the back of my neck or actually that'd be beautiful as a center focal in the necklace you could do that too you'll see that these have a beautiful finish they are rhodium plated and gold plated and all different sizes and a different number of loops like this little guy here has two loops so it would be a two strand so really quickly heart these wonderful double ones and then these guys here so these ones do not have crystal they've got that beautiful plating that lovely filigree and they do look great on both sides and we've got one two three four five six seven strands that you can accommodate here with the seven loops on each side beautiful pieces here so yeah I quickly want to show you these just before I dived into how you would use these so I'm just gonna make a single strand a bracelet but you would use the same technique on any of these on the multiple loops so I've got this little guy right here I'll pull out his little tab so I'll separate out the two clasps and for this project I'm going to be using some beading wire I've pre-cut myself sixteen inches I have some little bead Stoppers to help me along the some Swarovski crystal six millimeter pearls some crimp bead covers and I have a pack of crimp tubes so this one actually is nice because it gives me three sizes at 1.5 by 1.5 a 2 by 2 millimeter and a 2.5 by 2.5 millimeter and for this particular one I'm going to use the middle size so there we go just scoot some of those guys out those are the 2 by 2 millimeter size and then for my tools I have as you can see a little pair of scissors I have a pair of cutters for my beading wire a crimping plier and a chain nose plier to apply my crimp bead covers and then just a ruler to help me along as I go so to make a simple strong bracelet and I'm going to teach you how to crimp a crimp bead in this process - which is what you'll be doing for all of these clasps if you choose to do a string project with them I'm going to take the beading wire place the tail end into a bead stopper and I'm going to string on one crimp tube your crimp tube size is really going to be based upon the thickness and weight of your beading wire so I have a nice medium weight beading wire right here but if you have a heavier weight one you'll want to use a larger crimp tube or if you're putting multiple strands through it so I'm just stringing on my pearls without a needle the beading wire is stiff enough that does not require a needle and I'm going to string on a number of them until I end up with what I think is the length I want for my bracelet a standard bracelet length is usually around about 7 inches give or take everyone's wrist is a little bit different but if you are making this as perhaps a gift or you know giving it to a loved one 7 inches 7 and 1/2 inches is usually pretty safe so you see I'm just adding one bead at a time stringing them on and they're looking nice you can add other beads to this design of course - you can add little metal spacer beads little crystal rondelle's if you go to beadaholique.com you can see a wide selection of beads available for sale we have a lot of projects showing you how to use them too so that might give you some more ideas for your stringing projects so just adding my beads it's quite soothing so this really is the same process you would do whether you had a single strand clasp or a multi strand and if you didn't want to do a strong project you could always attach jump rings to these little side loops as well you can do some type of project like that so it doesn't always have to be stringing but stringing is really nice and pretty easy to do okay we're getting there let me see how much I have here so I've got my ruler and the clasp itself is only gonna add about a half an inch it's quite a small little clasp so I've got almost five inches okay so I just need to add a few more so I think I'll want to add a total of about six and a half inches of beads and then I'll allow that half an inch for my clasp and it might go a little bit over seven inches by the time I have my crimp tubes and my crimp bead covers but it'll be pretty close to that standard bracelet size it's always good to have a ruler handy and as you're designing you can kind of get a good idea of what it's about to start looking like here terms of length yeah it'll be a little over seven inches but it probably won't go past that seven and a half so that's about right I'm going to add another crimp tube so I've got all my pearls on there and now I'm ready to actually do my crimping if you're not familiar with the crimping plier I want to show that to you right now this is a special plier just for crimp beads and it actually has two notches up there at the top so the one closest to my handle here the back notch is shaped much like a crescent moon or a kidney bean and that's what we're gonna use first to crimp our crimp bead and that's going to help mimic the shape of that crescent moon and then we're gonna fold it over with this little oval shape up towards the top of the tip of the plier so it's a two-step process so I want to scoot these down a little bit more so I have a little bit more beading wire on each side there we go you can see that 16 inches was really plenty so I'm just gonna feed it through that loop and then back down through my crimp bead and you can go through a couple more beads too if you so choose just went down through one more bead and you're pulling it together like so so you're creating a much smaller little loop up towards the clasp and I want it to be able to move still and also if you are gonna be applying crimp bead covers like we're gonna be doing in this project that adds a little extra space to so you want to make sure that you have plenty of room right there it's not too tight so to do the actual crimping go ahead and place your pliers over your crimp tube and set it in that back notch and simply squeeze and give it a good squeeze so when you take it out you see that it's really now shaped like that crescent moon and then I actually like to go from the top I find it a little bit easier so I'm going to be putting it in the front notch I'll try to show you here and it's standing upright in that not and I'm gonna squeeze and it just folded it over onto itself so it went much like this it's a little hard to see cuz it's so small and at this time I'm gonna apply a crimp bead cover so that's what this little guy here is it basically looks like a bead that's open I'm gonna grab it with my chain nose with that opening facing outward and I'm gonna slide it over my crimped bead and now I'm just going to gently squeeze it together so basically you're bringing that bead together and it is soft enough that you can shape it a little bit so you can go from a couple different angles okay so that side is now finished now I'm going to trim my tail at the very end I like to trim my tails together you could trim yours now if you wanted but it's just a little easier for me I find to trim them together at the end so now we're going to repeat the same process on the other side so we're gonna find our clasp that has the little tab part to it and thread our wire through it and now go back down now this end right here is a little bit kinked so I'm just gonna trim it okay so loop back around and down through the crimp bead and I'm gonna do that one other bead as well yeah we'll go through it sometimes it can be a little bit hard when you're working with something like a Swarovski pearl it is a faux pearl but they do have a lovely coating on it that sometimes makes it a little bit hard to go through that bead you don't have to go through the adjacent bead it's just a preference so on at this point I think I'll just let it be how it is and now I'm gonna pay special note when I make this loop I actually want to make it even a little bit wider because I have to be able to press this tab down to secure my clasp and I don't want my crimp bead cover getting in the way so I've got my straw stringing here there's no large gaps it's still flexible I haven't pulled it so tight that it won't move on me so I'm ready to create my crimp bead same exact process make that loop just a little smaller not much though okay let's have it in the back launch crimp so I'm gonna squeeze it and put it in that front notch to fold it over and I do like to go from top down I just feel like I bet I get a better grip on it okay and at this point I am gonna trim this tail cuz it will be easier to trim before that crimp bead covers on there and I got a lot of nice room right there so I can still work with this clasp that is a little tip that you tend to learn by experience and having pulled it too tight where you can't work with that little tab so do you try to leave that little extra space okay we're just gonna put that crimp bead cover over it and squeeze look for where that seam is okay just shape it and now we can't easily grip that tab so we're just going to go back here trim off our little tail or it exits that pearl and then we're gonna close our clasp there we go so we have a really pretty very simple strung pearl bracelet with an elegant elements clasp and that is the exact same technique you would use to attach any of your beads to any of these loops on these multi strand ones as well so I hope you enjoyed this pretty quick and easy video on how to make a strong bracelet and you can find all of these clasps this project and many more items and ideas at beadaholique.com you

You recently viewed

Clear recently viewed