|
Toho Round Seed Beads 11/0 7BDF 'Transparent Frosted Teal' 8 Gram Tube SKU: JSK-0260 $2.25 |

|
Toho Round Seed Beads 15/0 55 'Opaque Turquoise' 8 Gram Tube SKU: JSO-0037 $2.99 |

|
Toho Round Seed Beads 15/0 2100 Silver Lined Milky White 8 Gram Tube SKU: JSO-0162 $3.95 |

|
FireLine Braided Beading Thread, 4lb Test and 0.005 Thick, Crystal Clear (50 Yards) SKU: XCR-1275 $13.99 |

|
The Beadsmith English Beading Needles Size 12 (4 pcs) SKU: XTL-3006 $3.99 |

|
The Beadsmith Cordless Thread Zap II Thread Burner Tool SKU: XTL-0106 $16.49 |

|
Fiskars 5 Precision Tip Scissors - Super Sharp SKU: XTL-5700 $7.45 |

|
Beadalon Large Beading Mats - Prevent Bead Rolling 13 X 18 Inch (Set of 2) SKU: XTL-9935 $6.75 |

|
The Beadsmith Scoop Eez Long Tube Scoop - For Seed Beads and Delicas SKU: XTL-9011 $3.09 |
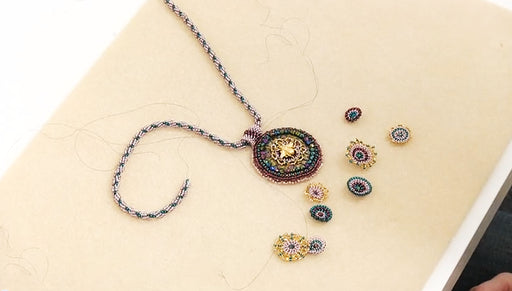
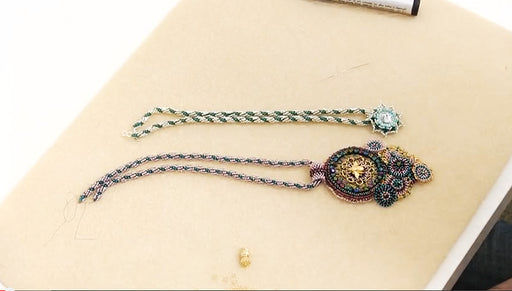
Hi this Megan with Beadaholique.com and today I'm going to show you how to do an embellished beaded bezel for the evening star necklace so there are a lot of ways to embellish a basic beaded bezel the way I'm going to show you is just one possibility and it's for this specific piece here I'm going to start with the beaded bezel done, we do have a video on how to do a basic beaded bezel so if you don't know how to do that go ahead and watch that one first, do that part first so that you can start with yours done also this is the same thing this is the Evening Star necklace and I just did another variation here of that same piece and this is what I'm going to show you how to do in the basic beaded bezel here I used one color of 11/0 round seed beads and two colors of 15/0 round seed beads so I have those here but I will also use these in the embellishment and I also have size 11/0 delica bead and a 3mm crystal bicone start with about four feet of crystal fire line if you're using all dark colors you can use smoke we're going to weave up start at the back and probably the second row there and just bring your needle through along the diagonal straight through you want to get to your third row in which is going to be the first row where the 15/0 beads meet the 11/0 bead then since I'm going to be tugging on this a lot I'm going to knot this now if you have a second needle, if you don't you can slip this off I want to be able to give my work a nice strung tug to tighten it. I'm gonna go ahead and tie off my tail and weave it in it's also going to be kind of a lot going on so you don't need all that extra thread hanging around pull you're knot really tight weave that in a little bit trim that end off so once you have your tail all secure and ready to go start by exiting a 15/0 seed bead in the first row of 15/0s right next to the 11/0s take your accent color, your 15/0s, the ones that we had at the very last row in the bezel takes three of them on your needle and then you're going to go right back down through the next bead in that row make sure it's not twisted should make a nice little triangle point you're going to get one the main color 15/0s and go through the next bead in that row you just going to alternate between each bead in the row three of these white 15/0s and then one of the turquoise and with this particular bezel that we did that had thirty-six beads in the original round, it's going to work out nice and even so that it will alternate you'll end with the single turquoise when you get back around the last spot should be for a single turquoise bead go down through that bead and then right through that next bead which is that 11/0 bead just keep going at a diagonal and go through the next bead there so that's the first row of embellishment you can see it's really pretty just like that, a lot of the stuff is just layers of different embellishment you can kind of do anything you want here so if you like it this way and you want to a different or the next differently it's really open to imagination here but to do this particular one the next row we're going to grab one turquoise bead then we're going to grab three of the delica beads and then one more turquoise bead and this row we're going to skip a bead in each a bead each time in the row skip the next bead in the row and then go through the following bead and just continue like that so one turquoise three of the silver one turquoise skip the next bead go through the following bead when you come all the way back around it should line up perfectly, just go right down through that next bead in the following row. Skip the one, go through that one then go at a diagonal right through the next one as well and that's what your second row should look like it kind of look like a little flower at this point for the third row I'm going to go through the next bead in the next row at a diagonal and then back up so that w'ere going through this 11/0 bead in the middle row of the 11/0s that's just inside the edge of this embellishment we're gonna do a little bit of a back stitch now for this next row grab one of our round 11/0s our teal beads one turquoise one of our crystal bicones another turquoise bead and another teal bead this is the unit for this row we're going to do a back stitch so instead of moving the direction of the thread we're going to move back the other way go ahead and go to the next bead in the same row head through the in the same direction as you did when you came out of that bead I'm heading this way, you're going to head this way again bringing your needle down through the bead and through the next bead towards the back if you can't get it to go through sometimes if you're work is nice and tight it can be harder. Go ahead and just bring it out, then bring it through the next bead pull that tight you see you get that nice bicone right at the cone of the row before so we're going to continue to work these which means we need to weave ourselves to this bead here which is the middle row of the teal beads right before the edge of this unit above so the easiest way that I found is to actually continue into the next bead which is that 15/0 right there and go in those two seed beads again go into the next 15/0 and up into the 11/0 go through those two beads and then you're only one bead away from where you want to be so right through the bead you want again its one teal bead one turquoise bead one crystal bicone one turquoise one teal bead go back again through the next bead in the row, the prior bead in the row go down through that bead and the next one in the next row pull that tight go down through the 15/0 up through the next 11/0 you wanna pull these nice and tight because these have a little bit more movement and the next row is going to be based off of them so the finished piece does have movement to it, it's not really rigid but you do you wanna make it as as stable as possible go through the next 15/0 and the next 11/0 through the next 11/0 up that's where we're going to do our next unit to the prior bead in that same row and through that bead in the next one down pull it snug then you're going to work back where you want to be so those two beads those two beads and out the next one this row is the hardest one so if you get this one figured out then you're good going to go back through the last bead and the one next to it pull tight through that 15/0 and an 11/0 next 15/0 and 11/0 and then the next 11/0 just continue all the way around once you've put in your last unit go ahead and go right back through the two first beads in your row. Don't go up as it were instead you're going to go right back up through the bead that was the original bead in that unit because what we want to do is work our way back into that unit so once you're coming out of this bead here at the base go ahead and go through the first beads and come out your bicone we're going to do our last little bit of embellishment here this is row four or three and a half kind of, it's built off the last row this one's going to be three delicas the silver one of the turquoise one of these milky white opally color we're going to skip the last bead strung and go back down through your turquoise bead here hold onto the last bead and pull that tight and then string three more of the silver delicas and heading through the next bicone bead pull it snug and make sure that it's really tight at the little point there you're gonna do that all the way around so three of the silver one of the turquoise one of the white pull them down go back through the turquoise skipping that last bead hold on to the last bead and pull down then three more silver beads and go through the next bicone when you're all done go right back through that first bicone and then just weave your way down back onto the basic part of the bezel here tie your thread off and weave it in and that's how you do the embellishment for the beaded bezel for the evening star necklace and this necklace is a project on the Beadaholique.com free projects page so if you want to see step-by-step how to do the whole thing how to do the bezel and how to embellish it and make the necklace and attach it with the clasp and everything then checkout the free project page because it will give you all of the materials that you need and step-by-step instructions so that will teach you how to attach this to this which basically is stitch through if you want to experiment on your own and also don't forget that this is just one way to do this. There are countless ways to embellish this beaded bezel. Feel free to play and experiment. Go to www.beadaholique.com to purchase beading supplies and to get design ideas!
Related Videos


How to Bead Weave a Metal Bead Bracelet using Modified Ladder Stitch
In this tutorial see how to make the Firenze Bracelet - a metal bead bracelet using a modified ladder stitch bead weaving technique.


How to Attach Embellishments to a Focal Piece
In this tutorial learn how to attach assorted embellishments to a focal piece in bead weaving and bead embroidery. This is a very free form activit...
View full details

How to Add a Clasp to a Bead Woven Spiral Rope
Spiral rope stitch is a versatile bead weaving technique but it can be challenging to figure out how to add a clasp to the end. This video demonstr...
View full details