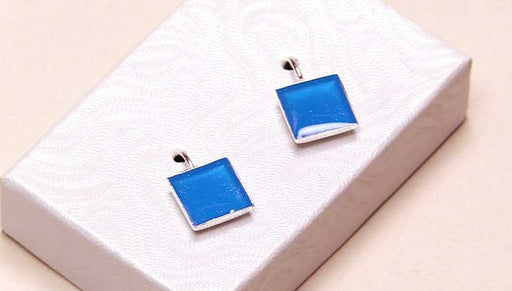
How to Achieve a Marbled Effect in Resin

SKU VID-1758
Designer: Kat Silvia
In this video you will learn how you can get a marbled effect in your resin directly in your bezel findings. Be patient with this technique, it takes time but the end effect is worth it. You can make all sorts of one of a kind pieces with this technique. Experiment with more than two colors and in various types of bezels and molds.
Audio Transcript
Note: This audio transcript is auto-generated and may not be completely accurate.
hi this is kat with beadaholique.com and back bezel that i was able to use so you can see that the marbling doesn't really go all the way through to the back and i'm gonna show you why that is when I show you the marbling effect but how cool is that on the front it's very nice so this is how you can do it in an open back bezel I just use some packing tape on the back side and we do have other videos that show you how to pour resin into open back bezel so I'm going to direct you there for this so I have that version and then I also have another little version that didn't work quite as well now this is a backed bezel and what happened here was I did the resin too early and I'm going to show you why you wait you kind of want to achieve that particular effect and there's a technique that I'm going to teach you so that this doesn't happen but I did want to show you my little oopsie piece so that you can see that this is a little bit of a more advanced technique but it still looks kind of neat you know it just wasn't quite the clear marbling that I had wanted it to look like in that one so I'm gonna give it a try in this nice big beautiful vessel it's the sort of upside-down teardrop which I love so we're gonna get to filling this guy here so I have my resin here I am using the EZ cast and I poured this maybe about 20 minutes ago or so so you can just see that it's a little thick which is good this is what we want for your first pour you're just gonna pour it as though we're any other resin piece so I'm just kind of scraping down the sides of my piece there and I want to color this resin so what I'm gonna do first is pour out some resin that I can actually color so I keep this crystal clear resin right here so I can use that for some other projects because we're not gonna need this much resin alright so I'm gonna pour a good amount so I can color it easily there we go set this aside all right so now I have my resin here and I want to try to get a excuse me I'm just going to use a little paper towel just to wipe off my glove there all right and you can see that my work surface is protected I know I'm kind of working through a little quickly here but it's because I want to work with this resin while it is still ready to go okay so I have a white a green and a black what I'm hoping to try to achieve here is a nice dark rich green color so we're gonna see exactly how that works out anytime you're using dye for resin just give it a little shake shake it up and my very messy bottle here all right so I'm gonna use a little toothpick and just try to get a little bit onto that toothpick and actually I'm gonna pour this over a separate little vessel here because I want to make sure that I can control the amount of dye that I'm putting in there's not particularly an exact science with the right amount of drops and dyes you can just see that I'm kind of adding one drop at a time and I know that won't be quite enough but I'm gonna add another another drop here now when you're coloring resin there is an exact science in terms of you don't want to add too much dye to your piece because then what will happen is the resin won't set up the way you need it to it it changes the chemical makeup of it so we are gonna be just sort of experimenting with adding dye just a little bit at a time you can see that that starts to get nice and green and rich for me and also you know you can see that I kind of eyeballed the amount of resin that I have here so you can test that as well all right so it's still looking pretty transparent but I'm having a nice green color there so to add a little opaqueness I think I'm gonna try first adding a little bit of the black just to see how dark I can get this all right so again I'm gonna use that same little technique let's give it a little shake and using a fresh toothpick I'm gonna kind of pour it over my little cup here and let's just try out lost my little my little blob I think that's why they give you so much all right I'm gonna bring that over here and drop it in just one little drop of black all right set that aside and let's see how this starts to turn out getting a little bit more in there there we go hopefully you can see against the white of my table it's still looking pretty transparent let's go ahead and add in just another little drop of black before I add in the white now the white is going to really make it opaque but it is also going to lighten it up a little bit so that's why I'm trying to kind of go back and forth with the black so I get that little drop in there there we go all right and let's mix that in you can also use a popsicle stick as well I'm just using a toothpick just so I can kind of watch how this goes all right so we're getting there I know I promised you a marbling effect so hold on we're just getting our green where it needs to be and I'm gonna use a fresh toothpick again you do kind of go through sadly a lot of material when working with resin but at least toothpicks are inexpensive you can also use plastic sticks if you want and you can try to wash them that's always an option for you as well and one drop of the white all right so let's see this is one drop of white now it's really gonna start to make it opaque but like I said it's gonna get that really pale green color going in there which you might not mind so we're just gonna mix that up the opaque colors you really have to mix quite a bit all right so yeah see how that one little drop of white really changed what happening in here so you can make the decision to try to go back to the green and add a little bit more green I'm gonna try to add a little bit of black actually because what you want with when you're doing the marbling effect is to really try to create a nice contrast because we're gonna marbled with the white so you actually get a little sneak preview of what that's gonna look like a little bit hopefully if all works the way I want it to and you know like you can see on my table here I have several pieces of several bezels and the reason for that is you just want to be at the ready with other bezels because you're gonna have a lot of resin left over so you can create other things and there's always the opportunity that something just doesn't turn out the way you want it's it's sadly the the reality of working with such a fickle material like resin alright so that's a heading a little bit more of that darkness back in there it's not quite as the emerald color I hoped it would be but I'm actually I'm not too mad at it I kind of like it it's very milky and very pretty so now what we're gonna do so I'm gonna add in one more drop of that green and then I think I am happy and good to go and I'm just gonna use that to mix alright closing up my colors here really quick and setting those aside all right let's get that green back in there yeah that's that's the color I want very pretty alright so the last thing I'm gonna add to this cuz why not is I'm gonna use some crystal clay sparkle this now I have some silver and I have some gold I want to use both but for the green I'm gonna add just a little bit of silver just to give it a little shimmer and then when we go to add the white I'm gonna add in that gold color okay so here here's a little tip for me - you set your resin aside take your sparkle dust out to the side and open it away from your resin because you do not want to get too much of this into your resin you want to be able to add it gradually and slowly alright so I'm just gonna add a little bit there and you can see that I'm doing with this with a toothpick so you can really see how fine that is alright I'm gonna set that aside very carefully and let's go ahead and mix in that silver and it's just gonna give just a little bit of shimmer and sparkle to our resin not too much I don't want it to be overpowering but just a little little dimension there alright so now our resin is ready to add so I'm gonna take my toothpicks out now for this I like to use a small popsicle stick I think it just helps graduate that resin right in there so we have our bezel ready to go it's on a nice flat surface and now we're gonna start to add our resin and go ahead and just grab a little bit at a time and we're just going to place it into the bezel and because we know that we're gonna be doing a marbling effect we don't want to fill it up because we want to be able to add more resin later we're gonna add that white resin to Marble it so you can just see that I'm kind of pushing it around just a little bit because it wants to stay in it original space so I'm just kind of adding and just pushing it around allowing it to go into those other spaces you can also get a little closer to the edge and because we have this little point down here I'm really going to try to get it in there and go ahead and push it towards the sides it'll start to connect with the sides and move all the way around and just take your time resin is a very fickle thing like I said so just push it to the sides there there we go I think I'll be able to add a little bit more there we go alright so I'm just gonna kind of rotate this and once it finds its way to the edges as you can see it starts to want to go towards there towards the towards the edge and it works itself up the sides so you can just kind of rotate and I'm just gonna very carefully we don't want any overspill here you can see that I'm kind of under filling the bezel especially as we're starting here because I want the top to be flat but I still want that marbling effect all right I'm just kind of pushing it towards the edge there I'm actually really happy with this color green it's not what I had fully intended I thought it would be a little darker than this but you know what I kind of like it it looks like a little jewel alright so now it's finding its way towards that tip I'm gonna add in just a little bit more resin just to the main piece here and it'll sort of fill in level itself out it is self leveling resin there we go alright so that's as much as I want to fill it I'm gonna set that green aside I can use that for a different project and let me just double-check that it's getting towards that little guy there this is where those toothpicks come in nice and handy I just want to make sure he's getting all the way up in that little corner there we go alright perfect so now here's where we're gonna talk about the marbling so I have this set I'm going to wait about an hour until I start checking this what we want the the idea is that we want this resin to start to set up so that when we go and drop in our marbling effect that this is going to be really easy to kind of move around but it's gonna hold that shape so start checking this within about an hour there are many factors that go into why you'd want to wait maybe a little bit longer or a little bit less it could be a little warm in your space it could be you could have high humidity there's a lot of different factors so you know just check you'll know and I'll show you how we're gonna know because I'm gonna keep this little green resin here and you'll be able to see this kind of set up and see how mmm when I drop it in there it just disappears immediately so what we're gonna look for later is when that doesn't happen so I'm gonna come back when this is ready and I'll show you how we're gonna do that next step if you start to see some bubbles form you can take your lighter light it up and wave it across the top just sort of as it's setting up but don't heat it up too much we don't want it to over cure alright so there we go I will see you guys back here in about an hour but it will be about 10 seconds and movie time alright see you back here in a minute okay welcome back so for me it has been about an hour and a half or so since I've I've been kind of checking my resin it's been about a total of two hours since I initially mixed my resin so this is the piece that I've been working with here and here's the white that I want to use to do my little swirl with but I first want to show you kind of what you should be looking for in terms of you know having your resin be set up so this is the green so you can see this is really nice and kind of almost very goopy and it's keeping that shape on the bottom which is what I wanted to show you just enough to sort of kind of feel a little a little more viscous so you can just sort of see how that is a little little goopy er all right now before I go into this what I did first off-camera is I mixed my fresh white resin and then I added in the gold Sparkle dust here I thought I was gonna get a really fun Sparkle color but a hole it actually did was kind of turned my resin and this has a nice little pearlized effect to it but it turned to the resin a little yellow so I'm not gonna use this so I'm glad I sort of tested this out I didn't want to get a little bit of gold in here but I just it's it's not the way that I wanted it to I just don't think it's gonna look right having that sort of creamy color with the green for my purposes here and also I think you'll be able to see the swirl a little bit easier with just the white so again this is kind of what you're looking for this almost looks a little bit more now like glue you can see that it holds a little bit of its shape but it still disappears in there so this is about what we're looking for here now if yours is a little bit thicker than this that's okay but any thinner than this I wouldn't do this next step just yet all right so here's what we're gonna do you're gonna need some fresh toothpicks so have those at the ready and now when you go into your bezel we're just gonna place a couple of little drops and let those sit for a minute and then we are going to do the swirl effect so just figure out how big of the drops that you want now this is gonna take a minute for them to actually drop into the resin which is why I say to just kind of just be patient and let it sit and you'll notice the technique that I'm gonna use I'll just kind of talk through while we're waiting for that to drop the technique I'm going to use is allowing the resin to get in there you can push all the way down to the bottom because this is not an open back bezel if you wish however just be aware that once you push your toothpick in you don't want to pick it up because in essence what that does is that starts to mix the resin so you're gonna lose that whole marbling effect okay so there's one little drop and you can make your drops all different sizes it is entirely up to you and two another one that's kind of down here and just sort of let that drop off but yeah that's what happened with the blue one that I showed you earlier is that I was picking up my toothpick thinking that I could sort of fold over the resin to get that marbled effect and it just did not achieve the way I wanted it to and I'm gonna try to lift that off there we go all right I'm gonna do one more it's gonna be just a nice little small small piece down here towards the tip and just be patient your resin isn't going anywhere I know the suspense is probably killing you but you also want to use a fresh toothpick you don't want to use the one that you've been mixing with because you're gonna have all this extra little little bit of resin on it so you just want to make sure see if I can't get a little more to get it to drop a little faster but I do want to do just a tiny little piece here another I'm just going to another little one that didn't quite work and you can just see how that's reacting to the resin that's already there all right so that's what I'm going to start with here so now I have my fresh toothpicks and now you're just gonna dip it into the white and drag it around and whatever marbled effect that you want so because I have this big one up here I'm going to kind of start here and start just kind of dragging it around all right I'm gonna hold my piece and remember don't pick up you so you get to where you want it to be so that is how you can achieve that marbled effect and I'm actually very happy with that it's nice and subtle I'm gonna leave it just like that it should set up really nicely you can at this point if you did want to add another drop in there and drag that through you can absolutely do that so this is one of those things but again because this has that green resin on it you can either use the other side but for safety just to keep everything nice and clean I'm just gonna set that aside and you can use a fresh toothpick if you did want to do another little drop of white you can see there's not as much up here I kind of like the way that looks it's very subtle it's a nice effect that I wanted so I am happy with that but that's how easy it is to achieve that marbled resin look all you need to do is just sort of wait let the resin kind of set up and then you can sort of manipulate it a little bit if you notice that it's a little too hard to drag through you may have missed your opportunity but that was sort of the perfect amount of time for me and really you can just check by what's in the cup here because you can't really check what's already in your bezel but you can check what's in the cup there and you can just see that it starts to look like a goopy kind of a glue and it leaves a little bit of shape at the bottom but it still becomes part of that resident because we don't want this to sit on top so that is how you achieve your marbled effect in resin I'm going to finish this project and this will be available at beadaholique.com as well as all of these supplies and tools that you've seen here today if you're new here to our youtube channel be sure to hit that subscribe button below to get all the latest from beadaholique

Customer Reviews

Based on 1 review Write a review

You recently viewed

Clear recently viewed