
|
Beadalon Beading Mats - Prevent Bead Rolling 12 x 9 Inch (Set of 3) SKU: XTL-9930 $3.99 |

|
FireLine Braided Beading Thread, 4lb Test and 0.005 Thick, Crystal Clear (50 Yards) SKU: XCR-1275 $13.99 |

|
The Beadsmith English Beading Needles Size 12 (4 pcs) SKU: XTL-3006 $3.99 |
Related Videos

How to Flat Even-Count Peyote Stitch
Learn how to use a simple peyote stitch to weave seed beads into colorful patterns used to make bracelets, necklaces and rings. The pattern used in...
View full details
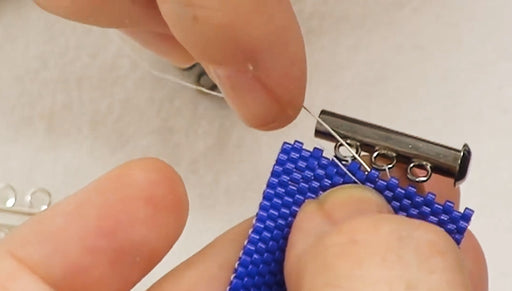
How to Attach Tube Clasps to Peyote Bead Weaving
In this video, you will see two different methods to attach a tube, or multi-strand, clasp to a piece of Peyote Bead Weaving.
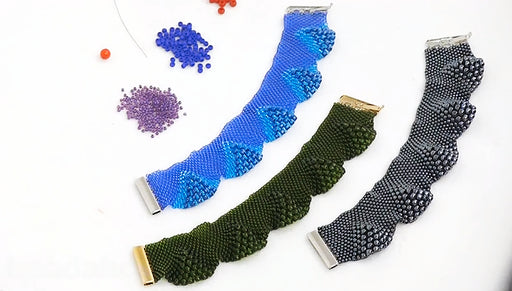
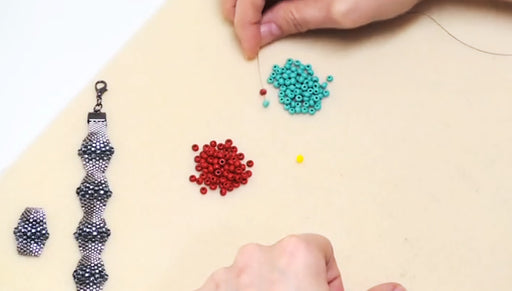
How to do Peyote Bead Weaving with Various Sizes of Beads
In this video, you will see how a wave-like effect can be achieved by using various sizes of seed beads in the same peyote stitch. This technique c...
View full detailsCustomer Reviews
Based on 2 reviews
Write a review