Store Closing, Limited Stock
SKU VID-1300
Designer:
Alexandra Smith
In this video, you will learn how to weave beads onto wire-woven rings that were created using the Ring Weaver Tool by Beadalon. You will see two ways of adding beads using 26 gauge craft wire. The video includes design suggestions for embellishing rings and pendants using this technique.
FEATURED IN THIS VIDEO
Audio Transcript
Note: This audio transcript is auto-generated and may not be completely accurate.
hi this is Alexandra at PETA Holly to show you how to add beads to a wire woven ring so I've created a couple of projects using this ring weaving tool by beadalon and in this video I've got a couple of frames ready to show you how to incorporate beads into your design so for the ring will be adding beads along the edge and these are - paçoca beads and then for the pendant will be weaving in a slightly different way around the rim to add some Czech beads as I've done here with the Swarovski crystal and some drops so to begin I'm going to use 26 gauge wire which is different from the frame the frame was used using 24 gauge wire so I'm going to measure that out and we get 10 inches for the ring and to attach snap I'll find a spot on my ring that I weave into and I'm going to create a little coil along the edge my pliers will help me grip just going to wrap the wire around to latch it on there get a nice tight connection to the bin with okay then looks like the edge of my tip of my wire has tucked itself in nicely inside those warps so it's a Gooden secure and is it go ahead and string a bead on I liked the shape of these my nose part pukas because they're like little pegs with rounded edges that can rest themselves into the size of these warps so with the remainder of my wire once we get my bead down there I'm going to thread into my warp slide it all the way through the middle onto the other side of the ring where I'll add another bead so now my second bead on the opposite side of the ring and you'd back in my works make sure the wire doesn't kink and pull flush and each bee will need setting into its spot because they are cylindrical okay you could really use any number of types of beads for this project which fun to get creative with see boots with works so I'm going to continue around the perimeter just like so and once I've got them all on you'll see how it looks in one more hand and I will continue all right so I've completed the wrapping of my beads around both sides and I'm just ready to close with the same type of coil I did at the beginning just could wrap my wire around the rim in a tight way we'll hold it firm at a couple of rotations and just also to make sure that the tip that I'm clipping is facing away from the skin so it doesn't poke and then it's also test in enough that it won't be catching on anything tuck it in with my pliers and all set so that's a fun technique you can even go back through with some thinner wire and incorporate some little sparklings in between smaller beads whatever you'd like so that's that and now for the pendant to create another version of this I have gone ahead and attached the coil of my wire onto the side and for this version I'm going to be attaching some really fun water melon colors of czech glass around the edge so to do that I'm attached on one side and putting the bead on and I'm just going to go ahead and coil around the side of the screen you get the beads to rest within the warps of the frame on the outside bring them up next to each other to set the day lay in a little pattern and I'll work my way around with the pinks and then at the bottom and hang down some little leaves so it's fun to find different ways to design using the ring weaving tool also need a pair of earrings with these hoop earrings all right and put this one up just a little bit so it's closer together add one more bring that around the edge and now I'll add my leaves go to three just like I did with those turquoise glass drop tea I'm going to place it so that it's facing outward before I situate my wire and that we'll get to lay the way I want next one then this is 26 gauge wire that I'm using around the edges we had that'll be really cute once I get these beads on I'll go ahead and put them onto a finished chain like it's the other good cut in a puppet time and start again with my pink beads I've always been really fond of this bright fuchsia color kind of a fun bubblegum I candy to get three more on there sure they're eating myspace to match my other side another fun idea might be to hang something from the center of a charm perhaps once you get my last beating will come down just a little bit to leave myself space but the jump rings that I'll be using to attach them to the chain so I'll be you know I'm going to close it up with a coil in the same way as I've been doing so I'm bringing it around and then through one of the elder warped layers and just create a nice secure wrap you could bring it through one more time to be safe and clip you get a little tuck and now I'm ready to add my jump rings now I have a slight bit less space up here so we'll see how it hangs get my chain ready pull that up in front of me and using sixty millimeter jump rings that are going to go see right through the warp and onto the chain like so close that up and I'll do that one more time against that bead there create my second connection we go through the warp onto the chain and closing it up let's cut another one here we go all right there's my little watermelon vine pendant and the black and white ring so there's how to add beads onto a wire Boldin ring using the ring reading tool by beadalon these project bundles and supplies are all available at Beetlejuice calm and please be sure to subscribe to our YouTube channel for all the latest updates thanks for watching you
hi this is Alexandra at PETA Holly to show you how to add beads to a wire woven ring so I've created a couple of projects using this ring weaving tool by beadalon and in this video I've got a couple of frames ready to show you how to incorporate beads into your design so for the ring will be adding beads along the edge and these are - paçoca beads and then for the pendant will be weaving in a slightly different way around the rim to add some Czech beads as I've done here with the Swarovski crystal and some drops so to begin I'm going to use 26 gauge wire which is different from the frame the frame was used using 24 gauge wire so I'm going to measure that out and we get 10 inches for the ring and to attach snap I'll find a spot on my ring that I weave into and I'm going to create a little coil along the edge my pliers will help me grip just going to wrap the wire around to latch it on there get a nice tight connection to the bin with okay then looks like the edge of my tip of my wire has tucked itself in nicely inside those warps so it's a Gooden secure and is it go ahead and string a bead on I liked the shape of these my nose part pukas because they're like little pegs with rounded edges that can rest themselves into the size of these warps so with the remainder of my wire once we get my bead down there I'm going to thread into my warp slide it all the way through the middle onto the other side of the ring where I'll add another bead so now my second bead on the opposite side of the ring and you'd back in my works make sure the wire doesn't kink and pull flush and each bee will need setting into its spot because they are cylindrical okay you could really use any number of types of beads for this project which fun to get creative with see boots with works so I'm going to continue around the perimeter just like so and once I've got them all on you'll see how it looks in one more hand and I will continue all right so I've completed the wrapping of my beads around both sides and I'm just ready to close with the same type of coil I did at the beginning just could wrap my wire around the rim in a tight way we'll hold it firm at a couple of rotations and just also to make sure that the tip that I'm clipping is facing away from the skin so it doesn't poke and then it's also test in enough that it won't be catching on anything tuck it in with my pliers and all set so that's a fun technique you can even go back through with some thinner wire and incorporate some little sparklings in between smaller beads whatever you'd like so that's that and now for the pendant to create another version of this I have gone ahead and attached the coil of my wire onto the side and for this version I'm going to be attaching some really fun water melon colors of czech glass around the edge so to do that I'm attached on one side and putting the bead on and I'm just going to go ahead and coil around the side of the screen you get the beads to rest within the warps of the frame on the outside bring them up next to each other to set the day lay in a little pattern and I'll work my way around with the pinks and then at the bottom and hang down some little leaves so it's fun to find different ways to design using the ring weaving tool also need a pair of earrings with these hoop earrings all right and put this one up just a little bit so it's closer together add one more bring that around the edge and now I'll add my leaves go to three just like I did with those turquoise glass drop tea I'm going to place it so that it's facing outward before I situate my wire and that we'll get to lay the way I want next one then this is 26 gauge wire that I'm using around the edges we had that'll be really cute once I get these beads on I'll go ahead and put them onto a finished chain like it's the other good cut in a puppet time and start again with my pink beads I've always been really fond of this bright fuchsia color kind of a fun bubblegum I candy to get three more on there sure they're eating myspace to match my other side another fun idea might be to hang something from the center of a charm perhaps once you get my last beating will come down just a little bit to leave myself space but the jump rings that I'll be using to attach them to the chain so I'll be you know I'm going to close it up with a coil in the same way as I've been doing so I'm bringing it around and then through one of the elder warped layers and just create a nice secure wrap you could bring it through one more time to be safe and clip you get a little tuck and now I'm ready to add my jump rings now I have a slight bit less space up here so we'll see how it hangs get my chain ready pull that up in front of me and using sixty millimeter jump rings that are going to go see right through the warp and onto the chain like so close that up and I'll do that one more time against that bead there create my second connection we go through the warp onto the chain and closing it up let's cut another one here we go all right there's my little watermelon vine pendant and the black and white ring so there's how to add beads onto a wire Boldin ring using the ring reading tool by beadalon these project bundles and supplies are all available at Beetlejuice calm and please be sure to subscribe to our YouTube channel for all the latest updates thanks for watching you
Related Videos


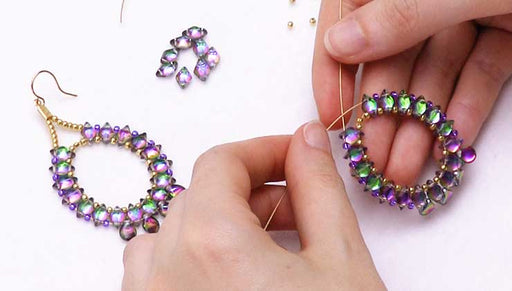
How to Make the Cabaret Earrings with 2-Hole GemDuos and Pip Beads
Learn how to make the vibrant, splashy Cabaret Earrings in this video, featuring 2-hole GemDuo beads and Czech glass Pip beads on a handmade beadin...
View full details

How to Make a Stackable Charm Bracelet with Leftover Chain and Leather
Store Closing, Limited Stock
In this video you will see how you can use leftover scraps of chain and leather cord to make a bracelet with a trapped TierraCast charm. Stack thi...
View full details

How to Make a Bracelet with Vintaj Patina and Filigree Links
Store Closing, Limited Stock
In this video you will see from start to finish how to make the Lady Gwendolyn Bracelet. This bracelet uses Vintaj Patina on Natural Brass filigre...
View full details


