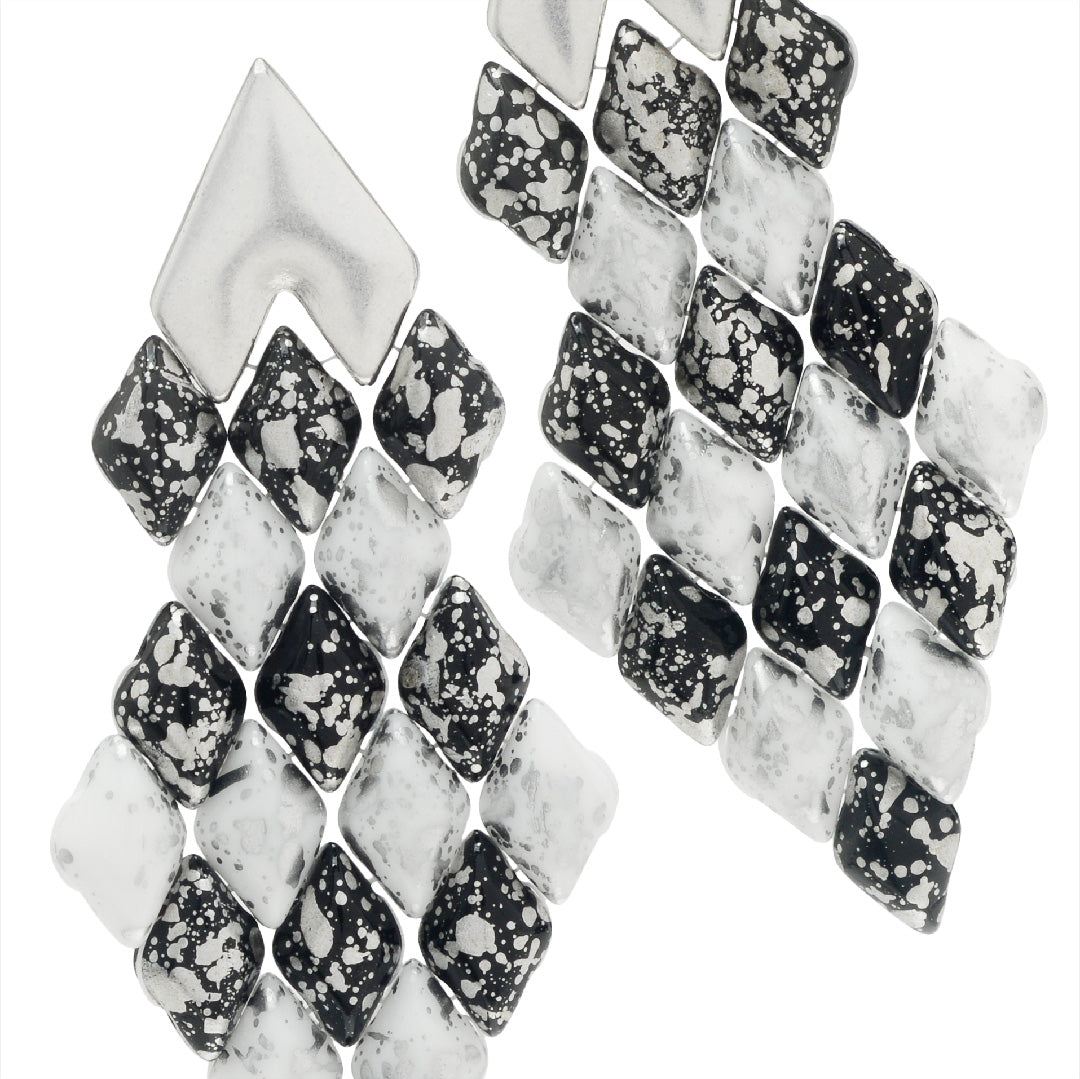
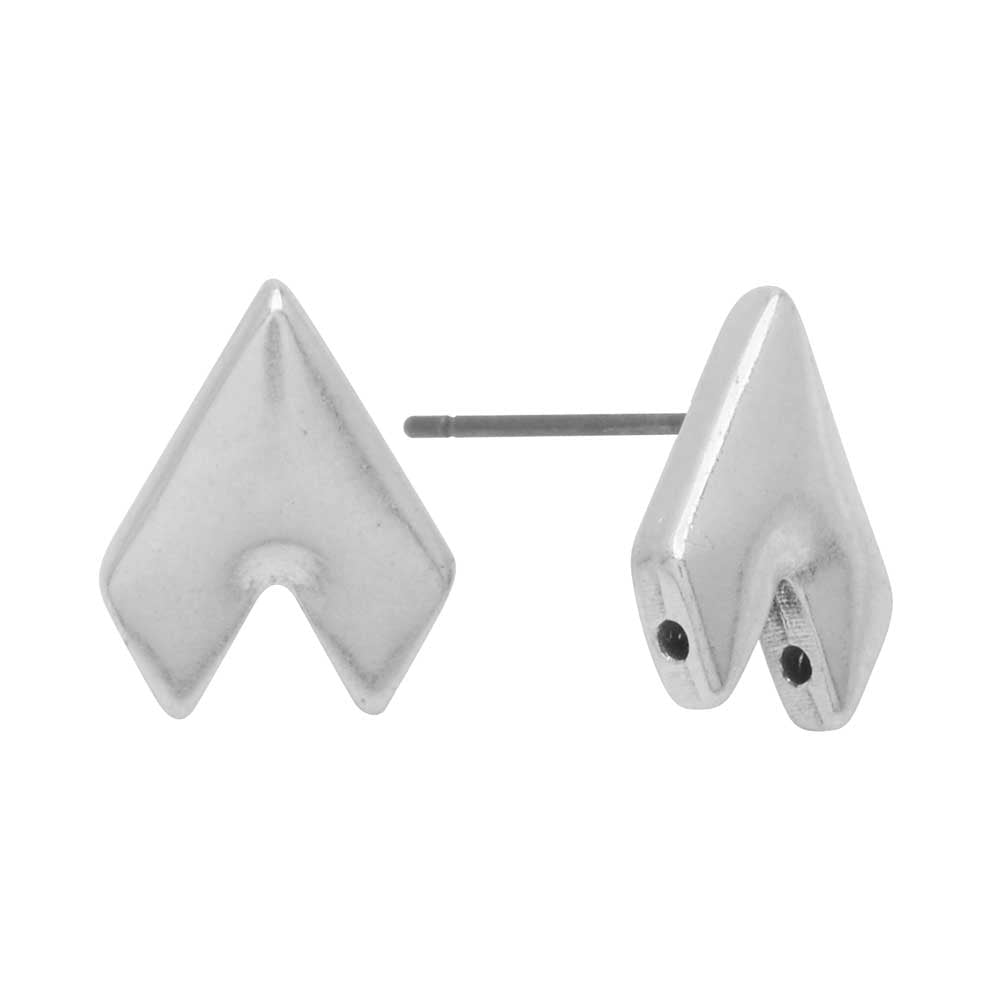
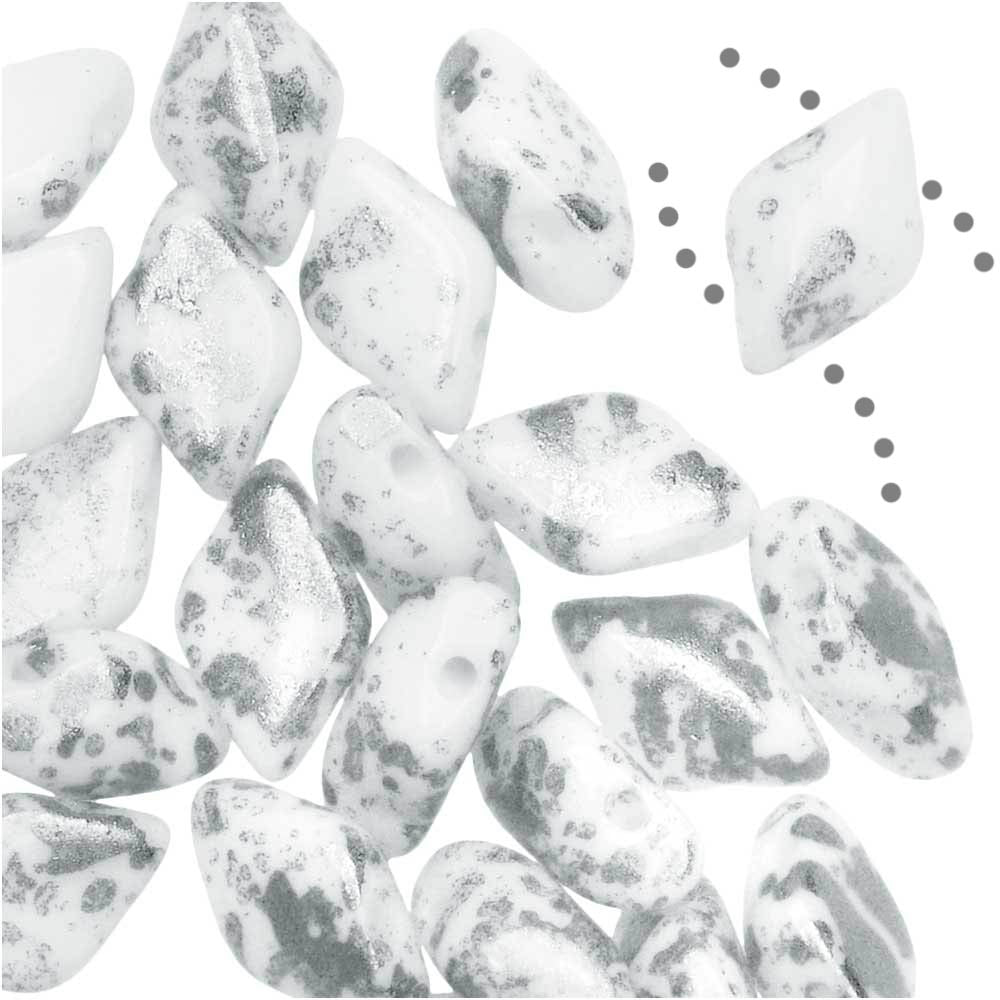
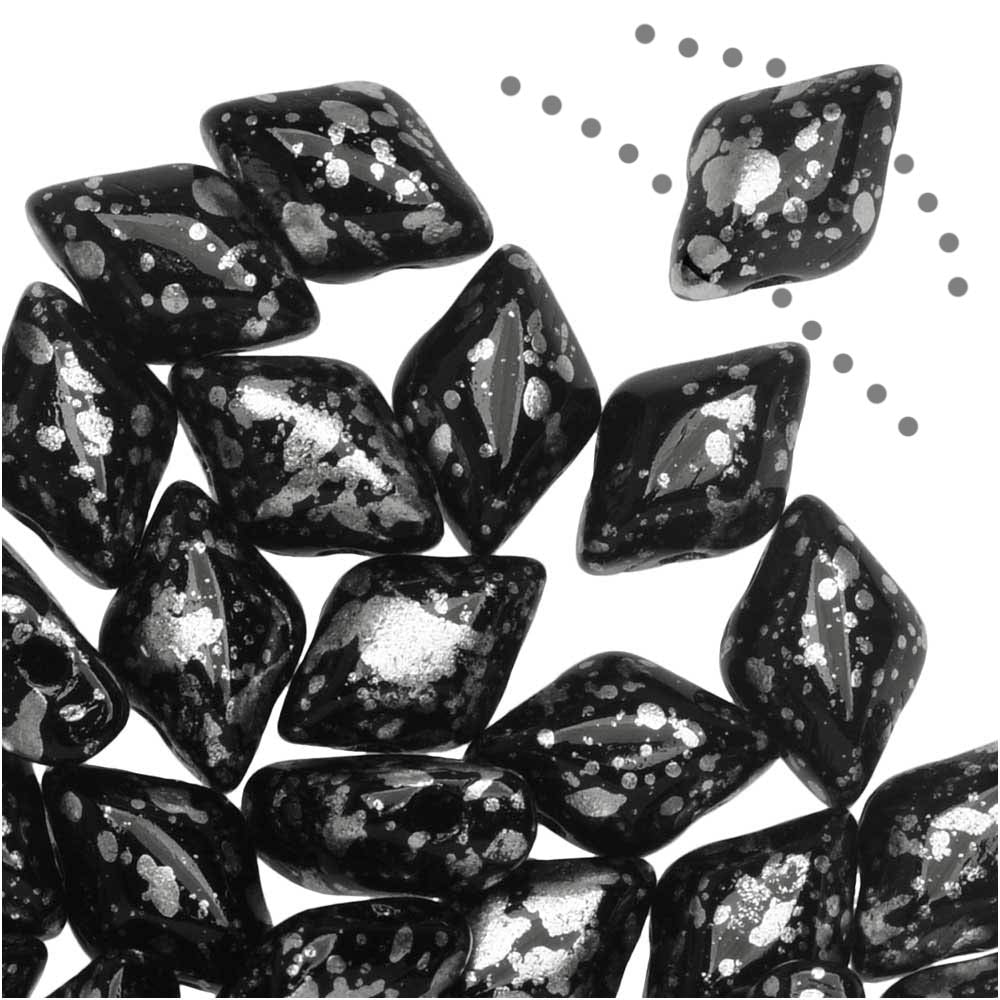
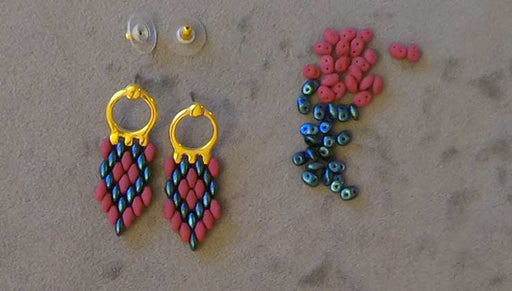
How to Make the Night Circus Earrings featuring Cymbal Earring Posts for GemDuo Beads

SKU VID-1816
Designer: Kat Silvia
In this video you will see how to use a double needle method that yields results without any thread bridges. The use of the Cymbal Earring Post provides a professional finish, just choose your favorite GemDuo beads to create this design.
Audio Transcript
Note: This audio transcript is auto-generated and may not be completely accurate.
hi this is kat with beadaholique.com and in this video i'm going to show you how to make the night circus earrings featuring symbol earring posts for gem duo beads so you can see i have one completed example here and this uses that beautiful earring post and i've just created a nice little diamond design i went with the style of the gem duo's there so i have two colors here i have the black and the white and those are both in the silver splash you can choose whichever earring back you like for these i chose just these little silver bullet clutches but the only tools that we're gonna need to complete this is we're gonna need two size 12 beading needles onto it i have about three feet of a crystal fire line in the four pound strung so we're going to be using a double needle method so you only need one strand of thread and then the only other tools is you're going to need a thread zap or a pair of scissors so if you have that ready to go let's go ahead and get started so we have our two needles here and we are going to be doing a sort of crisscross system so what i'm going to do first is take my little earring post here and i'm going to flip it onto the back that way you can sort of stay down there and you can see what i'm doing as i go back and forth now the gem duo's actually do have a front and a back the front side is a little bit beveled on the top and the back side is going to be a little more flat so what we're going to start with is we are going to start with nestling one of our little gem duos right up in the center there and again make sure that the back side is facing you if you're if you're doing it where you flipped it over here just make sure you keep track of your front and your back it's not quite like superduo so you just want to be mindful of that okay so here's what we're going to do we're going to take one needle and we're going to go through and there's a little hole on the side of the earring post and i'm just going to send that all the way through and the reason i've nestled that gem duo up there is just a little easier to catch than trying to sort of weave your needle back through but we want to come out all the way to the other side and we're going to pick up a third gem duo now i'm starting with a row of three black and go ahead and pull that through and what i want to do is i want to center all of this into my thread here so you can't see my needles there off camera there but i just want to center that right in into there perfect all right now taking the needle that is in your right hand and here let me flip this over here so you can kind of follow along this way sometimes it's easier to see there we go and now what i'm going to do is just turn that around and i can go ahead and pull that through sort of keeping everything in place as much as possible i'm going to string on one of the white gem duos and i'm going to go through the bottom hole of that middle top gem duo just sort of bring that together and this is where you know and especially in this setup phase you want to just go slow make sure everything is nice and centered i'm going to do the same thing i'm going to pick up another gem duo again making sure that flat side is facing me and i'm going to go through oops sorry i'm actually just just going to just going to string this one down because what i'm going to try to do here is avoid any extraneous thread bridges so now i'm just coming out that white bead right there so we're not actually going through that last gem duo because we're going to take the needle that's in our left hand and we're going to string it through and we're going to go back through and here's where we're going to pick up that gem duo bead there that white one now if it works out and you're you're really good you can get all the way through and one one go if you can't don't worry about it just go through one bead at a time all right so now i'm just gonna pull that and that's gonna criss-cross there now don't do what i just did go back through that black bead there make sure you're coming out those two white beads there we go so we don't want to go all the way through and again this is just an attempt to avoid as many uh extra thread bridges as as possible okay so i hope that's clear so we went through the top and we connected our first gem does we went around the sides and then we went through that bottom we added our two white beads there and we are coming out those white beads so we're not going through those two end black beads there okay so now take that needle and we're just going to turn it around and i'm right handed so i typically always use my right needle first if you know if you're left-handed you want to do that and it feels better go for it all right now we're going to pick up one of the black gem duos and go through one white gem duo there and now we are going to pick up one more of the black gem duos there and just kind of let that hang out to the side alright so now go ahead and take your left hand needle and we're going to repeat that and we're going to go through now i'm not picking up that first black one there you can see that i'm going through all three out to the side here and before i finish this row i'm going to pick up one more black gem duo that's just going to kind of sit out to the side so that makes sense so i have two sort of hanging gem duos out to the side all right now we can sort of tighten that up as we take our right needle and we're gonna sort of add on another row just in the same manner so we're gonna go through that black one coming out i'm gonna pick up a white bead go through the black one pick up another white keep pulling there we go make sure everybody's nice and happy and now we can go through this black bead here on the outside so that's sort of starting to connect with everyone there and we're going to add one more of our white beads on the outside here and that one is going to be our new one that's just going to kind of hang out there okay so let's turn our thread around now on this one make sure this is there you go and turn it around go through just the black bead the white bead the black bead there the white bead and come out that black bead give it a nice little tug there we go tighten everybody up and we're going to add one more of our little white beads to the outside okay so you kind of see what's happening here okay so this row of four is as wide as it's going to be so now we're going to sort of reverse that style and start to taper it down so go ahead and take the needle in your right hand and we're going to turn around that white thread or excuse me through that white bead and now we're going to pick up a black bead go through the white and i like to kind of go slow just to make sure everyone's facing the right way you can see i've got all of my flat sides on the side which is exactly what we want if you are working on on the back side of your earring if you if you decided to flip it over and you know you can always pick this up and hold it in your hand if that's a little more comfortable for you but i'm just trying to kind of keep it down on the table i figured it might be a little easier to see all right and then one more black bead but we are not going to go through that white bead so that's that's our going to be here one that's just going to kind of hang there all right and taking our left hand needle we're gonna send it all the way through there the only thing we're not gonna go through is that last final white bead so go through that black bead and come out the side okay perfect there we go looking good okay so now go ahead and turn that needle around go through that black bead and this helps to just avoid those you know extra thread bridges i know sometimes that bothers people they don't want to add on you know extra little seed beads to cover it up so you can you know use this style if you choose all right so i picked up one went through the center picked up another and this is going to be my one that's just going to sort of hang there again taking the left-hand needle there let's make it sure everybody's everybody's where they need to be there we go turn around on that black bead and go through but don't go through that last black bead come out that white bead at the top all right all right and to add on our final bead we're going to go through that white bead one more time pick up our little black bead our final bead you can just leave that and we're going to turn it around so taking the left hand needle go through our little black bead there and that's it you are all finished now to tie it off you do have a couple of different options here you can go through and create an extra thread bridge on these white beads which is why i did the pattern the way i did and using crystal the way i am because if you wanted to have these be your darker beads i would recommend you could always do the smoke fireline so you would see it a little bit less but with the silver splash on these beads you're not really seeing it all that much anyway so what i'm going to do is just to show you how to tie it off i'm going to go through and i'm going to go through this white bead right here i'm going to sneak my needle down through and now that i've tightened everything it is very tight in there so just sort of sneak it through if you can pull back and then take your needle and kind of catch that little thread bridge underneath there create a little loop go through that loop and tie a little knot now if this was a bracelet i would probably tie a couple of knots and go through a couple more beads if i could but with it being an earring there's not going to be a whole lot of stress on it so i have that side there also i'm technically doing two knots anyway because i have the thread happening here so i'm going to just sort of repeat that on this side and come through so i'm just sort of finishing the criss-cross there going through the back coming up through this last little part here i should have zapped off that that first side of the thread first all right coming through and catching that little thread bridge and this is just a really simple sort of quick little knot that you know you might be familiar with from from sewing or other projects that we've done here all right and just sort of i always like to send it through one more bead just to make sure everybody is nice and ready to go i'm going to take my thread zap for today so just go ahead and press that and it will start to heat up and when it's ready you just come in and you just zap off your little threads there okay there's one and sorry my hands are in the way but all right and we are done make sure you put your guard right back onto your threads up don't want to lose that so that is how easy it is to make the night circus earrings and these are featuring those beautiful symbol earring posts so you can get all of these by heading over to beadaholique.com and if you're new to our youtube channel be sure to hit that subscribe button below to get all the latest from beadaholique.com you

You recently viewed

Clear recently viewed