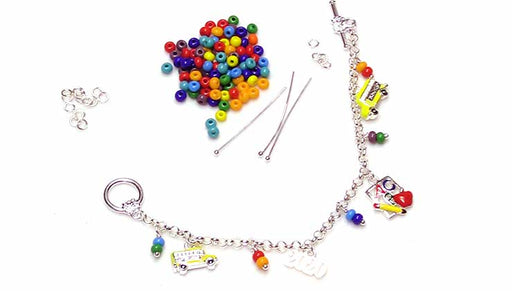
How to Make the Mustard Seed Bracelet and Earring Set

SKU VID-1699
Designer: Kat Silvia
In this video you will learn how to make this bracelet and earring set with a few easy steps and simple techniques. This design features a unique link chain that is adorned with mustard colored beads for a vintage style jewelry set.
Audio Transcript
Note: This audio transcript is auto-generated and may not be completely accurate.
hi this is kat with beadaholique.com this particular chain so what I've decided to do and I'm going to show you this in the video here is I'm going to add a little pop of color in between that so I'm going to use this link chain and I'm also going to add in some of these czech fire polish beads they have just a nice little sparkle to them but they have that rich mustard seed color so I thought that would play really nicely with the antique silver so the other pieces that I'm going to be working with here today I have some head pins here I have some eye pins I have a lovely little magnetic clasp that is also antique silver so it's got that nice little rosette style to it I have some jump rings and I have a pair of earring hooks now very simple tools for today we're going to be using a pair of round nose pliers a pair of flush cutters and I have two pairs of chain nose pliers to help me with those jump rings alright so if you have everything all on your table and ready to go let's get started so I'm gonna start here if by showing you this chain now like I said you can use the little small links there I really like these big links so I'm gonna really kind of pull these out and separate them so that I can use these in my designs so let's start actually by creating our first pair of earrings so what I'm gonna do is I'm actually just gonna take my flush cutters and come in and these have little thin jump rings in between them so you don't need to cut the links you can set these aside and maybe you'll find something else to use your little pieces there for but I'm just gonna separate this first little link for me and like you can see I'm just using my flush cutters just snip off that little jump ring there alright so I'm gonna put that aside for a moment get that out of the way there we go alright so this is one of my little links it's nice and small and delicate and what's great is that you can use it long or you use it what sort of horizontal that way we're gonna stick to this way because I want to make a nice cute little drop earring so what I'm gonna do is I'm gonna take one of my head pins now this is an antique silver head pin it's got that nice little ball on the end and this is a two inch 22 gauge so I'm going to be using the 22 gauge because I'm gonna do a wrapped wire loop so I slip on my bead and then I come in with my round nose pliers and I'm gonna come just above where that bead sits just like that and now I'm gonna bend my plier backwards and I'm gonna bend my wire up and over my plier there and I'm gonna bring it across now before I do the wrap I actually want to attach my little link to it so I'm gonna slide that on and kind of wiggle that in there you need to open up my loop just a little bit there we go so now it's attached to my loop let me kind of wiggle that in my hand there so it's attached to my loop before I've done my wrap so what I'm gonna do is I'm gonna come in with my chain nose pliers and I'm just gonna sort of grip that little loop right there so now I am free to take that wire and wrap it up and over twice so I get a nice pretty wrap at the top and it's already attached to my piece so now I can just come in with my flush cutters and snip that off set that aside and again just with my chain nose pliers I can come in and just kind of tuck that little piece of wire in there there we go so now when you look at it it has a nice little wrap on it and you're seeing it from the front there so you see that nice little wrap on the side all right so that's one port part there so now just taking my little earring hook opening it the same way you would a jump ring slipping that on and now I'm just gonna close that up did I have a nice tiny little pair of earrings but just has a little pop of color at the bottom so that's one earrings you simply repeat to make your second earring but let's go ahead and move on to our bracelet here so again I'm going to be doing the same thing where I'm just going to be separating these links now depending on the size of the bracelet you need you'll separate more links or less but you can just sort of keep going I'm gonna probably need I'm gonna say maybe five or six but I'm just gonna snip these all off and separate out my links and this is a great thing to do with any sort of charm chain that you might have you can use you know one link or two or you can create a focal now you can you know put beads in between all of the links let's say you wanted to use maybe a smaller bead something that wasn't so prominent you can absolutely do that as well all right so let's see how far this gets me that's fine I'm just separating them out there yeah let me just do one more I think I might need at least six I'm going for maybe a six and a half inch bracelet here so all right so let's set that aside and kind of move these guys out of the way there we go all right so now what I want to do is I want to take some of my little guys here and I want to show you something so here's something that I learned I thought was kind of neat so in her earring here I'm using the antique silver head pins but for my eye pins I didn't have any antique silver on hand so what are we actually gonna use is I'm gonna use gunmetal and it's gonna look okay like it's gonna look the same so this is just a little bit more of a brushed look so what I'm gonna do here is I'm gonna do a little gunmetal so it's gonna still look the same in terms of matching with the metals but it's just gonna be a little bit shinier and a little bit darker but if you're working with antique silver and all you have is gunmetal absolutely use it I still think it matches it's totally a design choice it is up to you all right so now what we're gonna do is we're gonna do a simple wire loop so I have my eye pin there and I've slid on my bead and we're gonna do a very similar technique I'm gonna pinch it a little bit lower there I'm gonna pull it back and now I'm gonna go up and over the top rotate my pliers and bring it across and that is my simple wire loop so the simple wire loop is easier than the wrapped wire loops if you did want to do a simple wire loop for your earring here you can absolutely do that as well all right so I'm gonna repeat for maybe let's say two four six I'm gonna repeat for eight of these so do that for eight with the eye pins and I will be right back to show you how we're gonna connect it all together okay so you can see that I've kind of alternated and laid them out so what we're gonna do now is we're going to start connecting them all together so go ahead and take one of your pieces here and we're gonna open that loop same as you would a jump ring you can just probably just bend it with one plier there and I'm gonna slip on one end of my link chain and just close that up make sure it has a nice good closure and then we're just going to move down and do the same with the next one so you're just sort of linking these together in a nice little chain manner and you're gonna see and this is why I wasn't quite sure how many I would need to make my bracelet long enough but I'm gonna show you a couple little easy ways to adjust the sizing if you find that it's too short too long so what we're gonna do is I'm gonna continue here I'm just spending that open got to make sure it's open enough and then when you close it just really make sure that that I pin is nice and close there because we don't want anything to slip out all right so what you can do here a couple little design tips is you can alternate the size of the beads let's say you wanted to do these are six millimeter but you could do like a six millimeter and then on the next link an eight millimeter you can change up the colors you can do kind of a rainbow effect also Swarovski crystals work wonderful for something like this especially if you're using a brighter chain I think that's always really really fun to do yeah so you guys can really make this you know sort of design idea your own you can also hang extra pieces from here if you want but I just like the nice little sleek link chain that's happening there you can start to see it develop alright just a couple more here and again you just see how that gunmetal really is just part of the silver metal that's happening at that antique silver so when you're using it in a type of design like this you can really go either way so don't feel like oh I'm buying antique silver chain I have to have antique silver eye pins and head pins no you can probably get away with either this or like a stainless steel color type of wire that's going to have that little darker metal to it I will say that the silver plated does tend to look quite bright but it you know can be a little bright spot in your antique design so always always go with what what your gut tells you so I'm gonna bring my ruler in here cuz I'm getting towards the end here and let's see so I have my magnetic clasp about here so what I like to do is kind of place that at one end and then I'm gonna have this at the other end okay so I'm getting close to where I want to be so here's what I'm gonna do I am going to open this one and loop it on to my clasp there and I want to see I'm just gonna kind of gauge it on my wrist make sure that nothing is twisted or tangled and just sort of see if I can get it all the way around almost almost almost so I have an option here because what I'm starting to realize is that if I add the extra link and then add the extra bead I'm going way further than I wanted to go so what I'm thinking about doing is instead of doing that I can bring in either one of these little small guys here at both edges so I can kind of cheat that a little bit so let's try that so this is a this is why I told you not to not to discard any of those links just yet because we might want to use them so I can use the little link there and now I'm just gonna close that up again making sure it has a nice nice closure to it and now here's where we're gonna come in with our little jump rings so I have two jump rings there and one that is now attached to my magnetic clasp there we go so now I can come in with a little jump ring and this is an antique silver jump ring just give that a little twist to open it and now I'm gonna hook it on to that little piece there the one I added and hook it onto my magnetic clasp I'm just making sure I have a good grip there the magnetic clasp tends to get really friendly with your pliers there we go okay so now I've added hopefully just enough length there to get me to where I want to go all right so now all I need to do is I'm gonna bring in another little piece and I'm gonna do the same thing on this side so instead of adding a whole extra length and a half I'm just sort of adding in a very small portion making sure it's open wide enough there we go slide that on and now also your clasp is attached with jump rings now if you didn't want to do the jump rings you could simply attach it with the eye pin at the end so you can add in that little piece either let's say you wanted to create a little focal you can do that absolutely as well all right so let's make sure nobody's twisted here and then I'm going to separate my clasp you see that little rosette just sort of fits right out slide that on and again just coming in with my pliers all right there we go and I just want to make sure that everything is going to fit the way I want it to yeah let's give it a little test here all right there we go yeah so that fits my six and a half interest so the great thing about this little clasp is it can actually be your little focal on top well you have your little chain and all of your little colorful pieces at the bottom so it's a really simple thing to use with the link chain and then you just choose your favorite color and you'll find lots of little uses so that I use with the foot of this chain so if I wanted to I could make a couple pairs of earrings or let's say I wanted to make a much longer pair of earrings I could have done a double drop something like that so you have a lot of fun options when working with link chain I hope you enjoyed this video you can get all of the supplies you see here and all the tools by heading over to beadaholique.com

You recently viewed

Clear recently viewed