
|
The Beadsmith Bracelet Bending Pliers - Gently Curve Bracelets And Components SKU: XTL-0084 $18.99 |

|
Vintaj Special Edition - Wire And Rivet Flush Cutter SKU: XTL-5606 $10.99 |

|
Baby Wubbers Quality Fine Chain Nose Jeweller's Pliers SKU: XTL-0020 $32.99 |

|
Baby Wubbers Quality Fine Bent Chain Nose Jeweller's Pliers SKU: XTL-0023 $26.99 |

|
E6000 Industrial Strength Glue Adhesive (0.18 fl oz) SKU: XTL-1054 $2.99 |

|
Silver Plated Open Jump Rings 5mm 21 Gauge (50 pcs) SKU: FJR-5459 $1.99 |

|
TierraCast Pewter Charm, Round Cross Symbol 16.5x11.5mm, Antiqued Silver Plated (1 Piece) SKU: PND-0780 $2.10 |

|
TierraCast Maker's Collection Cord Ends, Taj 9.3mm, Fits 2mm Cord, Silver Tone (2 Pieces) SKU: FCR-2124 $2.99 |
Related Videos

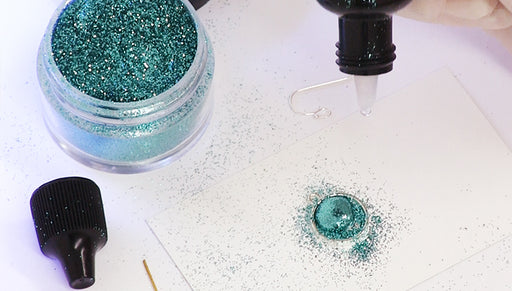
How to Add Glitter to UV Resin and Make a Pair of Earrings
In this video learn how to add glitter to UV resin and make a pair of sparkly earrings. UV resin cures in just 15 minutes in a UV light (or sunshin...
View full details

How to Make Scrabble Tile Magnets using Magnetic Tape
Scrabble tile magnets are great because you can spell out all sorts of words and phrases with them. This video shows you how to quickly and easily ...
View full details