How to Incorporate GemDuos and Cymbal Bead Substitutes into Right Angle Weave

SKU VID-1668
Designer: Kat Silvia
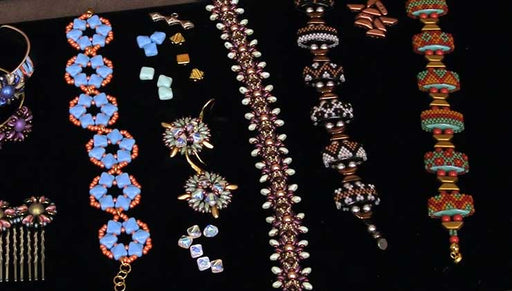
In this video you will see how to make the Parade Sparkler Bracelet. This design features a traditional right angle weave with Austrian crystal bicone beads and Miyuki seed beads. You will learn how to integrate Czech Glass GemDuo beads and Cymbal Bead Substitutes into the bead weaving seamlessly for an added deign element and extra sparkle.

The brand name for the crystals shown in this video is no longer available. High quality Austrian crystals are now available under the PRESTIGE™ Crystal Components line.

Audio Transcript
Note: This audio transcript is auto-generated and may not be completely accurate.
Hi, this is Kat with beadaholique.com so I have an example here on my table and this is what we're gonna be kind of recreating here you can obviously see I have a different colorway that we're gonna be utilizing so what you're gonna need to complete this project is you're gonna need some gem duo's and these are two whole kind of diamond shaped beads and then I have the symbols here and these actually have a little core and these obviously don't have the crystals in them just yet so I'm gonna show you how to do that and then I have my three colors of four millimeter swarovski crystal bicones I have some 1100 Miyuki Delica seed beads and these are just gonna add a little bit more glint to that and then finally all the way up here I have my clasp which is gonna provide a nice sleek finish it's a nice magnetic clasp and then for the filling of those little holes on those symbols we are going to be using the Swarovski crystal round flat back rhinestones in stone size 12 that's SS 12 is what fits inside these little guys alright so those are the beads that you're gonna need for supplies I'm gonna be using the crystal fire line in the 6-pound cuz this is gonna be a little bit of a heavier bracelet so I want to go for the 6-pound as opposed to the 4 pound so I have about 5 feet strung on my size twelve beading needle and then I just have a pair of scissors and then I have some gos hypo cement that's gonna help me with those crystals later and a magical pick and I'll show you how to use that once we get to that point alright so if you have everything ready let's go ahead and get started like I said I have about 5 feet or so strung onto my thread so what I'm gonna do is I'm gonna kind of walk you through what's gonna happen here because there's a lot of design choices that you can make when you get to kind of creating this bracelet so what we're gonna do is we're gonna do a very simple right angle weave so we're gonna kind of start on this side so I'm gonna show you how to do that right angle weave and we're gonna build up and then we're gonna kind of incorporate in that symbols and the gem duo's so as you can see here my first panel only has one of those symbols in the center and if you jump over here to that second panel and this is going to be true for the third and fourth as well you have three but the idea with the bead substitutes is you can kind of incorporate them wherever you like so let's say you wanted to do an entire panel that's all those gem do bead substitutes you can do that so there's just kind of a couple of options there and of course obviously you can vary up your colors and whatnot so I'm gonna kind of just dive right in and get started okay so we're gonna start with a very basic right angle weave and what I'm gonna do is I'm gonna pick up my I'm gonna actually kind of set this guy out of the way there we go I'm gonna begin and I'm gonna pick up one of the seed beads and I'm gonna start with the green here so I'm just picking up four seed beads and four of my bicones just alternating those and this is creating that first unit of four now this is a little bit more of an advanced technique so I'm not gonna spend too much time going through the right angle weave but just so you know you start out with four units there you have four and four and I'm gonna go ahead and slide that down so that it's close to the end I'm gonna leave a tail of about a foot or so because this is what we're gonna use to tie off and add our clasp later so now I'm just taking that I'm gonna make a nice little overhand knot bringing that through and bringing that all the way down there and just for security I'm gonna do that one more time and bring that all the way down alright so now you can see that we have our first little unit here and I have my tail coming out this side and my thread coming out here alright so now what I want to do is I'm just gonna kind of take my needle and I'm gonna work around that unit going through one bead at a time you might be able to catch two if you like but what we want to do is just work our thread all the way around so that it's coming out that top seed bead there so we're not going to go all the way around the circle I'll show you where I'm coming out here and a second let me move my hand this guy's a little hard to hold so I'm just gonna kind of work it around and I'll show you where we're coming out all right so this is the last one so here we have and let me kind of set that down so this is still our tail here and this is where our needle is it's coming out that little top seed bead right there so now we're ready to add our next unit so since we already have our seed bead I'm gonna start and I'm gonna use the crystal in the center one here so I'm gonna go crystal seed bead crystal seed bead crystal seed bead and crystal so you can see that I don't have that fourth seed bead because I already have it down here go ahead and slide that all the way down and wrapping around we're gonna go through that little seed bead one more time and that creates our second little unit there just like so so now same thing I'm gonna work my threads so I can get up to that next unit so I can keep building upwards and again I'm just sort of as you go just sort of check your tension give it a nice little tug you want to make sure these guys are gonna sit nice and square alright so just like that alright and through that top seed bead there and then we're gonna repeat that process with our pink beads so again we already have that seed bead so we're gonna go crystal seed bead crystal seed B crystal seed bead and her eye fine I'll take you there we go alright so again just bringing it and swinging it all the way down and around and we're gonna go through that same seed bead that we're coming out of there to bring our little unit together okay so let me kind of set that down so you can sort of see what we're working with there so we have our three little units and our top little unit here so now what I want to do is I want to go through that first bicone and that first seed bead and let's kind of cinch that up give it a little maybe a little tension a little structure and we're gonna go through that first seed bead now here is where I want to show you your first design option so let me bring back in my example here so you can see that I've done only one unit here before I've added that length of Jem duos but in each other one I added two panels of the right angle weave so you can kind of see those little units there now in the beginning of the bracelet this is where you can kind of expand the size of the bracelet so you can actually do two or three if you want this to be a little bit of a longer bracelet this is a very small this is about a five and three-quarters about a six inch bracelet so if you do want a larger bracelet I recommend just adding units of the right angle weave to either side so what you can do is you can leave a really long tail if you're not sure in the beginning to do that or you can just add on those units here as well I'm gonna go ahead and jump right into the gem duo panel just to kind of get you there but that is a design option and a sizing option for you if you're creating this bracelet okay so we are coming out of this seed bead here so what we're gonna do is we're gonna add on one bicone of the same color so whatever color that is at the top there I'm gonna add on one of the pink so we're gonna go ahead and kind of slide that down I'm gonna go really slow so you guys can kind of follow alright so I have one pink bicone there and then let's bring in some of those gem duos just into the frame here alright so now what we're gonna do is we're going to go through the top hole so you can see on the gem do is there is sort of a beveled top and a flat back so we're gonna kind of always work and make sure that you're going through the right side of the gem duo so we're gonna do is we're going to go through the top hole and I'm just gonna kind of slide that down so you can see how that's gonna fit there alright and then I'm gonna pick up another pink bicone and I'm also gonna pick up one seed bead okay let's go ahead and slide that down okay there we go and now what we're gonna do is we're gonna come back around but what I want to do is I want to add on two gem domes but I kind of need to add them in this way so I'm gonna go through the top hole going through that way and then I'm going to string on the second hole of that gem duo and I'm just gonna kind of pick this up I'm going to string on the top hole of that kind of third gem do there so let me kind of get my thread going through there and then I'll show you where we're at okay so we went up and through the top picked up our bike on inner seed beat and went down through the side here see how we did that okay so now what we're gonna do is we're going to turn our thread around and we're going to go through that second hole of that gem duo and this is the same technique whether you're using the bead substitutes for the whole thing for part of it whichever it's the same sort of orientation with those holes alright so now we are gonna pick up one of our bead substitutes so again these do have obviously a top and a bottom sort of a front and back and you're going to go through that sort of top hole there and we're going to do the same thing that we did before we're gonna go through that second hole of that gem duo that's right there alright so we're just kind of zigzagging our way through so you can kind of see what's starting to form there okay alright so now what we want to do is we're going to now pick up three seed beads so pick up one two and three and what this is gonna do is this is going to allow us to get around there and now those are gonna sit right there we're gonna pick up another gem do ya let me just get my next to ready here so we're gonna pick up one gem duo we're gonna go through that bottom hole and we're gonna pick up that second white gem do that's right there and we're gonna thread our needle all the way through there we go and now you can see I know what's gonna happen here is we already have one of our little seed beads as part of that crystal unit right there so I'm gonna pick up one seed bead and I'm gonna go through that seed bead they're kind of bringing that around and I'm gonna pick up one more seed bead and I'm gonna go all the way through my little thread path that I already have there from the bottom of that gem duo to the top of the cymbal to the bottom of that gem do all the way through the bottom there all right so let me just hold that stable then I'll get my hand out of the way alright so there we can you kind of see what's happening there so we're coming out of this hole here so now what we're gonna do is we're just gonna go down through that hole thread path one more time so I'm just going to go down through these three little seed beads and across all right so now we are coming out that second hole there so we're gonna do is we're just gonna create that thread bridge and we're gonna go back this way through that first one and then let me bring in another gem duo we're gonna go through that top hole there just have to pick it up there we go it's like that down and then naturally you're gonna I got to start picking it up there we go and we gotta go through that other gem duo right there so they should all just kind of align and you'll be able to tell right away whether or not your gem do is are facing top or you know front or back so you can kind of flip that around or just go back through if you end up having an issue okay so now kind of as we did before we're gonna pick up one seed bead and now we're gonna pick up one of the green beads and we're gonna go around through this top here and now we're gonna pick up one green seed bead or excuse me one green crystal bead and one seed bead and we're going to go excuse me I lied alright just one because we already have our seed bead there see it'll kind of naturally tell you what needs to happen so don't worry alright so there we go so the last thread path that we need to do is we just need to connect these beads together here so we're going to go through that one more time and I want to see if I can catch all beads there we go alright there we go so now the next logical place to go is we're gonna go through just that seed bead there and just like it is on the other side here and I'm just gonna kind of cinch up my tension there there we go and just as it is on the other side we're ready to start that next unit so you're just going to kind of continue on in that same manner so we're gonna pick up one of our green crystals a seed bead a green seed bead the green a seed bead and one more green and go ahead and slide that down and what we're gonna do is we're just gonna kind of bring that back and we're gonna utilize that little seed bead there as our seed bead that is part of our right angle weave unit so just kind of sneak your needle through there and you can see that we're already ready to begin doing our next little units there so let me do one more because it will be kind of the final piece of the connection there and like I said this is kind of how you can expand you can also do these little units of right angle weave in between you can make you know instead of having two panels you can do three panels or you can kind of just adjust it however however you like all right so this one's gonna be the last sort of part that's a little bit different so we're coming out that top seed bead there so what we're gonna do is we're gonna add on one crystal bead and then to kind of utilize that Center seed bead we're just gonna sneak our needle through there and come up with that crystal bead that's right there make sure he's flipped around properly so now we can continue the rest of that right angle weave unit so I'm gonna pick up a crystal a seed bead crystal seed bead and one more crystal because we already have that fourth one there so now we're gonna go through that little seed bead that is right there oops there we go we're just gonna sneak that through and watch our unit kind of come together all right so now let's move our thread all the way back up to the top and we're just gonna repeat exactly what we did at the bottom there with that green kind of utilizing that seed bead at the top there now in right angle weave you might kind of get turned around and if that happens just keep moving your thread along this sort of circular thread path and that will lead you in the right direction so don't feel like you're getting lost just kind of keep going all right so what we're gonna do now is we're gonna add on one crystal one seed bead one crystal one seed bead and one crystal so I have three and two and now what we're gonna do is we're gonna again kind of go through that seed bead there we're gonna utilize that and then to finish up that little unit we're gonna add on one more of our pink crystals and go through that little seed bead there alright so that finishes up our unit so just kind of get your thread again kind of following that circular pattern until you are coming out that little seed bead and now you can continue to do your right angle weave so you'll be working up and down so it will kind of flip around for you if you decide to not do that gem do a panel right next to it but you'll just kind of do the reverse so you'll be working your way up alright so that is how to do the basic adding of the gem dews and symbols into that right angle weave I'm gonna continue to do the entire bracelet off-camera and then I'm gonna come back and show you how easy it is to just finish it off with that nice sleek clasp and then we're gonna be adding our crystals into those simples alright so I'm gonna finish this up and I'll be right back alright guys so here is the finish to leave and I want to let you know that I made a mistake I'm human so I'm gonna show you how to fix it alright so let's go back all the way to our very first unit here so if you remember we were kind of coming out the top there and I told you to go over across and down and through and then we kind of continued heading down but one thing I forgot to tell you is we want to make sure that each of the little units is connected so what I should have done is gone up and over and down and through and then back through one more time and then down so that's the only thing that I made a little boo-boo on but if that should happen to you guys what I had to do is I didn't realize I had done that until I had gotten all the way over here and I was doing it on the set one and I was like oh shoot I missed a little step so what I did is I did my little loop and then what I did is I whoa and just follow that thread path all the way down until I could come up here and make that little loop and then I brought my thread all the way back over here and just continued so if that should happen to you or if you notice like oh I had it a bead or I you know needed to fix something or whatever just kind of again just keep following those little circles of the thread path so that's how you fix it but you know we're human we make mistakes and instead of filming the whole video again I just wanted to let you guys know what had happened right there all right so just make sure that all of your beads are connected and once you've brought yourself all the way to the end here is what it should look like now what we need to do to add that clasp is we need to be coming out at the bottom side of one of those three little beads here so that top one we need to be coming out at the bottom all right so now what we're gonna do is we're just gonna take our clasp and I'm just gonna unclasp it set one aside and now what we're gonna do is we are going to pick up two of our seed beads and we're gonna go through that very first loop just like so and string that down and then we're gonna pick up two more seed beads and what we're gonna do is we're gonna go into that second seed be there the one that's on that middle unit so let me just pick up my work there there we go alright so you're gonna start to see that kind of come together there and then we're gonna pick up two more seed beads and we're gonna go through and I'm just gonna kind of I'm right-handed so I gotta work it around there there we go go through that second loop and then pick up two more seed beads and go through that very last seed bead there on the bottom now if you'd like you can kind of go back through and reinforce but you see how it creates just a nice little line there so what you can do is we can just go down through our beads and we'll just kind of come back around and let's say I've gone through it twice just for the sake of time but if you did want to go through it again you're just kind of following along there you can get all the way back up to the top and go down through one more time but then we're just gonna take our needle and kind of catch one of those little thread bridges there that's happening in the back there we go and make a little loop stick our needle through there and pull tight and that's gonna be our nice little knot there that we can now just sort of tie off and that's the same little method you'll use if you need to add thread you can work with a longer piece of thread this definitely did I needed to add thread about halfway through so you just kind of use that same little method and then you just weave in some fresh thread alright so let me finish up this other side really quickly here and I'm just gonna kind of flip mine all the way around I'm right-handed so it just makes it easier for me to work that way but when you're using these magnetic clasps you definitely want to make sure that they are going to be facing this the right way so you want to make sure that you have one up and one down you don't want to end up with that kind of situation that's always it's happened to me before and it's always frustrating so just make sure it's flipped the right way so we're gonna do two seed beads go through that first hole do two more seed beads and go through that middle seed bead two more seed beads through that second hole kind of doing my little backwards method alright and just two more seed beads and going through that third one there alright so now we have our nice clasp attached and I'm just gonna go down through a couple and you can catch that little thread bridge wherever you want I'm just gonna do mine right there on the edge and then just kind of go through the next adjacent bead alright and let's just trim that off coming in with my little snips there we go okay so now our bracelet is almost finished the last thing we need to do is we're just gonna be adding those little crystals and this is why I like to do it as the last little thing that way you've woven in all your threads you're not gonna mess with the bracelet you can actually leave it to just kind of hang out there for a little while so let me move some of this stuff out of the way there we go so these fit that stone size 12 and what I'm gonna do is I'm gonna use my little magical pick here and this is just a little piece of tape and what this does is this kind of activates the magical pick so I can come over here and just pick those little guys up but before we do that because we want to move fairly quickly we're gonna use our GS hypo cement and you can see that I definitely have used this one before so what we're gonna do is we're just gonna take off for a little tip there and it has that little needle point so all you're gonna do is you're just gonna add a little tiny dab of glue into each one so I'm gonna work fairly quickly here and you have a little bit of time so I'm just gonna add to each little one here just a little tiny drop you don't need to add too much there we go and now I'm just gonna close that up and quickly we're just gonna kind of use our little pad here to activate that and just come in there and just kind of slide it in and we just work our way all the way across and you can use this other side to kind of nudge it in if it kind of gets out there they kind of sit really nicely into these little bezels so you just work your way all the way across and just you know in case you guys are curious the G's hypo cement does dry fairly quickly but we always recommend at least 24 hours to really just let it sit and be alone so that it can really achieve that full maximum bond that you're gonna want because we don't want to lose any of our crystals but you know you will have extra crystals so definitely keep those handy in case you know over time maybe one pops out or something you can replace it and you just do this exact same method with that GS hypo cement and if you want to you can do half the bracelet at a time I just wanted to move quickly for the purposes of my video here but if you think that you're you know don't have maybe a steady hand you can definitely take your time adding these in alright and last one now we are at full maximum Sparkle I just love this Saurav ski crystal bracelet and you can just see this is a real true testament to how different things look in different colors just look at how different the gold version with the pink and green looks from my red white and blue version so these years those beautiful Swarovski crystals the gem goes and the symbol bead substitutes so you can get all of these supplies and see this full tutorial by heading over to beadaholique.com and if you're new to our YouTube channel here be sure to hit that subscribe button below

You recently viewed

Clear recently viewed