Beadaholique Live Class: Quick & Easy Jewelry Featuring Gita Settings and Austrian Crystal

SKU VID-1559
Designer: Design Team
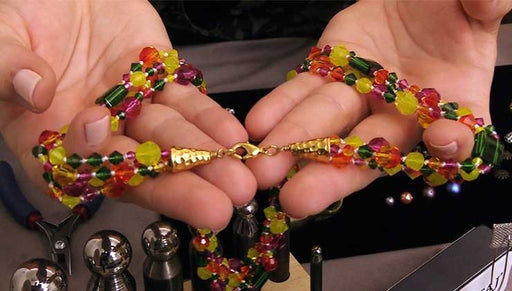
Join Designers Kat Silvia and Julie Bean as they make six complete projects to show you how easy it is to design high-end jewelry with Gita settings and Austrian crystals. These specialized settings are designed to perfectly fit a variety of Austrian crystal fancy stones, allowing you to design a custom necklace, bracelet, ring, or earrings.

The brand name for the crystals shown in this video is no longer available. High quality Austrian crystals are now available under the PRESTIGE™ Crystal Components line.

Audio Transcript
Note: This audio transcript is auto-generated and may not be completely accurate.
hi everyone welcome back to our next live class we're at the beadaholique studio and today we're talking all about Gaeta jewelry for Swarovski crystals yeah and it's so beautiful jewelry that you can make at home and you know it's quick and easy we're gonna be doing lots of projects but you know if you guys have been shopping on beadaholique.com this week you kind of gotten a little sneak peek of what we're gonna be doing so we have lots of projects to show you and lots of fun things yeah and this is really a new collection for us and that's why I wanted to dedicate a whole class to it because there's so many different things to cover there's earrings and bracelet snowflakes and we've already made a ton of projects and in the course of this broadcast we're going to be making six more complete project mm-hmm yeah ah so Ghita jewelry heavily maybe we should take just a nice pan of it and we can kind of see what what we're talking about if someone's not familiar with yeah I was gonna say so if you're kind of just clicking on now you know it's Kat and Julie here and we are talking all about Gita jewelry and this is beautiful jewelry that's designed to fit with Swarovski crystal fancy stone so you're noticing a lot of prong settings I do have a couple of glue in settings but today we're gonna be talking mostly about those prong settings because it really gives a nice finished look to jewelry and you know it's this is gonna make some great holiday jewelry and gifts and even you know prom and homecoming and stuff like that that's coming up I know we're sort of out of wedding season but I got married in October so I'm for me I would be getting into it you know years ago but you know it's just kind of interesting to take this jewelry and just see you know it's gold and silver and then really truly just choose your favorite color fancy stone your favorite shape and size and create some beautiful quick and easy jewelry with us that's gonna be what we're doing today and if you do you have a moment coming dress or a bridesmaid dress or you know a holiday outfit for a party by being able to select your Swarovski crystal color you can absolutely like create custom made coordinated jewelry which is really nice and it's yeah it's so perfect for bridesmaids oh you know so alright so let's jump right and we always have a giveaway yes you know and let's just start with the giveaway because we do love to give things away yes we hope you love to win it now the way you enter this giveaway first off is by leaving a comment and it can be any comment it can be hi I'm watching guys from Seattle or just you know what you love to make jewelry wise give me anything yeah if you have a favorites RAAF's key color let us know that so for today's giveaway we're giving you five different pieces here to create finished jewelry and we're actually giving you some popsicle sticks and we actually to show you how to use those so you're getting all the pieces and all the tools you need to complete five different projects so what we have over here is I have a beautiful set of these leverback earrings and a ring here and that's gonna use a Rivoli size 14 and that beautiful majestic blue which is just such a gorgeous rich color and I have to pop it in sure just on that black velvet it doesn't quite do it justice yeah are you guys so pretty and of course you would set it properly which will show you what we don't want to do that for you we want to let you guys have some fun too and then we have a beautiful silver necklace here and these are some fuchsia tones that are going to fit right into that nice little setting there and then over here we have a beautiful set so we've given you a bracelet and a pair of earrings for this side so what we're gonna do is we're giving you some crystal and then this beautiful color here this is called paradise shine so it's got that nice little sort of mermaid shimmer so that's the same color in a different size stone there on a ring that Julie had made so yeah so we wanted to give you guys some of some of those fun crystals too so lots of different little sizes you know so if you want to wear something a little delicate you know we're a little more subdued but then we also wanted to give you something a little a little brighter so a little fun there yeah and we have a surprise we have a surprise today so we we haven't done this before any giveaway so we're gonna see how this goes but you guys are the ones that need to make it successful alright so what we're gonna do is because Julie and I have been crazy making projects and we're gonna make six more in the class today what we want to add to the giveaway is we want to add one of the finished pieces on our table here today but you guys get to vote which one so what the overwhelming majority votes is what our giveaway winner will win yeah and you vote by just leaving so we're gonna show you all the different pieces we've made and then you just say I love the purple bracelet or I love the majestic blue earrings or you know you can really use loose terms you don't need our actual project yeah just the purple purple and gold necklace so you know that was so so don't worry about going to hunt for him we want you guys to stay on the feet here and enjoy but just you know shout out what you like yeah you know let's show you and then this will give you an idea to as you're looking at these pieces of the variety of jewelry you can create using these Gaeta jewelry findings as frosty crystal exactly all right start on your face okay we'll start on my side so so go ahead and vote and you guys can start voting now and vote all the way through the class so if you see us make something and you're like oh I want that you can vote a million times I don't care all right so so one of the pieces that I have pre-made here this is we'll call this the purple and gold bracelet now this features beautiful Swarovski crystals of course and that's that Rivoli style so I have the purple version I'm gonna be making a silver and black version here in the class here and then I also have some earrings here and now these ones in silver are going to be the crystal rainbow and then I'm gonna make a scarlet and gold version here you can just kind of see that on my table I also have up here and I'll kind of bring it in for you this is a beautiful little we'll call this the pink and gold link necklace thank you I was like we'll keep it we'll keep it easy so this is a beautiful little necklace there so you can win that as well and vote for it and then I'm gonna be doing an emerald and gold bracelet and this is an adjustable slider bracelet and I actually did a version down here which you can see this is my little Halloween version so if you want the Halloween bracelet go ahead and vote for that one there and then just to kind of continue you guys I have a few more finished pieces up here that I want to show you we have the blue and silver bracelet up here with the and that comes with the earrings it's a nice little set and then I have two pairs of earrings over here I have some purple pairs and this is that paradise shine again but you guys can just say purple and gold and I'll know what you mean alright so that's kind of what's on on my side of the table here I know we're gonna cut we have some more happening over there so Julie one you point that out here we've got these really pretty majestic blue earrings with that crystal surround which I think you were pointing out these are perfect like wedding oh yes something blue you have that crystal paradise shine ring and the gold we then have some more earrings we've got pears done in scarlet so this is just a scarlet or you could say red and gold earrings and then I've got over here another pair of earrings now I call these just champagne and ice one so now these were fun because they used heinous setting that has a little loop at the base I was able to connect a Swarovski crystal pair unless using the patina crystal so it just it has that wonderful mottled look to it I've got a couple pairs of earrings over here I have these little I think I call these the country blue I just think they're really pretty and these are like a little resort color themed earring that's using the two stones on that gold setting up here I have a tanzanite and gold necklace a little bicone dangles I'm actually be teaching how to make a variation of this in the class here so you'll see how to add these little dangles to the psyche so I think it's fun to pull out that color so you can vote for that if that one is what you think is something we should add to the giveaway and then down here are my three projects so I'm going to make I've got a little pair of tassel earrings I'm going to put together with this crystal lilac crystal and again these little Gita findings with that loop at the base which is so versatile I'm gonna be doing a gold necklace in the majestic blue with little bicone dangles and then this really cool ring it's got two stone settings so that's a really fun one so you can just wear it whichever way you want and you'll put the settings on there and then finally I have in my ears a little pair of blue and silver earrings this is a Montana crystal Montana blue crystal and then cats got a parrot I just couldn't resist so I have some just crystal and gold earrings just very classic very cute little studs so that is that's all the finished jewelry and then of course a couple of the pieces that we're gonna be making so you guys can choose what you like we love to give you guys jewelry and we just thought hey we're making all of it someone should enjoy it absolutely so yeah so just vote for your favorite and you know again vote for your favorite and then let us know where you're tuning in from or what you're excited to see maybe your favorite color but EULA let us know also if you're a gold or silver gal you know or guy no judgement this is a lot of sparkly jewelry so we'll have everybody involved but yeah so I think we're ready to kind of dive in and get started absolutely and questions definitely ask questions yeah we're here and we've got wonderful people behind the camera we have Chris and Brian and they're helping us so we will you know be here and answer all your questions - perfect all right you're gonna start by making something really beautiful oh okay all right so I wanted to kind of kick it off by showing you guys some of the specific tools that are used for the Gaeta settings now we have the smart setter tools here and I have four different varieties and if you want to come on over I'll kind of show you how they look on the tool so what's really nice is they're actually color-coordinated which is fantastic but they also have written on the sides there so that you never have to do a guessing game so if you do get all four tools you never have to guess which one fits with which it also has that nice little stone size on this side there so this is a 39 stone size this one is 429 and then I have the 11 millimeter 47 which is actually an 11 millimeter Rivoli and then I also have this one which is 4 a 12 millimeter Rivoli and a 12 millimeter square so it makes it really nice and easy and just kind of as you look down the the barrel of the tool here you can just see that it has a nice little sort of capture cone on the inside so what's going to happen is we're gonna press it onto our stones but it's never actually going to touch the stone because we do not want to scratch the crystals which is why we have these special tools but I will say these tools are great if you are doing a bracelet like this where you are popping in multiple stones it just kind of makes the whole process nice and easy so basically to get started here I've already started to put some of my stones in there and now you can see all the prongs are still up there not across the stones yet so let me just start by finishing off popping in my stones here there we go alright so now really easily you just kind of take it and it sort of fits really nicely in your hands you want to get a good grip on it and you just place it above the stone there just making sure you cover all the prongs and then all you need to do is just simply press down and just lift up and you can see that those prongs are nicely set now you'll be able to see it a little bit more on some of the darker stones here so let me just kind of keep going and you know it's just really nice and easy they just kind of press and set down and again you're not touching that stone at all because it's got that nice little concave in there so don't worry about pressing too hard you know you I just have just kind of a medium little pressure here so yes you can see those prongs just kind of come right over and they just sort of hug that stone and this is a really nice little finish they don't wiggle at all in there so you're not gonna have any loose stones happening all right so I'm just going to keep kind of popping and going down the line here so you can see that like you know if you wanted to just bend each of those prongs separately it might take you a minute but this way you're getting all four done in one go ups and one more there yeah and that seems like a great tool if you are making a lot of jewelry like let's say you're doing your bridesmaids jewelry or maybe your main jewelry to sell this would be such a time saver oh absolutely yeah and you can just kind of see but I'm kind of kind of cooking along there you just want to make sure to keep the other stones out of the way while you're pressing down but I'm just on my table here and you just sort of press them down and I like that it kind of gets all of them all at once there all right all right very nice and I had one that kind of stuck up there for me there we go so you can actually go back over and you know do that again if you feel that some kind of ended up being a little higher than others if you kind of moved your tool a little bit but you can see that they're all set in there and nobody's moving around but then when you wear it it's just really really gorgeous and it just sparkles so so nicely and I love that all of their finished pieces so when you get it it'll come without the stones but it actually has a nice little chain extender and a little heart there on the end I just love that so what you could also do is if you wanted to remove that you could shorten the chain extender let's say just wanted it to fit really nicely there is a jump ring here on the end or you could leave a link or you could kind of just shorten that up so you can adjust that just with some chain nose plier it's just very very simply there you go so it was really fast yeah so so these tools are really really great if you are gonna get something that you're gonna have a lot of stone sets just like that because otherwise you do have to kind of bend each one individually so it would not be as quick and easy all right so yeah so that's one of mine done Joey what do you have to show us today now you're gonna you're gonna use some popsicle sticks right and I am and I love popsicle sticks like for everything I brought it so great so those the prongs Center tool is great if you have something that you can lay flat on the table because you see that cat was applying pressure and like a downward motion on a flat surface let's say you have a ring well you couldn't really apply pressure with that ring right like that you wouldn't want to do that so there has to be another way of doing and what we've discovered as a popsicle stick it's a great method when you need to hold an object in your hand popsicle stick is also great if it let's say you've just got one stone to set really nice and easy but not as quick and easy method so I have this ring right here and it does come in this wonderful silver and gold and what we're gonna do is it uses two stone settings there's two stone settings and two stone sizes and what's nice is you're probably wondering least my first question be well how do I know what stone size on the beadaholique website under all the different Gaeta findings each and every listing will tell you exactly what stone size you need so that takes the guesswork out of it and then you can just go on to our suave ski crystal section you can look at our fancy stones and you can actually filter by stone size so you can just end up with a whole page of every beautiful crystal color that comes in that specific stone size so let's go ahead and set the small one first and I was actually playing with colors because I know for the big one I want this gold patina I think it is my new obsession so let me go ahead and set that one first so I just popped it down in there and now I'm going to hold it in place and I'm gonna take my popsicle stick and I'm gonna bend a prong over and what I like to do is I like to work a little bit slower I go to the other side of the diagonal side and then Bend that prong over and then I go to the next corner and I'm just using the tip of the popsicle stick and pressing it into place and then I'm gonna go diagonal bend it over I'm gonna go back to the first one I did bend it over and now I like to do now that they've all got some type of event aspect to them so they're now holding that stone in place I don't have to worry about it falling out now I like to go back and do one final one where I do like a little gentle rolling motion and because it's a wood popsicle stick I don't have to worry about scratching my stone so now I can just go and make sure that they're all nice and tight you know so I want to make sure they're flat so they don't snag your clothing especially on a ring and we're going into sweater season mm-hm you want to make sure that they're all nice and flush so I've got that one set now I was playing with these two colors I have it like this pinky tone to it I thought ooh that would be really pretty but then I was like you know what I want to be able to wear this with everything so I was like I'm just gonna go with the very classic crystal so I just put that one in there so this is an SS 39 stone and this is an SS 29 I moved my ring before I could put my finger on it when I love that you have the patina in there and then are just sort of accenting that sort of color with a crystal cuz you're right then you can kind of wear it with everything so again I'm just gonna hold it in place and gently bend over one of the prongs go to the other side and I do like working diagonal I just feel like I get a little bit better of a set okay so this one the last one and now I'm just going to do the same thing I did before just like a nice rolling motion and those guys are set so now we've finished that ring and really quick before I go on any further I wanted to show you the variety of rings because this is one has two which I love is a very modern look but there's also ones that just have a really simple elegant look to them that you would just put one stone I think this is that that's 39 so you would just put one stone in there so you have a whole variety you've got like this big one with the crystal paradise shine and then you do have these guys with the crystal surrounds as well which are just so pretty and sparkly oh yeah I really love those and you know it all kind of coordinates together so if you did want to do one of these stones and kind of bring in your earrings it all kind of coordinates together so you can really make lovely sets which again is is perfect for gifts or anything like that alright so that was one of my projects that was it looks like something you would behind a really expensive store it really does and you know and then you also get to say it's frosty crystal which is beautiful the quality is unmatched so it's really fantastic and you can say I made that yeah we have a question oh great questions yeah thank you so the question is could you use a ring mandrel so if you did want to kind of set that on to a ring mandrel and then still use one of the setter tools I think you could it just might take a little sort of finagling to figure out how you want to sort of press it together yeah but I think I think you could do it yeah cuz you just would need some sort of surface to really press down on I like having I like using it for the flat one so that you can get that you're going to experience the same issue though with the stud earrings and even the leverback earrings where there's nothing really to kind of place it into now you could try to put the base of it into like a piece of wood or something out like drilling the holes yeah I was gonna say if you created a little hole so you could do that so that would be an extra step in the process however if you are making a bunch of them it might be worth it for sure you know so yeah and I would say if you do have a ring mandrel if you happen to have a vise to go with your ring yes that would help a lot because you're gonna have to stabilize that man at the same time you're trying to stabilize yes I was like you'd have to kind of figure out how you'd want to like press it in or like if you want to kind of give a little leverage you could also put it on a ring mandrel and then put the ring mandrel down I would just be careful of the back of it yeah just I wouldn't want to kind of get like a little flat back on the bottom of the ring especially that one that does actually have a back these other ones don't right technically have the back so you could set it like that but I would worry about that one you kind of you might smush it a little great question and the smart idea yeah love the ideas all right you're gonna make something I'm gonna make something so this is a great example so if you didn't want to go full on crystal but you just wanted a little pop of something on the wrist so we are going to be making an adjustable slider bracelet and it kind of looks like this so what I'm gonna do is I'm gonna have a nice little crystal focal on the top and this again is my little Halloween version so I was using our cute little skull chain they're just a little well that's something extra so I'm gonna do a little fall version here and I'm gonna use this oak leaf chain as sort of the little the little base parts there but the basics of creating one of these bracelets is really really simple but first before I give in to that I am gonna set my stone so I have a beautiful oval here now this is an emerald and this is a that eighteen by thirteen so what I want to do is I'm going to show you a different tool so I could use a popsicle stick with this but this is the prong pusher tool so this kind of you can see it sort of has that little square tip there so it's gonna work the same way you just have to have a little bit more control with this one and just be a little bit more cautious with this because this could scratch your crystal but I'm going to show you how to make sure that doesn't happen all right so what we're gonna do is I'm just gonna kinda and you can wipe the fingerprints off later I'm just going to kind of put my thumb right on top of that crystal there to make sure it doesn't move around so what I'm gonna do is I'm gonna come in and what I'm gonna do is I'm gonna do that same kind of rolling motion over the top there just with that crystal so just kind of coming in hopefully I'm trying to try to make sure you guys can see this and you're just going to do that same little press motion but you're just touching that wrong and then again kind of working diagonally you're just gonna come in you're just gonna press down again and now I can go to the other two sides and just press that over and then move to the other side there and press it down so you really just want to focus and make sure that you're not touching the crystal at all that you're just getting those little edges there so this is a nice little technique here just to really focus on just getting those little tiny prongs all right I'm just wipe out my poor little fingerprints there all right so that's the prong pressure tool works kind of the same way but again it great to have a nice little tool because the metal part won't wear out as quickly as say a popsicle stick well so food for thought and just just to let you know all right so we're gonna make an adjustable slider and now we've done this before and I do have a full video so I'm going to go a little fast for the live version here but I'm gonna take my little adjustable slider clasp that it has that nice little silicone and the center there and I'm just gonna slip my chain through going one way just like so and then I have a little scrap of wire here so I'm gonna create like a little wire needle onto the other end here now what I want to do is I want to kind of crisscross it so that I'm going through the opposite direction so I'm just going to hold my little clasp slip the needle through there and now just give it a nice little tug and it should slip through the other side so now I have my life's little adjustable slider clasp so I can go ahead and remove my little needle there and now what I want to do is I want to get those ends as even as possible so that I can still find the center point of my bracelet here so I'm just kind of eyeball and measure there how did it find the center all right the whole or twice cut once exactly all right so speaking of cut I'm gonna come over with my flush cutters here and now that I found the center link I'm just gonna come in and just sort of snip that off to separate the center portion here all right so there we go and now I have some jump rings here yeah steal from my other side there there we go so I have my jump rings and so simply I'm just gonna open these up and attach my little focal to the center part of my bracelet I'm just gonna slip down there and I like that some of the Gaeta findings are these beautiful little links for you to use in such a way so you can just kind of you know just use one stone you don't have to go crazy you know if you just want a little pop a color to what you've got or a little pop of shimmer or crystal you can do them all right so I'm gonna close that up all right so once you've gotten this far it's time to kind of test the size so what I want to do is just sort of pull that apart and slip it over my wrist now you want it to slip over fairly tightly so you can kind of see that there's a little bit of extra slack there so what I'm gonna do is I'm just going to kind of pull just a little bit there we go just to make sure that it slips just over my wrist there we go all right so that'll work so now what I can do is I can come to the ends of my chain here and I'm going to snip off fairly close to the edge there all right and we do have our question so while I'm getting this done so the question is would you be able to attach the crystal to the chain before you put the chain through the adjustable slider clasp yes you just have to know your size kind of ahead of time because if you're putting it in the center of the chain you can do that you can also you know I I realize that people are probably gonna be mad that I just wasted chain that's okay I'll use it for earrings I don't worry I think that yours like don't worry earrings but yeah you can absolutely do that you can link it together and then just link one side and then just link the other side through so either way just kind of steps you know and we do have another question as well could you use a drop of hypo cement to hold the crystal in place you're still gonna need to go ahead and put those prongs over I don't think you need the hypo cement at that point the prongs are very strong so the glue you could do it I don't really think you're going to need that those prongs aren't going anywhere yeah you should be fine if you find that the stone is loose you'll probably just need to just reapply the pressure to the to the prom and you'll know that in the stage where you're actually creating it it's not really a situation where it's gonna come loose over time right yeah once it's in there it's in there yeah and that's a good point there is no swapping out crystals you know you DMVs and you set them once and that's your piece of jewelry which which is great because you do you want them to be solid in there you don't want them coming out yeah and if they ever if you ever feel like it's loose you can always just kind of take your popsicle stick again and just sort of press it cuz let's say you did catch it on a sweater or something and it did pull loose I mean we haven't found that to be the case but you can just kind of go around and just just double check and just make sure that everybody is you know nice and cozy in there and that they're not gonna it's not gonna move it's not gonna fall out you know I'm kind of trying to shake it there but yeah it's not it's not going up yeah all right so what I've done is I've done on one side there has I've just taken some of this little charm chain and we sell this by the inch so it's really just super horrible so what you just need to do is you just need to find your link here that you want to cut off there we go and you can see that I'm getting some extra little dangles there which is perfect because then I can add those to my earrings that I have my extra chain for later hint hint alright so now I'm just gonna take one last jump ring just gently twist oh and then I'm gonna slip it on to the charm chain here I'm just gonna find that last little link slip it on to the edge of my chain here and then you kind of have some fun little extra-long dangles now you don't have to add anything that's too long you can actually add another little Ghita setting tiny little pendant there at the bottom if you didn't want to have something that really really flowed down like this is obviously a little bit more of a kind of statement tee piece there but what you could do is we actually have a little small let's see where are they pendants okay this is a silver one but you could add that one down there as well we also do have some smaller ones that are going to be closer to this size so you can add a little crystal down there instead if you want it to so that's something to consider also anything that's a link like that will work in the center so if you wanted something just tiny and delicate you could use that as well so there's a lot of a lot of different options with such like a simple technique and a simple sort of idea so very very small like oh the leaves and the Emirate yeah I really loved the leaves so yeah very nice alright alright Julian onward onward I'm throwing a necklace and so I have this one here now this uses a little cushion stone it's a tanzanite cushion stone as all this beautiful pre-made chain and I just accented it with the same color the tanzanite in a little five millimeter bicones so I'm going to do the same thing but I'm gonna do it with a necklace setting that uses our Rivoli instead of a cushion and I'm going to do these in the coordinating color of the majestic blue so what I have to start with is my pre-made necklace chain and what's great is just like the bracelet it does have that extender chain there it's a nice long necklace then you can then adjust and I've already popped in my little Rivoli in here and so I've got all those prongs sitting upright and now what I'm gonna do is I'm going to use my popsicle stick again and I'm just going to start to fold over those prongs so this one I could have definitely used the setter tool that cat has as well so that would have been a great application for it if you've got it now at home and you're using it on your pieces you can do bracelets and necklaces because as soon as I have the set I'll turn it upside down and show you that as a nice flat back to it okay I've got that almost set all right so now it's set and if you look at the back it is really nice and flat so we could have used a setter tool and now what I want to do is make some little dangles to go with it just to accent that color so I am going to be using my favorite tool which you guys have all seen before it is my wire looping pliers because they make life very easy and they're so fun and quick I'm just gonna put a little bike on it I don't know why I think that the black is kind of difficult to take a look as I'm going to do this on the gray so here we've got that little majestic blue five millimeter bicone I'm just going to go ahead and grab it with my plier right where the plier or where the wire exits the bead I'm gonna squeeze it flip it over and rotate my pliers at the top and pull it over so it Criss crosses and I'm actually doing this kind of backwards for camera and it's still really easy so that's how do you think that tool is and then we're at Criss crosses we're just going to snip and we have a little simple wire loop and a little dangle so let me go ahead and I'm gonna do a total of six of these so let me do that and then I'm gonna show you how to attach one and then while I'm attaching the rest Katz's gonna review the giveaway again so if you are tuning in midway through here we are doing agita jewelry finding or showing you how to use them with a Swarovski crystal and we're making a bunch of projects and every live class we do on these monthly classes we do a nice giveaway or we think it's nice we hope you think it's nice and I do want to show you how to attach one of these before we go over to so I'm quickly making these little dangles and even that's that's so fast and easy oh I love these pliers I think this was my very first beadaholique.com purchase very nice yeah seven years ago that is like a very good investment yes and I still have that same pair and I use them all the time yes actually every tool I use on these broadcasts I have the same exact versions at home they are my person like I I don't bring my personal tools here but I use these same cutters and I use the same wire looping pliers and I just love them you definitely get used to a certain you know type of tool and how it feels in your hand and kind of the technique that you like to use with them so yeah we have our good old standbys and it's funny because everyone's so different you know it's great to see okay so there are six of these little dangles and to attach them what I'm going to do is I'm just gonna take a pair of these chain nose pliers and these are sirhan just gonna open up that little loop and if you look at the chain here I'm just going to attach it on you can do it wherever you want but I'm just gonna count one two three and they're just gonna attach it right here and then I'm just going to close it on up like so and we have a little dangle attached now and it's fun you see how that color is just kind of gonna walk up the line of them that's beautiful alright I'm gonna attach the rest in the same method and cats gonna show you the giveaway sounds good alright so yeah see if you guys are just joining us well Julie's doing that here is our giveaway so we're giving away five different pieces here and we're giving you guys even the popsicle stick so that you guys can complete this so when it arrives at your beautiful home you can create five projects right away no additional tools or anything else needed so we're giving this beautiful pair of leverback earrings and a matching ring here with some majestic blue offski crystals and then down here I have a silver necklace and this is going to be using those fuchsia shut-ins and then over here we're gonna be giving you a set that is the gold beautiful and we have the lever back earrings and the bracelet here and this is going to use crystal and the paradise shine so we're giving you all of this and the popsicle sticks to create these projects but to add to that what we are also going to do is we are also going to be giving you guys a Finn peas so I have a couple pieces here so these ones this is the one I just made here so you can win this one this is the emerald we also have the Halloween version as well and I'm going to be making a pair of scarlet and gold earrings here and this is going to look very similar to this version here this is the crystal dark rainbow very very cool color I love that it's a little different for Sourav ski and kind of cool it looks like a like an oil slick or something and then these bracelets are also out there for you guys as well so we have the silver and black version we have the purple and gold version of the beautiful rib Alize and then some more of our little stud earrings here I have some of those pairs these are gonna be amethyst and then here's that crystal paradise shine so you guys can actually see it set into that gold right there and then I have a set and this is a blue and silver set you're gonna get a nice little bracelet and some little stud earrings there and then I also have a necklace here and this is a beautiful sort of link necklace so this I believe recalled the pink and gold link necklace just to kind of give it a day for you guys it's easy to vote for so we have this and then continuing on the table here we have a beautiful paradise shiner ring and then we also have these blue studs now these are just so gorgeous and so fantastic I really like these ones and then we also have some scarlet here these are a beautiful scarlet pear drop we have some emerald there as well and if you just kind of look down there towards the friend there we have a pair of pink pink leverback earrings as well and I can take over your arms long enough all right so we also have the necklace that I just completed here so we've got that majestic blue Rivoli in the center with bicone accents then we also have up here we've got these earrings I think I called them the Cabos troll earrings but they just have wonderful resort colors and they used two stones these little I think I call them country blue only the champagne I serious you could just call them the patina earrings or we are the ones with the pear drops whatever you like and then up here we have the tanzanite necklace and it's the same necklace I just created by using that cushion stone instead of the Rivoli and then on my work surface here the ring we just made here in the broadcast and you're just tuning in you can definitely watch the replay and see how to make some of these pieces that you might have missed and then I'm going to make a little pair of tassel earrings over here using these chakra elements too and the crystal lilac and the way you vote and the way you enter to win is by leaving a comment here in the feed and so we're gonna take a general consensus of what was the overwhelming favorite and then we are going to add that to the giveaway at the end and also announce oh where yeah so a little a little different giveaway for us but I like it I like it so we've got so many pretty pieces and I think you brought up the best point of all they should be worn they should be worn they should be enjoyed love yeah so we wish you all the best of luck yeah so just keep on commenting so are you done with you all right oh my god how beautiful and see if I could do this what's keeping everything straight and you know I do I do love having the color sort of continue and you could use a different color as well but that way you know it really makes it more of just a little focal necklace that kind of just adds a little bit more color to it and yeah definitely do the back comes all the way up earn around you don't have to just stop at three and you definitely get enough with the bicone so I have a lot of left over so you can yeah keep it going all the way around well cuz you know as you're noticing with a lot of the finished pieces here there's different stone sizes there's different links even on some of the bracelets here you can choose a smaller stone size that will go with the whole length or you can choose these little focal ones but even if you had a focal and you wanted to add maybe a little charm or something else there you can absolutely do that so it really gives you a lot of versatility I mean you could also if you wanted to you could remove the chain and add something different to either side let's say you wanted to add cup chain or something so you know all of these little sort of components here can become other components so don't be afraid to kind of mix and match and really utilize the full strength of everything you know there's lots of play with just great mm-hm alright you're gonna play some more I'm gonna play some one all right so I have a pair of earrings and I was definitely kind of inspired by Christmas but one of the things that I kind of look for is I want sparkly Christmas jewelry that I can still learn after Christmas so I don't know if anybody else feels that way because so I wanted to create these sort of red and crystal and I I love red it's probably one of my favorite colors so this is a beautiful scarlet so it's a nice rich red but it's also that kind of Christmasy red which I love so what I'm going to do is I'm going to put this little cushion stone into a little setting here now you'll notice the cushion stone is generally considered to be a square and while this is still a square what I love that this little pendant does is it kind of turns it on its side so that you actually get a nice little diamond shape to it so it looks a little bit more it has that more diamond to silhouette drop so just something to kind of think about there some of these are you know they'll do it straight up and down you know so you'll get the square but I like this one that's sort of the vertical version alright so again just kind of coming over and getting my fingerprints on there don't worry I'll wipe them off later alright so I'm going to take the popsicle stick and just do that same just a little rollover method there just pressing onto the stone and I'm gonna go across the way and just kind of pressing down and turning and pressing and you can see that just the best way to do this is to just kind of just do that rollover method it'll just get that stone just said really nicely in there for you and you can either use the tip here or you can use the side version so either way all right so now I have my stone set there so now I'm going to set this one and actually I want to show you guys how to use that stone setter again so let me get this onto my little surface there now this is a 39 stone so what I'm going to do is I'm going to find my correct tool so this is the blue tip tool there so again just going to kind of come over the top here Center it and give it a nice strong little press down and we're set so that's how the stone set our tools work so I didn't have to go around with my little popsicle stick so there you go all right so now probably the easiest part is just putting it all together here I'm just going to use a couple of jump rings and if I forgot to mentioned before these are five millimeter 20 gauge jump rings that I'm using here which fits really nicely in these little settings all right and get your last boats in because we are going to tally real soon which one is your favorite piece and then throw that in the giveaway indeed so yes so get everything ready here and then I'm just gonna open up my little earring finding there slip that on and close that up alright so there you go so I'm gonna make the second one here while Julie is making hers but that's how quick and easy that comes together so you can see that's a little Christmas jewelry asked but you can also just wear it with something red so I like that that is a really good idea cuz it with the green you do have the trishal of red yeah I see there you go there now we're Christmas yes you're not Christmas that's it now I can worry about the rest of the year alright so what you're gonna make something kind of kind of cool you're gonna use some different components in there let me use some different components so I wanted to use these little Dena jewelry findings that have the little loop at the base because they come in both the two different finishes so you see here and this is gonna get use that SS 39 stone and we have quite a few of them at beadaholique.com and it's a really a great variety of colors you can also get the same setting in a post so you see you've got that post where you don't have that lever back but I want to show you how nice this is this is one of the nicest lever backs I've ever seen it's got a nice graceful loop to it and it really closes very nice alright so I'm gonna set my stone first I'm just gonna hold it again and I'm gonna grab my popsicle stick do my same fold-over method okay and then I do because I'm not using this smart setter tool I do like to go back and just do once more on all of them there's kind of that really fast gentle rolling motion all right it's set for one of them and now I'm just gonna connect them with jump rings now cat was using five millimeter jump rings I'm using four millimeter jump rings and I have this chakra element it's a root symbol I just thought it was a really pretty element a nice little connector it's gonna open up that jump ring and I'm gonna just work my way down the earring and this connector looks great on both sides so I don't have to worry about a front and back type situation close that jump ring and now go down here connect this and my little tassel on these tassels come with the little caps already on them so that's nice if you are doing something that is gold or silver because I do kind of silver - you have a nice element that matches I think we often talk about when you are doing making jewelry one tip for making a design look cohesive is to add extra elements of your metal color so it's not just say the earring finding this your only gold element or your clasp to adds little beads or something that has some gold tooth so there is one earring all done and I'm gonna go ahead and see where cats acts I need to make my second earring - yeah so I'm just kind of finishing up here so one thing I noticed is that when I did my first one my Christian stone wasn't set as fantastically as I wanted it to and I think that's because I was probably trying to hold it in my hand so what you can actually do is even though my earring is all made I can you can press it kind of against your work surface and just kind of use that as leverage to really get that stone to be set because if you kind of touch the stone so if you kind of tap it you don't want to hear a little click clicking noise because that means that it's probably a little bit loose so that's a little indication for you that you just need to kind of go back but that's again why the popsicle stick is a really versatile tool so that you know you can just kind of go back and kind of its kind of like tightening a drum so you just kind of work your way around to do that so but there you go there's the two little finished pieces there so this uses that nice little link connector and a pendant so when you guys are shopping you know Julie had said this earlier you guys will see that each Ghita setting will let you know exactly the stone size that will fit in there so we've also made it easier for you guys to kind of shop by shape in the Swarovski sort of settings so if you know that you want to use a cushion stone or you know that you want to use a Rivoli we've kind of integrated that into the websites that you guys can really just shop around for that another thing that's really helpful is that on the website under Swarovski you can actually shop by color so if you're looking for crystal colors and let's say you want to try to coordinate it becomes this really beautiful visual page where you can kind of look at all the purple varieties we have and then see if we have the fancy stones in the right size that you guys want and also if there's something that you guys are oh you know I really wish you guys had a green in this let us know cuz we can kind of try to hunt some stuff down for you we want you guys to have as much access to as much of the items that you want as possible so yeah so just let us know every time I talk to you alright here's the little earrings all done of course I already have a earring in my ear otherwise I put these on but I like that you could coordinate you know you're coordinating the metal elements of the Gita and you're coordinating the crystal lilac with the pretty lilac tassel so it's fun to play around with colors absolutely alright so let's take one more look at our table here as we're figuring out the piece that is a favorite so we didn't really have a chance to spotlight all of these different earring findings but these are all the different leverback earring findings and you see some have two stones some have a single stone we've already been focusing on the one with the little link on the bottom but there's ones that have like actually a little cup chain dangle to them so they've got a little bit of movement to them and they are that really really nice quality finding so I I just I love this I love the size of it I love the shape of it I think it just is a very comfortable earring to wear so those are the earrings and our little posts as well in a variety of sizes and in case you are wondering they do come with the internet with the back attached so so you don't have to buy additional earring backs if you are getting a post so just in case anybody is curious about that yeah I think those are the only ones we kind of didn't get a chance to cover yeah look at the different earrings but I know we took a look at the ring and the necklaces and the bracelets of the links mm-hmm alright I think re to find out which projects we should be adding to the giveaway yeah and if you guys still have more questions if you're watching this later continue to comment we try to monitor those as best we can you can also send us a message on Facebook or on YouTube we always are again turn to keep up on all those comments so if you have a question and it's later still still ask your questions so yeah you definitely will check it out all right so which piece are we adding so I don't know if you guys heard that from Brian in the background but it was a close one between the Emerald bracelet that Kat made and the country blues earrings so the country blues earrings are heading over here right now beautiful and we will add those to the giveaway and who are we shipping this giveaway to Rachael Boyd congratulations Rachel so all you need to do is send us an email to service at beadaholique.com and we will get your shipping information so congratulations to Rachel and have a wonderful weekend Rachel I know this will be coming shortly I know I'm gonna say enjoy the sparkles all right well thank you so much for joining us today guys it has been so wonderful and again keep commenting we're gonna keep checking it out and just let you guys know while this is live going on we have a 30% off Swarovski sale so if you're excited to get some Gita pick out your crystals and you're getting 30% off your crystals yes so just a still tip alright thanks so much everyone and we'll be back here on the first Friday of every month with a brand new clasp if you have any ideas of what you'd like to see maybe a new technique let us know we're happy to accommodate we love it and checking in with us during the week - we do a beating break every Tuesday now so you can come join us and we'll make a complete project yeah more projects alright have a wonderful weekend everyone and we'll see you back here very soon bye bye

You recently viewed

Clear recently viewed