Beadaholique Live Class: How to Create a Boutique Look with Artisan Brands

SKU VID-1541
Designer: Design Team
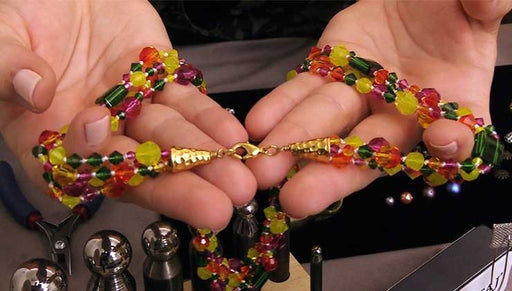
Join Kat Silvia and Julie Bean as they show you how to create a boutique look with eye-catching beads and components from some of our favorite artisan brands including Zola Elements, TierraCast, Nunn Design, Vintaj and more. An easy way to showcase this is with stacking bracelets. Along with Beadaholique's President, Sarah Diamond, Kat and Julie, will be showing you how to make several styles of bracelets including strung, stretch, memory wire and chain bracelets.
Audio Transcript
Note: This audio transcript is auto-generated and may not be completely accurate.
hi everyone welcome back to betta Holly Clive I'm Kat Sylvia today I'm joined by Julie being my other designer and our president Sarah diamond is back with us so welcome guys today we are talking all about artisan brands and really how to get that kind of boutique look which is where I am very excited we have so many great items that we brought in and they all look so fabulous together even though they're made by various of our favorite brands who personally design their their goods this is just fabulous you know and I love artisan brands because you can really see the heart and the you know the collection the style that goes into it it's it's really wonderful to kind of then be able to mix and match them all together yeah and I think what inspired this class was you and I had basically a play date yep we had a buy later they pulled so many different items off the beadaholique.com website and we laid them all out on huge table like this and we sat down opposite n to the table and we just start playing and most of these projects that you see here on the table came about during that play date well yeah I'm the clock too didn't you weren't you sourcing we have about oh yeah yeah yes we've got I came up with this idea at the last minute and it was like we've got three hours to do this let's do it and we just played and played and played and we had so much fun that we thought we wanted to share that enthusiasm and just the fun and the excitement of combining and mixing match all these wonderful brands like Nunn design like Azolla elements tierracast green girl all it's wonderful brand podge these really wonderful quality pieces and they look really good together it was a lot easier than I thought it was gonna be yeah I know I was worried at first I was like oh do they really all go together but we're gonna show you that they do yeah I think the word maybe we haven't mentioned that is unique every one of these pieces is unique so like you said art they can I even go together but you can get some amazing combinations and is it possible to be more unique than unique and my English teacher so yeah so today we're gonna be showing you actually several different bracelet techniques because that's kind of the easiest way for us to showcase how you can really suck them all up together and and how they wear together so we have five different techniques that we're going to go through today but if you are just joining us today we are talking all about artisan brands how to mix and match and blend the different styles together to create your own unique look and today as you know if you've joined us before we have a giveaway so let's start there today and we are going to actually be giving away a beautiful collection a little bit of everything so Julie why don't you help me out and point out some of the beautiful pieces that we have here today let's look at some of these front-and-center ones because they're so colorful so these are my sole elements this is a wonderful collection and they are just so highly detailed and just really like Sarah was saying very unique they really show stopper pieces so we're giving you a couple different focal some of these drops you can use it with earrings I think you made a pair of earrings I did it you guys which was really pretty you could do that with these as well so you can use them as a charm or you can use them as like a pendant focal we also have some wonderful pieces by Nunn design and tierracast some vintage this is actually a really cool this is launching on the fina Polycom website today this is a beatable wrapped wire hoop so when you look at it you're thinking oh wow someone wire wrap that it's this great solid hoop but then there's a little secret you can actually slide beads onto so that's pretty cool and that actually comes in different sizes it's wonderful Buddha charm and then some wood beads as well which we've really had a lot of fun oh yeah and you're gonna see them and some of the projects we're gonna be making here today you know what I love that would be just how lightweight they are so lightweight and what's nice is these are so consistent in their color and their whole size sometimes with wood beads it can be a little bit iffy but we found this wonderful brand to offer you guys that is just really nice quality wood beads and just they're not sharp or anything they're just very nice they're smooth they're sanded so we've had a lot of fun with these guys and then we're going to give you some opal on to make a stretch project out of and actually cat is gonna be demonstrating how to make a stretch bracelet yes with the opal and so you'll get to kind of see it in action and I think that's one thing about this class too if you're just tuning in we're just show you these artisan brands but we're actually gonna show you five different full bracelets being made with them so you're gonna learn five different techniques I think we're gonna do stringing stretch memory wire nodding and then some chains well there we go I've lots of fun all right well are you guys ready to Diamond I am alright to win that giveaway all you need to do is just leave a comment below ask a question let us know where you're tuning in from maybe what's your favorite brand that we're gonna be working with here today so we have lots of different stuff so I'm actually starting off and I'm gonna work with some tierracast now I am gonna do a strong bracelet here and I'm actually gonna make this exact bracelet you can kind of see the finished thing but when you're creating a strong bracelet there's a couple little extra special techniques I kind of want to show you so this is gonna be finished with that beautiful magnetic clasp at the end and we're going to be using these wire protectors here because anytime you're using a magnetic clasp but you're putting a little bit of stress on it so those wire protectors are actually gonna you know increase the longevity of this bracelet and then I'm going some beautiful gemstones in some white howlite and these are from Dakota stones a gorgeous gorgeous and then these are those nice little tier cat spacers that I'm gonna be putting in there alright so let's go ahead and get started so I'm gonna use B bail on this is a 49 strand and this is point 18 inches here so what I'm gonna do is I am just gonna cut off maybe about a foot or so I always like to cut off a little bit extra just in case you get to the end and maybe you have to redo one side so just however you guys want to kind of do it but I always like a little bit extra of course I'm not gonna be making a foot long bracelet alright so this is a cool little thing this is a bead stopper so it's got a nice little spring action there so what I'm gonna do is I'm gonna come and I'm just gonna clip it on about two to three inches from one end and that's gonna keep my beads from sliding off that other side just like so alright so now I'm ready to string up my project so these are what those tierracast spacer beads look like when they're flat so they have a nice sort of kind of look they're like little organic little nuggets there so I'm gonna string on one of those and then I'm gonna string on four of my wood or sorry to my wood my white howlite beads so I'm gonna just dump those out there for me now these are beautiful they're really large so you know I think white howlite is one of those things where you get a nice chance to see the actual stone and there's you know each little stone is different so I think that's why I like it in a large size all right so I've got four of my white howlite you can see that bead stopper in action right there he's just keeping everything together at the back half for me and now I'm gonna do three of this little these little gold spacers one more how light and now two spacers string that on down all right one haole and now I'm gonna do one spacer one how late and now I'm going to reverse the pattern here so one spacer one of my beautiful gemstones two spacers here now you can see that these beads have pretty size of a hole so I'm having no trouble really getting it on to that wire there which is what you want but if you are having trouble you can always go down and try to pick up your beads but these are gonna be a little hard to pick up because they're a little heavy so that's why I'm just kind of picking them up and placing them just like so all right so now I've got three spacers and I'm gonna put on there I feel like this bracelet would make a wonderful gift you know and I I made it in a different color at first and then I made it in the white and they're two very kind of different designs but all I did was change out that gemstone crazy cat tell me the story tell us the story told me about when you were wearing the blue one with the comment you get from your friends I got a comment that someone thought that was very expensive I was just like I was like really and I feel like that's kind of the compliment that we all look for is jewelry designers because we all we all want will the come and go you made that you know but like they were like yeah that looks really that's good you can to be expensive you know and I think there's something about gemstones and gold together it just it's really nice and it kind of does look expensive it has that nice quality too I think also because you got all the details every detail is there you have a really beautiful class but that I love these clasps look like beads all the finishes match and even down to the wire protector which is also gold which you had mentioned it's strengthens it also looks very nice it's a nice sleek finish all the way so all these little details change something from can change something from being looking homemade to looking very Pro and it's it's just not it's not that hard it's just knowing what details to pay attention to yeah it really is just those those little details and that's why it's always fun to keep learning because when I first was introduced to stringing I didn't even know these little guys existed yeah they might not have but we know they're here for us now thank goodness alright so I have all my beads all strung up and ready to go so what I'm gonna do is I'm gonna put on a crimp tube here and I can go ahead and just slide that all the way down there so now here's what we're gonna use our thread and wire protectors and they look like these little tiny little horseshoes here so they're gonna have two holes at the end and then that wire is gonna come up and over at the top there so all I need to do is just string on one side there and that's just gonna come down and now what I need to do is I'm gonna string that wire back and up and over kind of my little horseshoe there and you see how that wire just sits right in there it actually kind of disappears which is nice so again I'm using a silver wire but it's gonna sort of appear gold which is nice and it helps with that sort of sleek look alright so before I take this other end and string it back down through the crimp tube we're going to go ahead and take our magnetic clasp and string it right onto our little wire protector there and he's just going to come up and over the top just like so so you can kind of see how that how that sits right there so now one thing I like to do and this just makes it a little bit easier on myself is I'm not going to worry about getting it to scooch down there so I'm gonna kind of separate it from my beads just to give myself a little bit more room and you can only do this on the first side so it's just to give you just that little extra space so what I'm gonna do is just kind of get it up close to that horseshoe there and then I'm gonna come in with Mizer on my four and one crimping pliers here and I'm just gonna kind of get it in that notch now as we've all seen is sometimes when you work with magnetic clasps they like to get friendly with the pliers so we're just going to come in and just crimp it and you can see from the side view there that it gives us that nice little sort of v-shape or a little beam shape there and then I'm gonna separate that and then I'm just gonna turn it 90 degrees and hand let me get you to my player and then I'll show you again there we go so now it's I've moved it to the next little notch there and now I'm just gonna squeeze again and it's gonna kind of come together and really crimp that down so now we have our first side that's finished there and I'm gonna come in with a crimp cover and this will this is really nice because it makes it look like a nice little bead there right on the end and you just put it over the crimp and then crimp it down and I'm actually going to come to this other side here oh I was like I was like the plight of the right-handed I kind of gotta I gotta flip it around for myself there we go and I'm just gonna crimp it down over the top crimp bead covers are one of those other things that provide such a great finish it really hides your crimp bead which yeah it's not that attractive and it just looks like a bead and tip people don't know much about jewelry what you want is a little bit of mystery they don't know how it's all held together they can't see any seams or joins right and that's another thing that really impresses people with if they don't know quite how you did it yeah it really is that how did you do that yeah exactly that's right all right so now I'm gonna just repeat that whole process on the other side so I'm gonna move a little bit faster here just because we have a lot to show you today but these thread and wire protectors they're really really wonderful I've actually used this also with Griffin silk that way you're not putting too much stress on those knots if you're doing any kind of pearl knotting you can use this at the end of that so it is sort of a thread protector as well you know as a wire protector so just something to keep in mind and they do actually come in different sizes so if you are looking to work with something a little bit okay okay you guys gotta stop being friends for like a minute when you're hanging your necklaces off a little pegging and then some of them are magnetic and some aren't and they all just want to blow up words against gravity they just want to everybody wants to be friends alright so just kind of doing the same thing here and again just coming in with those around foreign ones these are probably my favorite crimping pliers but we do have several others as well but these I just like these ones you know a beginner mistake that I used to do at this stage when I would be beading and doing that last gram is pulling the wire too tight do not pull out a wire too tight because you know is if you'll get a bracelet set it won't Bend gracefully the beads will be kind of grading on each other and you'll get it'll always look crooked so you don't want to leave I don't know a couple millimeters yeah just a little bit of wiggle room I sometimes actually bend my bracelet or I came all the way into bracelet position yeah you make sure it's bending smoothly flowing smoothly that's definitely a mistake I used to make us well like I would do that all the time yes me too so that's a that's a nice little strong bracelet you know and it uses very simple techniques the sort of new technique here is to use those thread and wire protectors especially if you're using a magnetic clasp but I just love this clasp in particular because it just looks like a big gold bead and you know you have the gold balance on this side so that you have that in the back so I think it's a nice balanced design and the scale is really nice this email of the beads you chose here to complement this yeah mm-hmm and you can just choose your favorite gemstones and you know we're gonna be talking a little bit about stacking and whatnot so I have another bracelet here because as you can see that we have some left over howlite beads and this is actually left over even from a bigger strand so what I did is I made this bracelet so you can actually put these together so you again have that little gold pop there I added some wood and our favorite little tassels I would just like to say is the person who loves to wear silver because our redheads here love gold I do and go guys show very nicely on the camera for everyone but almost every design we make we will have the corresponding parts in silver and you can make the same sign at silver if you have a question you can write to our customer service sometimes if you look at variations of a project you'll see we've already our designers have already done it so don't despair yeah out there and you make a good point if people notice that we do a lot of gold on camera it is because it actually shows up better on camera so that you can see that technique a little bit more clearly but definitely there is silver out there and I love silver but it really is those tierracast spacers that help to really make that an outstanding design and elevator yes I like it alright so that's a strong bracelet so truly you have some nodding for us yes I have a really different technique and this was a fun project this is something I really hadn't done before um worked with a lot of leather and nodding I do a lot of strong I do a lot of bead weaving and loom work but it's really fun to actually get to play with leather and this comes together so quickly and easily so I actually started by this was going to be a bracelet and then Sarah Tsai and she's like that needs to be a necklace yep so this became a necklace and then I made a little kind of matching bracelet and so here again we're gonna look at the different artists and brands featured here here's the zola elements and I mixed it with some tierracast spacers again and then here's a tiara cast hamsa hand and I mixed it again with the tierracast spacers and then the definitely where these guys together and this is really easy to do and I'm going to show you how to do it and then what I love about them are these little fancy cord and crypts with these loops they're so neat and easy to use it might be something that you haven't really been exposed to before they're very tidy on the ends thank you nurse I remember the first I said you know how you remember significant others in your life I literally remember the first time I ever saw those cord ends or anything like them and I was like where do I get them where I have must have them they're neat they're really neat and there is something that I use and then I love them and then I honest and then I rediscovered them again yep house are amazing I'm actually working on getting us some more in different different finishes Oh wonder how they great maybe a little while but we love it we're finding okay all right let's make a bracelet all right we are gonna be using 1.5 millimeter leather cord and when you get this you get a full yard which is really nice we're not gonna need a yard for the bracelet you could actually make the necklace and the bracelet from the same yard yeah you can trace late' probably so alright so I could divide it in half and have 18 inches for the bracelet it's probably gonna be a little bit much but I'm gonna do it anyways just so I have enough to work with here on camera so I'm just gonna cut it with my cutters so if you look at this it's really a lovely orange color it's very consistent I like orange Julie I think I think Julie's feeling the orange room is all orange and you know we have orange walls in our living room so yeah I like more so you can hide in plain sight yes I can bend in with the wall alright so we're gonna just do a simple overhand knot in the middle of our cut piece so again I cut myself a little bit extra so I'm not having to be quite as precise and worried about it but we're just doing that little knot and we're pulling it pull it pretty nice and tight just like that now we're going to go ahead and string on one of these wonderful bohemian aged seed beads and I just got this wonderful kind of modeled look this is a wonderful turquoise and gold one and then we're gonna do the hamsa hand and what's nice is this is a two-sided little charm so it looks great from both sides and this is launching on the beadaholique website today actually if you haven't seen those before brand-new alright so we've got those guys and we just slid them down to the knot now we're gonna tie another knot and again these are just really simple knot so nothing fancy okay so we're gonna make another knot and just gonna slide it down to just really hold those two pieces in place and again tug don't be afraid to tug on this this is really nice strong leather okay now we wanna if you look at our example we want to create a little gap so we're just gonna move over a little bit and tie another knot and you can decide how big of a gap you really want so it's totally up to you okay now we're gonna slide on two more of these wonderful aged seed beads I like that big size of the Seabee and it's nice that it slips easily onto the leather you don't find that hell of a seed people you know yeah what would sighs did you see those were those are - oh yes are pretty big they got nice big holes and they easily go over the one point five millimeter leather yes leather comes in a bunch of colors too and it also does come in two millimeters but I don't know if these seed beads would fit on that but in case you're curious about oh i want a thicker leather yeah i'm not too definitely do the same technique but you're right just double check of your beads mm-hmm alright so again i'm just gonna tie another knot to anchor okay so we actually have half our bracelet done that's so fast this is very quick so now we're gonna tie another knot on the other side and in this case just eyeball it trying to make your gaps even just so they look nice and consistent so just kind of slowly pull this knot down see where you want it to rest okay I feel like that is the hardest part but I know ya boo not race ya just judging that distance some some people will put it a little all in the center of the knot to prevent it from closing all the way so they can you don't pull it all out yep this is where yeah and then you type it that's a good little tip yeah we should we should probably practice why no I do that with pearl nodding huh the bent tweezers for sure yeah all right so now we've got the other side with a little tiara cast spacer tie another knot and slide it down pull and you can tug on this don't be afraid so you're really given okay so now what you can do is you can either size it on your wrist and note that went by tiny add the little clasp and the little ends it's gonna add about a half an inch or you can just put it against a ruler or whatever you like and maybe if you are making something as a gift you can go with like a nice standard size totally up to you so I'm gonna line up my two ends and I'm gonna cut them together that way they're even so my little knots are matching and I'm using um flush cutters you can't use scissors but I find flush cutters work really well for this leather cord nice little clean cut all right and now I'm gonna pull out my Iran chain nose these are some of my very favorite pliers just gonna slip so if you look at this little end so let's look at what it actually looks like so it has a nice loop it has like this barrel here it's hollow inside and it has these little almost like little dots on each side and then it has a middle core it's that middle core that we're gonna be crimping so we're just gonna slide this in and you kind of push it you feel it hit almost like a ridge and it stops if you push it too far it will go through but you can kind of feel where it will just kind of catch now we're just gonna take our pliers and squeeze there's actually a wrong and a right side too though to that crimpable Center isn't there in terms of well there's fastened there's two little points where it fastens and you want to crimp across yes you want to keep those on either side when you crimp and squish yeah and you sides together yeah you're absolutely right sir so what you're look at it was the same side as the loop so you're just crimping yes all right you don't want to crimp perpendicular you wouldn't want to go there that's a good guy point so you crimp across parent sort of parallel - yeah so you would not want to go like that yeah you want to go that way and that will always be correct yeah cuz there are a little slight you're right like little divots where it is open so that you can be able to crimp it cuz it's kind of like the crimp bead has been soldered in there yeah it has to attach somewhere I know when I was a beginner and I was first experimenting with those I'm probably ruined a couple baby ho happens to the best of us tonight I will say you don't actually have to use a ton of pressure yeah they crimp pretty easily it's a pretty soft metal in that Center core and yet they grip so well yeah they really hold but I know we have different people who are watching who sometimes their hands have a little bit of hard time or arthritis or something you can still use these is not taking a lot of pressure well honestly if you are crimping it too hard you could I mean if you go really hard yeah you might cut that leather so you don't have to be careful of that as well so yeah just enough so that it sticks and then everybody's happy yeah I mean the leather is taking up a lot of room so you don't have to crimp the beer eh it's not an actual too much of a distance beneath traveled and unlike the crimps that I was using where you crimp it once turn it and then crimp it twice with these you just squeeze that middle part so there's no turning and and I'll share a little a little secret look at it right there you can see where it's crimped so if we look at side by side it was round totally round on the side and now you can see it is crimped in the middle yeah I had a little dirty secret I had smaller sizes of those I call them fancy crimp ease and I would literally just stick the end of the soft legs in would just crimp it and that would be I wouldn't have to double anything or loop anything and that was usually when I was using gemstones so it would it would be of a good scale and that was it was just easier so Julie talk is really quick you just how did you finish that off so as we were chatting so I just used a little four millimeter jump ring where is it and a little magnetic clasp and then I just attached the jump ring to the loop and to the class and we're good to go and I love bracelets with magnetic clasp oh there's so much can you tell we have an affinity handed application yeah you see easy to get on easy to get off mm-hmm yeah very nice oh yeah that's how you make that little yoga retreat knotted bracelet I love that yeah and you know it's a little extra pop of color because there's not too much gold or anything in there but if you're pairing it with something else where you've got more gold and I also like the textile of the leather I think that adds a little something so if you've got other big heavy beads chain gemstones and then you can add in a nice little textile so that's and the leather does come in color so it's an absolute design element if you wanted you purple leather absolutely all gold beads I mean whatever you want you're gonna get a great color combination and this actually might be a good time to look at some of the a Czech beads we have done so yeah now you can really see ya eyes different so we were talking about a you come in a lot of colors too and there look really great with the wood beads over here we've noticed so this is one of the stuff that when we were doing our playtime mm-hmm um it we were noticing laughs boy these wood beads look so great with these aged seed beads and then you start putting in like some solace elements with it and you put in some tierracast and just everything blends so beautifully yeah and there's a great example over here this is a something that you know I know this necklace here so these are the aged seed beads here with that nice little stripe happening and then we have those beautiful wood beads and just some fun tassels again trying to add in that textile but this was just something that kind of came out of I just wanted to put all of these beads together in some way but trying to make it look cohesive so what I got to do is I got to play a little bit with the size of those redwood beads they were a little bit bigger and chunky so I was like alright how do I get some tassels in there and then I added these little metal coin elements that was just a charm chain but I just broke apart and that actually ended up being one of the fun little elements of it to give it just a little little metallic I love it that's one of my favorite pieces you've done in a while thank you yeah and you know it just it's just so fun it's just that it's yeah I like that one it's a favorite of mine alright so before we go on if you're just joining us I want to kick back to our giveaway so the way you win or giveaway is you just leave a comment ask a question say hi um if that includes you and to be entered into our giveaway so again we are giving away some beautiful wood beads and we just showed off some of these but I just want to show you these are the packages that they truly do come in so you're getting a lot of would be which is wonderful and then we have some other beautiful components here we have some beautiful vintage we have some of their different finishes that beautiful natural brass and then we have the unfinished vintage bow which is lovely we have some beautiful zola elements here some Nunn design and just the copper in that it's probably one of my favorite finishes and then we get into some more tierracast pieces here and just some lovely stuff and Julie can you just open this one more time for me it's just such a cool little piece it looks solid but it's not gonna but you can slide beads onto it you can do a lot of different things but your hang charms and then if you want to keep it close you could definitely do that - I've been working out doing some crochet around the edge you gotta do um trees of life mmm this is perfect for trees of life pendants a good size it's a great size and you don't have to then make that oh no no loop which is you know it's doable but it's so nice to have it already made and solid so this does actually latch really nice and solid so if you want to keep it as a solid piece you definitely can or you can open it up and you could probably come up it a little with some pliers or some nylon pliers to avoid marring it absolutely yeah so and then we're also giving you some opal and stretch cord and I'll be doing a stretch bracelet here in just a bit so and you know um so all you need to do like I said again is just leave a comment say hi Melissa were you tuning in from that's always one of the fun things if you like to read of like oh we have people all over the world and that's so exciting for us it's so fun and we thank you if you're staying up late or got up early to watch this depending on your time zone thank you for joining us and if you didn't have to get up early well poo because today we're talking all about artisan brands however if you guys have a technique you'd like to see and something that we can do in a live class like hey I really want to know more about crochet that's one of the things that we're working actually well Julie did so if you joined us on our bee table Wednesday on Facebook Julie did a little bit of crochet this week and everybody was very excited and we were like we think people are excited about crochet so we're like it goes more so we're kind of mark yeah that's in in the works they're just letting you know but if there's something else that you guys would like to see let us know because we want to give you guys more techniques and kind of cool things or if there's something that you've been dying to learn let's teach you cuz we might be dying to learn it too we're always learning new things so yeah all right so Sarah you have some memory wire for today you know Julie designed this beautiful bracelet and so today I'm gonna show you how if she put it together and I will tell you that it's been a while since I've actually made jewelry myself so I feel kind of like you viewers will feel right now I am following instructions and I'm looking at the original as I go so I might be a little slower than the gals but I just want you know anyone can do this even me and well let's get started so what we have here is gold memory wire it comes in a packet with 12 loops so it's quite a lot to be you can do several projects with it well we had one very stacked bracelet very very long one so I did remove the staples ahead of time I will just cut the bag and take out now what I'm going to do is I'm going to cut a piece approximately like this example here just a little less than to a little more than one and a half loops as you can see this bracelet I'll bring it over here it does overlap and this is the safest it covers the most sizes of risks and it will not fall off when you shake your hand around so I am using memory wire cutters which are very strong and you should not use your lovely very sharp wire cutters that you would use on softflex for this because you will ruin them and I think everyone at this table exactly what I'm talking about end up with a hole in them yes yes strong yeah your wire they would just give me like this - it's like you have to do blades going together and there's just an empty circle yeah there is a crush cutter okay now I have to make the first loop and I hope you all watched the earlier lesson in memory wire bracelet then the ladies did earlier this week and I washed it so I would make sure I didn't mess up today I'm going to bend a loop underneath and I am wearing my glasses cuz these are very small players which is good it allows you to do fine work now if you're not doing very tiny beads the loop doesn't actually have to touch although if you're hanging a charm off you don't want to leave too much of there we go I think that's good enough and I'm gonna I'm literally following the pattern of this is this the lavender fields bracelet a lilac harmony probably yes lilac harmony I'm sorry guys so first I see there's one of these beautiful little Terre cast spacers gold-plated because we're all gold today apparently and one of these gorgeous bohemian aged beads basically um you know they're they're not old but they've been made to look old than the faded kind of coming off gold finish looks like they've been dug up in an old palace somewhere in Italy they almost kind of have like a clay look to them you know I love Ulster and it doesn't matter you don't have to pay attention to how you're what order or size you're putting them on because it's that's the fun it's random so I've done three of those one of these beautiful tierracast spacers and I'm gonna do three wood beads I'm literally you guys I'm literally looking at the original and I am copying it I'm kind of visual maybe a lot of you are and I don't usually have the patience to read written instructions unless it's just something very complicated that I can't grasp from a photo so I that's why we try to give you guys great photos so that you if you that's the way you learn you can just do a nice copy wow I'm glad I have my glasses on it um so yeah I don't know if you guys want to chat a little while I order my wake lattice we actually do have a question so we'll go ahead and Gration while you keep on beating there yes oh sure so hi hi Laurine um tuning in from youtube she has a question about crimp beads and she's breaking them a little bit so let's see um you know it might be the crimp itself it also might yeah I was gonna say it might be um oh I have I have I don't want to say not good quality but sometimes the plating can be a little off so it can actually like when you go to bend it in like into that little kidney shape that I was talking about that little bean shape it can actually crack in the center and that's happened to me before um in that case I think you just kind of have to cut it off and try to finagle it back um I have another thing yeah could be you know beading wire comes in different diameters and crimp beads come in different diameters and if you are trying to put to make much too thick of a wire through a thin bead a small bead then you you won't really have room for the bead to bend around the wire you'll be you'll be pressing it's so hard it's just gonna crack it doesn't have room to kind of bend and forms yeah you want to make sure you're actually your crimp bead is is big enough for the wire you using and that hires match it to this too like yeah they do feel for you Lorraine though I yeah a personal story that I can share that sounds exactly like what you were experiencing so I was able to bead weave loom all this stuff before I learned how to string really yeah straightening actually came later for me I did all this other stuff and I was I was considered myself pretty handy and proficient and I was like I'm gonna make a strong bracelet and use a crimp bead and I spent two days in tears hey seriously cuz imma not crimp a crimp bead and I'm like what am I doing wrong and for me it was what you first said I had bought just some random inexpensive crimp beads and they are not cracking and it wasn't me and then once I got some better quality ones it was working fine so yeah definitely look at the diameter of the pliers look at the size of the beading wire but so make sure that you're using quality ingredients because in this case it really doesn't make a difference I'm so sorry you're frustrated because I can feel you I was there and I was really I actually was crying to my husband because so so I know we sell both but we all have our leanings I lean towards crimp tubes over crimp beads me too yeah not alone but the reason is is that if you have that sort of ball shape at the top and then you try to crimp it it's going to have to collapse a little bit so but if you have solid it can just collapse in on itself so there's something there's like an extra collapse that happens with a rounded crimp bead and I think the reason is those crimp beads are kind of meant to be used without crimp covers I love using crimp covers I never not use them actually just because it I just want something just to look like a nice metal bead at the end I don't want to show that crimp so for me the crimp tube is is fine to use because I'm not so worried about how it looks at the end because I know I'm gonna cover it anyway yeah I think us a little more surface area and then crimp tube yeah a little easier to get it right in the pliers for both steps of the crimping yeah it's just a little bit easy so yeah so I mean especially if you are doing something because this is this isn't a crazy thick wire that I was using today but it is you know point 18 so Oh point 0 18 excuse me inches so I would I would use a crimp tube with that also you can look when we have our crimp tubes listed and our crimp beads as well there's an inner diameter that's listed so you can look at that and then look at your wire and also know how many times you're going through it because we can you can do a project where you've got three strands of wire going through but you might need to then step up your crimp tube into something a little bit bigger so good for that but yeah yeah sorry that's happening to you but try try again test it out maybe try a different pair of pliers try those around the foreign ones these are my favorites we also do have the mighty crimpers another thing to explore is the magical crimper which works very different than other crimpers but it could be a solution for you and that uses the tubes but it creates that nice little round ball so if you do want to kind of create that nice little bead but you want it to be very tiny that's the best way to do it and we do have a project in a video showing you how to do that it is the Dionysus bracelet I was like it's me thank you but you can head over to betta Halik and look at that and then you can see that video and see if maybe that might help guide you a little bit to like oh I like that look that's what I want to go for and that's what I was hoping for so then you can try using the magical comforts and also you can write into customer service here at beautiful week and tell them exactly what crimping plier using with diameter of beading wire and we can kind of help you to see if those are the right items to match together we had ice cream feet or tube so definitely that's something that anyone is always welcome to do if you are stuck on something please write in we are here to help you we want you to succeed we want you to be having fun so and customer service also feeds us questions all the time yeah I'm saying you know we you know can you help this person and we definitely try to help whatever we can and also on Facebook all right well I've filled my wire and it looks pretty oh god I was gonna I'm never that good cutting my wheresoever well I was just gonna say that this is one of those times when I would think you might not want to cut your wire exactly I mean I'm glad i eyeballed it I was nervous I wasn't gonna have enough room for loops so I was ready to leave a couple beads off yeah you can but what what's gonna happen now is I'm gonna loop it I will actually have a little extra but I am gripping a lot of loose beads and some wire and I'm just I don't want to lose my whole I'm gonna make this loop a little bigger than the other one because I can tell I do have enough wire I don't think most people are going to notice that these loops are slightly different size nope a special you might know in your heart but don't worry about it okay so now we have these really fabulous these are Nunn design bezel pendants their forecast which means they're quite thick they're really nice beautiful quality they're gold-plated and antique and they are made to hold a 39 is it ss SS which is a size of a Swarovski fancy stone now these Swasey fancy stones have the point on the back they're not flat backs like you glue on your nails or whatever yeah beautiful shit-tons so when you have a pointed back like that you get a lot more light reflection and it looks a lot more jewel like and this is this gorgeous actually they say well we yeah no these are crystal lilac and the reason they whenever they put crystal and fry the name Swarovski it means they have a clear stone and they've applied in effect so if it's something is called crystal Dorado or crystal this or that that means the stone itself is clear and there's something on so these are clear and they put this beautiful gorgeous lavender lilac on the back well and I just want to show this one is the other piece that's been glued in so you do actually see a little bit of the back of that stone so I love that this one actually has that lavender on the back so yeah they're they're gray on the back yeah so what's nice is that it actually has a nice little purple pocket up on the back yeah and these come in an antique silver finish of course if you were doing the scent you can do this same bracelet you could use a silver wire you could use silver Terra cast spacers and the other Terra casts and you could choose a different seed bead some of ours have silver finishes you could simply use up rightly coloured seed bead in any color would be do you want it would be then your own design you could do your own repeating pattern so what we have here I wanted to show you a quick here's that setting in silver she can see and then this a beautiful coral color and that's a bright silver so she does have it in like an antique so area and a bright as well now who made you do those jewelry generally show me these beautiful gold ones and I was like if you had silver ones I might wear them and and so because I'm the boss on a beautiful dress that would match that perfectly that's right and that's you know if that particular color palette wasn't inspired by your dress but that's one other tip is if you are looking for a color palette inspiration look at your clothing mm-hmm you guys these earrings are going missing right after this I wanted to show everyone now so the existing what your anxiety okay so um we have a pre-glued eat we use our standby e6000 for all these gluing applications and someone has kindly pre-glued this for me so that we don't I don't have to do that on camera make a mess this is Nunn design also and it's a nice textured jump ring and sometimes when a jump ring is on display at up front and center it's really nice to have something that's textured a little something extra it it just adds more design value and so becky nunn has designed a few of these really different sizes different textures gorgeous jump rings as that little tiny thing can make such a difference now I'm going to open it in the proper way I'm not gonna cheat like I used to oh well you know what let's see if these around ones will do it there we go we got it and I am going to see I'm gonna flip this over so that will be facing out when I'm done and then I will simply wow I'm so our designers are so smooth with this I'm a little clumsy not always but once I've flown across the room oh sure yeah both my pliers were chain nose this would have worked a little better but I I used them round nose but you know you can do that if you only have one chain nose alright did it flip over correctly or not did I do that backwards you know it depends whether you're wearing that the bracelet up or down I suppose no if you did it right but then it looks crazy you guys okay so so that it's correct if you want the the the charm to hang from above if you want hang it from below you would have I would have flipped it round but that actually was not so hard I literally just followed the example and we tried to take those photos so that you can do the same if you're not a patient with following written words like myself so yes so memory wire is our third technique very nice and you know it's easy and you can make all these kind of little ones here and then stack up even a whole bunch of memory wire ones and just sort of yeah make them all fit together so we have some other examples yeah they're trying to see one that might match well these don't match exactly but well they don't not man I just have to I think that's the fun that we're seeing kind of with the look that's really popular right now is you have things that have like a core theme like gold or yeah that was why I went for this while I saw gold I said okay that will do well you even have these two here and this trio here this is a kid but they're all separate so you could actually put them together and then have a cool kind of little texture that's happening in there and you can stretch bracelets or some of the other let me grab another short old bracelet um well this is a showstopper you might it kind of I didn't try this color up in color because the lines so good with color oh I like that there we go you don't want it all see me same yeah you've got a nice unifying Wow yeah I feel like I'm sitting next to two stylist oh yeah and then this bracelet which is a little chain yes Wow pretty you could just load your arm up to the elbow but I was gonna say and this charm actually and I'll do this a little bit later in the class you has a little vintage patina so it matches that little purple and you know coming back to the artists and brands and makes a match then we see the vintage patina there the zola chain there's all elements chain the Nunn design charm charm the Terra House spacers and they all look so good together yeah along with the Dakota stone gem and the wood needs and seed beads yeah so I mean like it's really that's why we wanted to put this collection together to show you guys hey go nut go nuts like go crazy that's what I did but I'll put everything you got on the table and um you know think outside of the box I guess so speaking of if you look over here at this tray this is a beautiful example of kind of how you can see all the pieces together so up in this corner these are a lot of the beautiful Nunn design and then in the center there you're getting some tier cast and then as we blend over to the other side you're seeing a lot of that vintage so you're really getting a chance to see that all in one space all on the same background but they really do Courtney quite beautifully together and one of the things I love about tierracast is they have a finish called brass oxide and that's gonna be that sort of brassy color but what's really nice is it does look beautiful with the Nunn design antique gold you know or even the copper so you can even mix the metals across these different brands to give it a totally unique look which I love I think actually if our caramel exhuming on these earrings so I think this is a good example because I have the natural brass for the vintage I've got the Nunn design gold I have azolla elements down there and then design jump ring and some patina and it would be and they're all matching even though we have varied you know we have different metals going on it looks like a nice cohesive design though you know even though you have that natural brass and the gold so yeah and here's another example where we've actually purposely done some of that grass oxide but we've also done some of the gold and we've done like a nice antique brass here and then the zola elements and just all goes so well yeah beautiful have fun alright so Julie you're ready to show us another guy yeah so let's keep making bracelets alright a day of making bracelets so make all your Christmas gifts at one beading party yes so Christmas already well all the stores have Halloween costumes is coming united's it's 100 degrees outside so hot yes I know you guys have been hearing that from us on every live broadcast but it's true so okay so I'm gonna be making this bracelet here this is the Vineet steai bracelet i did do this in another video so if you do want to see how to make this one I just want to show again that we're combining the Nunn design findings with the zola elements chain I think they match beautifully and we're also mixing kind of this wonderful coppery brass chain with the gold chain so again mixing metals but I want to make this project REITs here which really it's gonna use these wonderful copper components and so I'm just gonna move these out cuz I just have these as so are they pretty together type thing alright so I've pre measured my chain a six inches each and I've made sure that each little chain and we have another video showing this has an intact loop on the end of the link so that's really important it's quite easy to cut these so you would do have an intact link just want to make sure you do have it and we are going to start by opening a jump ring with our pliers and this is a very easy project so we're just going to slide let's see I'm gonna slide that onto there another one and another one so this does come by the foot this chain so if you are doing six inches each you couldn't make two bracelets I love that chain I have it it looks it if you look at it looks like lots of little beads joined together it's actually kind of enamel on top of the chain and little dots it's so light way that it's so flexible so drapey and I love the three colors combined yes I just love how light it is I am actually planning some earrings with a kind of cascade of well uh I guess a fringe of that chain in it it will make like a beaded fringe yeah and it will wave very little and it will move really nicely I am just gonna slide on this tierracast charm now right on to it and it does this chain will go right through it which is really nice so just slide that little guy down and he's just gonna wiggle a little that's fine he's gonna move along I'm not worried about it now I'm gonna go to pick up another jump ring and I love those tear cast charms with the rain facing perpendicular to the charm but if you wanted to use a different term all you need to do is just add a jump ring to it and once it's ready to go you can just slide that on oh absolutely you could do so much I'm just going through Oh so we're just sliding all these jump rings and these are an antique copper jump ring close it on up it's amazing what you can do design wise just with jump rings oh yeah they're so pointy all right and then I have these really cool Nunn design one so these are actually not only textured but they're oval so that's fun because they're just add that little extra element that makes you go wait is that what is that did you get that at a boutique like it's just that unexpected I love oval jump rings and I think thing people don't realize how great they are and we might have to just get into that someday because I could go on they really do have their their own space in designing you know and a lot of people yet they just don't think about them I think a lot of people don't actually know about them you know okay so I'm gonna get into it a little go for it I think that when you have for instance a chain and you put a jump ring at the end sometimes the jump ring ends up being rather wider than the chain and it attracts attention to itself sometimes that jump ring is just there to join two elements and you don't want it to attract attention if you can get a small oval jump ring attends it tends to blend in and look a lot like a link in the chain becomes narrower then it is long and people's eyes slide over it more it's a much smoother transition and that is why I love three by four jump rings thank you you make a good point about having it kind of look as though it's part of the chain because one of the trends that I continue to see is necklaces that do not have a clasp at the back so we got to do is just combine the chain with an oval jump ring oh yeah one and then you're you're tied in the back and then you're good yeah I have a note to do that alright so we finished it off just and the lobster clasp is just using that oval jump ring as the other half of the clasp so that's what's linking on to and a tip is if you want to make this longer but you still want to just use the six inches of chain you can build your own little chain extender with these oval jump rings so you would just link on a couple more and you could gain extra space on your wrist that's a good tip yeah because if you wanted to really use the chain for something else because sometimes then you end up with five inches of chain and of course we just had a great idea to make French earrings I would never toss your chain bits yes oh no no easy always keep them so yes so that was really quick really easy and I think this is another really great gift idea because I think a lot of people would like that it's so dainty and you can actually you can personalize it with the charm oh yeah you can even do like an initial charm if you want to do oh that's good if you have that one extra gemstone bead left off of your dakotas don't you you can put that on a head pin with maybe a couple of little bead caps yeah can simply be a bead hanging off it absolutely yeah it doesn't have to be a charm it can be anything you want or honestly if you wanted to you could just leave off that and just have it as three little dainty string I promise baby probably what I would do actually yeah just really delicate yeah fine piece of jewelry I like that very nice yeah so I I did you show this to to our viewers there I just want to kind of talk about that really quick because that's another type of chain bracelet and it's so cool that it fits in these little slider and okay so this chain is actually the same chain you see here and on this example I was able to expose the little links on the end and we do have this in the video form again and then attach a jump ring to it now here what I did was I simply slid this Nunn design slider end over one of these beads on each of them so hidden inside of here or this that be that bead that bead and that bead it's just the end chain links and it's sitting in there I think I even need to use glue okay it is a solid in there and these come in different sizes and you can stack up multiple you can do a really thick bracelet with these and so you'll notice it's purple and I have blue and turquoise here but it doesn't really matter you know I kind of like it yeah like that it's just that extra little color yeah and what a great way to finish a chain extender on a bracelet in any charm or beam as we were saying you can attach is a great way to dress up an extender and instead of just a weird piece of chain hanging off your bracelet is very purposeful and among this this item off and so yeah this is adjustable so you if especially again if you are making a gift or something it is nice to have it adjustable so that your recipient can definitely choose how long they want it to be and how everyone has a different wrist size mm-hmm just the way it is it's I think would be impossible to make you know a design that's not like a stretch or a memory wire that would be one-size-fits-all so it is nice to have it adjustable right because you know we'll say that a standard size is seven to seven and a half inches but my wrist is six and a half I think yours is like six and a quarter and you know the other thing too is that if you're stacking stuff up in your arm it's thicker as it goes out you know it's like you don't know how they're gonna wear it that's always something to consider as well so I love the idea of the little chain extender because also you can even shorten the chain extender as well so it doesn't need to be that long or it can be shorter and honestly even on something like this you know how its talking before you could add extra oval jump rings you could just as easily make your own little chain extender out of little these little jump rings just link them together like a chain and attach it there and then it would be adjustable yeah if he looks like you just need that just that little extra and there you go yeah so chain we love it chain we love it chain we have so much of it we do we love it keep adding more we can't help ourselves I know it's one of those things assisting yes yes speaking of things that we love we love stretch bracelets so we are gonna be using the opal on here so I'm gonna create a little stretch bracelet and I'm gonna do it very quick and easy using some of the wood beads here so this is just a super really song I just love these they're so nice and easy and I think you know as I was younger like I loved making these and then it kind of I was like oh I can make them look really nice I don't have to use plastic beads no you don't soak up our oh my skips over there just for a middle of these snips so snips thank you so the only beat I would say to be a little cautious of if you are doing a stretch bracelet it's just if you have a gemstone bead that's maybe a little bit sharp along the edges and might cut it but other than that like these wood beads are great for it metal beads mm-hmm so I'm cutting off a good amount and the reason is I'm gonna actually double it up as I go through I like to kind of get a little extra security on mine so let me just kind of pull this apart so you can see there's actually two strands in there that's a great high but I don't like to do one strand at a time just loop it around twice and that gives it just that little extra because I know people are always like oh well isn't it gonna stretch out eventually it was like you know it doesn't have to Sam yeah and that is a good point I was just about to say the one thing I always would tell people about stretch bracelets was don't put any really valuable beads on there because they are more prone to breakage and not the opal on so much but there are other kinds of stretch cord that 10 do tend to stretch out over time but this the opal on is so thin that you can double string it which makes it a lot more stronger and reliable yeah absolutely so one other extra little tip is if you're working with stretch bracelets and you are gonna be going through some small beads maybe they aren't too small here but the other thing you can use is one of these little big eye needles so they just kind of open up just like that and then you can slip on your stretch cord and this will help you pick up those beads probably a little bit easier now I will say just to leave yourself not too much of a tail because sometimes this can actually wear that opal on so you're going to want to be able to cut that off later so just a little tip so if you are using that sometimes these needles can tear a little bit depending on if you are trying to really squeeze some small beads through there all right so I'm just gonna start adding up some beads here so I'm gonna go for these wood beads first and just slide these down let's see I'm gonna what I want to do and I'll show you this technique in the back here it's something that you can do you don't have to do it but I have seven beads across the back here so I'm actually going to pretend like I'm starting with this bead in the center so I'm going to add four wood beads to start and you'll see why at the end but again just something but I do you don't have to do it it's totally up to you all right so I got my four wood beads there and they can come all the way down to my favorite little bead stopper down there and then in order to kind of mix the metals because I wanted this to be a piece that I could add to whatever metal piece I was already using I'm gonna pick up one copper bead one gold bead and one silver bead and then slide that down and then I'm gonna go and pick up three more wood beads are those in Nunn design metal beads these are the Nunn design metal beads they kind of look like a little nuggets and then I'm using tierracast charms but you can see that they coordinate very nicely great visual and how those metals look together I love Nuggets I love to make you even in like gemstones gemstones I guess it just gives that little kind of organic feel that I think you kind of want from something especially if you are using wood beads or gemstones or gemstones yeah absolutely if you want to both that idea of the natural crystal for me even if it's not so natural but it as you're stringing with sure absolutely go for it okay so a picture shot is asking if we have any tips for measuring your wrist when you're making a bracelet you know my probably biggest tip is I just take a piece of yarn if I'm not sure and I wrap the yarn around my wrist and then I lay it on a ruler and then how much but how much do you add let's say you wrapped it around your wrist and your Julie and your wrist is like five and a half inches you don't actually make your bracelet v Raich as you make it longer so you do um it depends on how you want to wear your bracelet so I think that's a big thing to some people actually like their bracelet to be a little tighter around their wrist and some people like it a little looser so you are gonna have a little bit of experimenting to do but I would add maybe a man maybe an inch not more than an inch unless you're using really big beads that's gonna be so bad that that was another consideration yeah I would so any kicker finds your wrist size quite easily by measuring of just a piece of yarn or string add three quarters of an inch inch in general but if you're doing something like what cats doing even this size bead I would say use a bead stopper mm-hmm and wrap it around your wrist before you tie it off so string on all your beads wrap it around your wrist before you tie it off and then see if how the comfort is yeah you want to make it a little bigger make it a little bit smaller I think you can adjust it as you go especially if you are making jewelry for yourself you have a lot of leeway if you yeah if you're making jewelry another classic mistake I made I used to sell it you know bead fairs and I I would just Oh the bracelet fits me it's fine and I print out and everyone would pick up these basically bracelets so small I was gonna die I was absolutely gonna buy your bracelet but I can't even get it round my wrist right here huh I had never occurred to me and so I was probably 7 to 8 inches is a standard bracelet length it's not your actual wrist size but it's a standard kind of bracelet length raised for a range so that's something to bear in mind if you're making to sell you know for adults yeah yeah also keep track of what you're doing as you're building a bracelet take notes so that next time you go to build another similar bracelet you kind of know that oh okay this was a bead woven bracelet you know I use kind of smaller beads or a loom bracelet and I noted that I needed it to be six and a quarter inches long including the clasp so write that down yeah I was gonna say I know because I do a lot of peyote and loom so I know exactly how many rows I'm getting for each design and like how wide I want it to be because the other thing with peyote is I like to do some of the wider ones but some people don't like that just because like the break in your rib can be different for people so I don't mind having something wider but it could fit here but it couldn't fit here you know so like you have to compensate and make sure it fits here not here right so that's also like so like it so if it is like a thicker piece that's something to kind of take into consideration as well but for something like your small little chain bracelet there once you've made it you can kind of put it on a mandrel and then go oh okay so it's this around the mandrel but it's this on the table which is different which is always a different size as I think if you're starting out you don't realize that I did not realize I did not realize that I even I've made mistakes where I've made something too small and then I put it on the mandrel I'm like oh no I'm like why is this five inches for note for people who don't know what a mandrel is or why a bracelet mandrel could help it's usually a form sort of like a cylinder except that it tapers more conical and the kind we're talking about would have the sizes a little lines mark so you would slide your bracelet down wherever it came to rest you would read off what size it was but again that's different than the length because of the size of beads you're using for instance if you're using really huge beads you can imagine that the I'm just gonna exactly say you had you know 30 millimeter beads your thread is actually gonna be way up here traveling around your wrist and it would of course that's a bigger circle right so the further away from your wrist the thread path is the bigger your bracelet is gonna have to be I wish there was an easy equation for it there's probably a quadratic equation problem but we do also have a stepped mandrel so if you really are trying to get it exactly like six and a half seven you know if you are let's say making for a show or something and you want to be able to tell people this is a seven inch bracelet around so you know we do have the little stepped mandrel as well that can help you with that and I know we do as we're building I'll see your task and you probably see mine we are often going like like this we're putting it on there we're just before we add the clasp yep so as we still have time to kind of rework it and do the design we are often putting it on there and making sure that it is what we want it to be well and and that bracelet is actually a good example of if you just take a quarter of an inch off each side if it fits better Myo because you've taken off a half an inch you know and honestly sometimes I can make all the difference so just offensive question thank you all right so I have gone through and strung once I haven't gone through again so now what I'm gonna do is I haven't tied a knot yet or anything I'm just gonna kind of circle around and just go back through all of these beads I love this tip I have not done this before with Sarah and I am going to now forever do this and absolutely because I'm always worried I mean even though I've been doing this for so many years I'm always worried that my stretch knot will pull out always so this is really handy thank you for the big eye needle yes this is where it's a little easier yeah because sometimes the the opaline can be just a little floppy and you know this helps it kind of just be a little bit stiffer and you can go through multiple beads at once yep a huge time-saver oh yeah yeah so but yeah I like doing stretch bracelets I you know and this is a great thing also you can make it slightly bigger because it just needs to get on to someone's wrist and then it can sit it doesn't have to be tight I think that's the other thing that people kind of misconceive about stretch bracelets is that it has to be tight on the wrists like no once you get it on it can be a loose stretch bracelet on someone's wrist yeah the stretch is not to cling on to your wrist in fact you do not want the bracelet to be constantly stretched while you wear it that's a great way for the court to give out eventually it's the stretch is just to get it over your hand yep exactly all right so all I did right there is I just tightened it up just a little bit I just moved to my little bead stopper because we want to start to get some good tension here now this is again another example where if you do pull it too tight you're going to have your beads kind of kink on each other so if you do think the wearer will wear it slightly loose you don't want that to happen all right so now I've come all the way to the back here getting my charms out of the way all right so I'm gonna move that remove that bead stopper there and you see I left plenty of cord here because I'm gonna want to cut that off and you can see that it got a little stuck in there let me try to just remove that there there we go so yeah there's a little kink in that so you want to make sure that you're not gonna use this part all right so now I'm just gonna kind of pull everybody nice and tight together not too tight just tight enough all right just snug enough that you don't have random thread just showing exactly yep but no tighter than that tighter than that so I'm just gonna kind of wiggle it together there we go all right so now I have my two chords here so I like to use GS hypo cement for glue when I use stretch cord you can also use an e 6000 but I like the GS hypo it's really nice it's got a nice little pin point that'll help you with that chord alright so if you can kind of see here I have one chord that's coming out this way and then one chord that's coming out this way but there's also that little tiny cord that goes across the whole thing there all right so watch what I'm gonna do I'm gonna take my longer cord here and I'm actually gonna wrap it down in the center there around that little cord and now I'm gonna tie my overhand knot and this is the best way I know how to get a good knot happening here so now I've knotted those cords together just like so alright so before I add my GS hypo cement I'm going to take one strand and I'm gonna go through the adjacent would be there and just slide it on through all right and I'm gonna take this strand and I'm gonna go through this wood bead just on this side now if you need to you can put that big eye needle back on if you have trouble alright so now I've got my knot in there and you can see that all those cords kind of fit really nicely there alright now we're gonna take our GS hypo cement and again you can see that nice little pinpoint there actually I'm gonna clean mine off just a just a minute there there we go alright so I'm gonna come in with that gos hypo cement put it on to the nut and make sure it gets under the knot to and all around it this is definitely the most secure method I've seen for doing a stretch bracelet yeah all right I'm just gonna Gia's hypo takes a quick minute to drive but before it dries fully what I'm gonna do is I'm going to take one of those wood beads and I'm gonna slide it over the nut and I'm gonna leave it there to dry and eat so what happens is not only is my not thank you alright so not only what happens is it's gonna dry it's actually going to secure itself it's gonna secure that not to that bead so now I don't have to worry about it coming apart so that's the best way I know how to do stretch bracelets I know it might seem a little complicated and convoluted but I promise you that is the best way that I know how it goes so I'm gonna let that dry but then once it's once it's done and dry you can also go back and just make sure everything is all settled and then you can just come in there with your snips and snip off your little cord ends there but that is how to do a stretch bracelet and that works you know like I said the reason I wanted to come back to the wood beads the reason I didn't want to start it over here you can do that but it's a little bit more difficult to get that knot slide into a place where you're gonna have some smaller beads so I always try to go for your larger bead and you know it is technically kind of the back of the bracelet so just something to consider again you don't have to do it that way I wrote up the project with a kind of a different method as well so there's just there's no wrong way to do it but that's the way I like to do it so take it for what you want I think it's wonderful thank you so I think you were gonna do a little patina yeah but before we do that let's do a giveaway reminder be getting close to the end of our class we've made almost all of our bracelets so thank you guys again for joining us if you are tuning in live we are having a giveaway we do this every live class so here we have a wonderful assortment of the different artists and brands that we've been talking a lot about during this class and how they look so great together so we got Zola elements we've got some Nunn design we have some tierracast some vintage we do have the full brand new spool of the opal on which cat was just using and then a couple sizes of these wonderful wood beads as well so all of this is gonna go to one lucky winner and you enter by leaving a comment telling us where you're from leaving a question during the live stream here and then we announce which is gonna be very shortly the winner and then we will mail this to you yeah so good luck you have a couple more minutes to go ahead and leave a comment or say hello say hi happy Friday oh yeah August out we will end early yes alright patina alright time for Tina now we've used us a lot before it's probably one of my favorite things it's actually what is I'm Julie's earring I'm the green and gold all right so I'm today I'm gonna be using the opal light color this is vintage patina and this is really nice it's a nice little sort of permanent ink it's really fast drying - which i think is one of my favorite things is as made for metal mm-hmm so we're gonna use actually the vintage patina on a nun design charm so this is a charm and if you can just see it there's a little divot there we have that ohm symbol so what we're gonna do is I just wanted to add a little pop of color just to brighten up the charm just a little bit so Sarah you actually have a paper towel over there then I'm gonna be borrowing in the back it'll have purple on it but you can get a better go ahead and keep it thank you alright so you don't need much so just a little bit onto my sticky note there and I'm just gonna take my paintbrush here gather up a little bit of that patina and come over to the charm and I'm just gonna kind of dab it in there cuz I really just want it to get inside that little divot there you don't need too much else but we're just kind of dripping it in there and it kind of has the consistency of like a nail polish but this does not work with nail polish just so you know um but I just want to kind of get it in there and then I'm gonna take my paper towel here it doesn't smell go does it no it doesn't and I'm just gonna wipe off the excess there on top there we go done that's it don't be happy at all that's it Wow so it'll take a little bit to dry there cuz we do have a little bit more patina but yeah I mean you can just you can use this and just kind of DAB it on is you know just a really fun little way to add some color you can add your favorite color you know just to get that nice little pop there so I had a nice little purple and then I finished off with just some of that Zola chain to make a little bracelet is just cheesy which is also available in silver but if you wanted to add a charm to you know if you don't either you could add a little itsy charm from non design as well yes oh yeah stone bead with bead caps anything mm-hmm all right all right yeah so if maybe we want to just quickly look at our table as we are getting our winner because we did a few other examples here I don't know if we've taken that close of a look over here lately but here is and don't forget to show us the tap when I'm sorry I caught on with the tassel so this here is as a whole elements tassel and these are so thick and you know are we pet them every time we pick them up Charlie my tassel and these are great because I think we have a couple examples of unfinished ones over here so oh no not the black one okay so these give you so many design possibilities because they come with these strings attached which is great because what that allows you to do is you can then look at this example here where we actually put four millimeter how light and we pearl knotted so then we were able to take that red of the tassel color carry it through here into our design and then pop it here with this other Zola elements chain as well so by having that available it gave us a wonderful opportunity to really kind of enhance this design and coordinate and then it was just a little clamshell not cover so real knotting all those seed beads are a chain these are all a chain they're not have to you don't have to do that yeah yeah no it's it's an amazing ornate beaded look and it's already done for you and I just used six inches on either side so I'm gonna have to buy a foot that's nice yeah yeah there's one foot and then I just put this wonderful this is our Moroccan chain it's silver one of my favorite chains we carry actually yeah so that's one way to finish those tassels and then if I could take the other example you can also put a jump ring on to it which was actually hidden beneath here is a crimp bead and we got a crimp bead cover and a jump ring and we do have a video showing you guys how to do that and I love that you made it into her purse charm that's so genius that was Sarah's idea alone I know I'm gonna have to get a read I think of red first chances we do have a question so our question is what was her name okay hi Carolyn she has a question about patina if you need to seal it so what I'm gonna say is in this particular application you're getting that color inside so you don't have to seal it in fact on this one I wouldn't you can seal it if it's more of an open technique where it might be hitting some might be rubbed or you know for example here this is an example of where you could seal it and I you know I'd recommend that but honestly you don't have to yeah what's really nice is it truly is a permanent ink I mean you'd really have to probably get in there with a plier to scratch it off yeah you know so you can you can really kind of just rub it and as it wears you're not gonna have that but also what I love about this patina and this look is that as it wears and if it does get scratched off a little bit it you it actually won't show how much is nice it'll just kind of continue that antiqued sort of look but it's just kind of what you want we do have two different finishes you can do a sealant which is going to be a shiny finish or you can do the matte finish with the vintage patina which will give it a nice matte finish so two options there you don't have to but you can I also know that people will seal their vintage patina over time so as they notice it starts to wear or something like that you can use that but that is a metal sealant so I would only recommend using that on the metal and I would say also look at the type of wear that you were talking about on that a little bit but a new type of wears can get if you shower with your jewelry if you go swimming with your jewelry that's when I would go ahead and take those extra measures to see just because it is kind of getting a lot more stress to it or if you wear your jewelry and then you put on a lot of lotion or perfume it's coming to that what what's the wear factor uh yeah just saying just don't go swimming with it Joey chlorine is really strong enemy of jewelry really or strong stuff I mean literally the only Madeline I know that could withstand it might be gold because and that would be pure gold because it's nonreactive even gold plate the the chlorine might work its way through the cold plate yeah yeah who wrote this metal underneath so don't go swimming in your jewelry yeah I do um I just sometimes don't wear my wedding rings but I'm still married um I used to stack wedding rings I just haven't collected okay that sounds weird rings I thought were pretty and I would add them to my wedding set so I would have like four rings on the same finger um two of them were Platinum's one of them was gold and one was sterling silver I would go swimming that's sterling silver one would turn black oh yeah and it's hard to get off when it's when it's a chlorine yeah you'd have to get a professional I don't know if you ever even gotten Windex on sterling silver that ammonia that is extremely difficult and yeah it will ruin silver plate like I just had a silver plated sugar bowl I got somewhere at an antique Mart and I you know too much Windex in the kitchen and boom gone yeah yeah so be careful yeah like really good question yeah great question all right I think we are ready for yes a show oh you know what Judy's cuz I yeah this is gonna be a great example of all the different metals but these ones here these are beautiful blanks and I love it on design I love that you can do a whole lot with them you can hole punch them you can actually add patina to them they're just really really nice I'm not gonna even metal stamp designs onto them we have something we're gonna be doing in a few weeks yeah yeah and I actually just did a project that you guys will see next week where I did paint some patina on a couple of them in a pattern so la unión do and I like this the antiqued silver especially in that big blank it almost looks like Matt's old it doesn't look it really it just it's a really soft matte finishes glowing eyes yeah is really gorgeous and the other thing that I want to touch on real quick here is that if you are looking to stack some bracelets these are some finished pieces now these are both from tierracast but they come just as is and I've seen women just wear a bangle just as simple as that and then we also have these Nunn design adjustable charm bangles so you can add lots of different little charms to that or just kind of add this to a stacked wrist we also have our stacking rings I just wanted to bring out some of those as well but then you can also do a very simple project like this that'll give you a nice little bangle with some cup chain so if you wanted to use something just simple again I have two here that you can just stack up and add two so as you're sort of playing around with all these different brands think about what you can put together that's really I think where the fun comes from absolutely don't don't limit yourself and not at all yeah we're like anything goes yeah yeah and you know I will say this a lot of these pieces they're very affordable and I think that is also something that is nice if you haven't one error if you've wanted to try something and you haven't before you know we make it really nice and easy very approachable to work with and use our projects as inspiration you know use them as inspiration make it your own make it your own different color but it's a great jumping-off point if you're interested in exploring any of these lines yeah and I think you've said before what's the project we are gonna tell you what sizes go together so that's the keys yes definitely change out the colors you know the beads but you'll know that like for instance you can use any color of this size seed bead and it's going to slide over that 1.5 millimeter chord exact on or if you're looking at a strong project anyone know what size crimp bead it goes with what size beading wire look at the project and we're gonna tell you that and then you can use as a jumping-off point yeah then you can choose your your favorite gemstone and your favorite B it's your favorite charms you know but it just kind of gives you guys that's that base for you guys to just do do what you want and then when you've done what you want share it with a share it with us on Instagram Facebook YouTube we want to see what you guys are creating and we love when people share us and tag us it's so much fun for us to get a chance to be like hey that's our project and that's a cool color way that's so neat I just love that so thanks for being such a beautiful community for us to share our work and share yours with us as well alright so we're now ready to give you something you got a lucky winner all right our giveaway this week goes to Cheryl realm from YouTube so thank you Cheryl for joining and tuning in you are gonna get this beautiful giveaway all you need to do is you just need to email us at service at beadaholique.com and we are gonna get your shipping information and send this thing out to you we're so excited so Ashley should I congratulate Cheryl Rome all right we did good ladies I want to keep going we'll keep going later all right thank you so much for joining us you guys I'm Kat join with Julie and Sarah we're from Vita Holly

You recently viewed

Clear recently viewed