Beadaholique Live Class: Summer Jewelry Trends

SKU VID-1676
Designer: Design Team
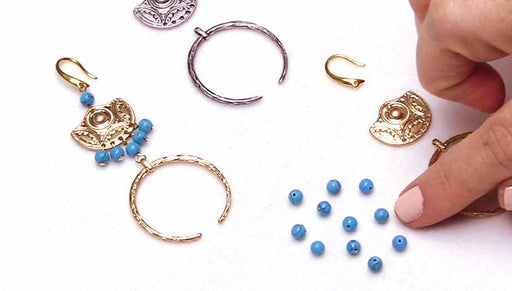
In this live event class, Beadaholique designers, Kat Silvia and Alexandra Smith show you some great techniques for incorporating the latest summer trends into your jewelry. Summer is the perfect time to try out a new skill - want to try your hand at Kumihimo or a wrapped loom bracelet? Check out our kits; complete with full videos and instructions that make it easy to follow along a create fun summer jewelry.
Audio Transcript
Note: This audio transcript is auto-generated and may not be completely accurate.
hi everyone I'm Kat Syliva and today I'm joined by Alexander Smith and Rooney are gonna do some summer jewelry trends this is gonna be really fun we have a very colorful table here today so we're gonna talk about some of our kids we have some tassels we have some sea glass this is gonna be fun got some great techniques and some cool stuff that we kind of discovered recently so Alexander's gonna show you a really cool technique and I can't wait to try it myself yeah so we're gonna get to that but why don't you guys come on in and take a look at our table we'll kind of run through a little bit of what we're gonna be talking about here today so like I mentioned we do have some beautiful sea glass now if you're a fan of betta Halik you know this is a very recent launch for us so we brought in some great new shapes and colors and styles so this is really gonna be fun here we're gonna be talking about some center lines stuff there as well we have some kumihimo and some kits here and this is gonna be great for utilizing you know summer time off you know you got some kits that you want to do this is gonna be great staying inside if it's too hot yes staying in the cool air hopefully and then we have some beautiful Swarovski crystals and these are some of those new delight I just love this ocean one and the Laguna I think those might be my two favorite colors it's really beautiful bright and colorful and then up here we have some more kits and these are actually launching today these are our June kits so we're gonna talk about those at length a little bit later but we also have some beautiful tassels by Zola elements all right so we've got the the long pagoda tassels and we've got these neat fanned tassels here's also a lot of these Zola elements acid table which we'll be talking a lot about and how well they're going with these stamping blanks up here so we pulled a bunch of those for you to see these metal stamping blanks I'm also some other fun metal elements by Zola and over here a couple of the mini kits which we'll go over as well these beautiful long necklaces utilizing those and then over in this corner we're going to go into a little bit of the textiles and the cords different craft types of projects rapid loom kumihimo macrame always fun for summer and so yeah up here just a little more the acetate which is the project that I'll be doing so hope you got a good look at everything on a table to start yeah yeah yeah I'm looking forward to this we have some some neat little tricks and tips like I said you know especially when it comes to summer jewelry you know the last thing I want to do is put on something really super heavy so we're gonna be talking about how you can do some of the delicate jewelry we have like Alexander was pointing out the acetate which is really nice and lightweight and I'm always looking for a nice big pop of an earring you know because during the summer months I tend my hair goes up my hair is too long so it just goes up so I want something really bright and colorful on my ears and the acetate is really really fun to take the chest with stamping blanks on it yeah so if you've joined us before you know that we do a giveaway for each of our live classes so let's go over the giveaway today now this is really fun we are giving away some stuff that you can't actually get on beadaholique so this is some exclusive stuff here so we are going to be doing some beautiful hemp cord so you know when we talk about summer jewelry I always love to kind of use a textile when I can so the beautiful hemp here is nice and colorful and that's a 1 millimeter chord you're gonna get all 4 colors there and then we have some lovely tassels and charms these are from Zola Elements really sweet and again here is that beautiful large acetate piece so you're gonna get a pair maybe you want to make some earrings with those you're gonna get a nice little Sun stamping blank and then down here we also have some great sea glass and some really fun seed beads and some cool colors and these are those Etsy beads that we have so these are gonna be really really fun and then as a added little bonus here I wanted to give you guys a little travel tool kit so this is a really simple box so I'm just going to kind of open it up here so you can see what's inside so inside here you're going to get five different tools so you're gonna get you know your really typical tools that's great for travel you're gonna get that chain nose that round nose you're also gonna get some nylon jaw pliers and some cutters and then the other thing that you're going to get is you're going to get that jump ring mandrel here and that's really fun so you can make all kinds of different sizes of jump rings yes I love the include that mandrel and also the nylon jawed yeah and these little pieces in here and these are just plastic so you can actually just take these out so what's great about this is that you can utilize the tools or you know you can use the box for something else for traveling so this is gonna be great so this is our giveaway today so all you guys need to do is you just need to leave a comment hey maybe let us know where you're going on summer vacation this year or what your plans are are you wanting to learn a new technique let us know in the comments below so you could win this giveaway so we are gonna announce the winner live at the end of our class and our classes usually run about an hour or so so stick with us we are gonna be going over at lots of fun stuff so are you ready to dive in ready all right let's do it okay so my first project today is I wanted to create I was actually sort of inspired by a different design of mine so I wanted to do a different version of it so one of the things that one of the big trends that I see is you see these big hoops and you see that there's chain and tassels and charms and all kinds of fun stuff coming off of them so it's really this long necklace and I have a design here that I did and this I did with the Swarovski pearls so this is one of the designs here so you can just kind of see how it hangs there you go and I added some crystals and just a little pop of color down there to the bottom of it using those Gaeta findings so as you can see on my table here this is kind of what I want to achieve here so I brought in some Swarovski crystals I have some charms I'm actually going to be using some acetate and this is that beautiful white pearl color I kind of like it cuz it looks a little bit like a shell so one of the things I was thinking is I always like to collect things when I go on my vacations and sometimes it is a little shell from a beach or you know maybe a little charm I picked up in a store you know or a little initial of something you know because I always want to have a little keepsake from each of my vacations but when it comes to actually like getting something I always go for something kind of small because I don't know I'm a carry-on girl I like to take my carry-on with me so I don't like big bulky bag so I like to have little things so I thought this would be kind of a fun little design idea to use maybe it's just some chain some crystals and then I have this Moroccan chain up here and this is gonna serve as my big focal up here at the top so I'm just going to have little charms and keepsakes happening down here and I chose a little bit of a larger hoop than the one from my initial design because I wanted to add a little bit more to it and this is one of those necklaces that you could also add on to it's kind of like a charm necklace you know like instead of a charm bracelet it's a charm necklace I love the concept thank you I thought it was kind of fun a little locket picture oh that would be sweet see it you can just keep building and building on this okay so the first thing that I'm gonna do here and I want to talk about this this is a Swarovski crystal setting for the 10 millimeter cushion stone and I just love this air blue opal color I just think it's so sweet and it's just it's very marine like yeah so I just wanted to set that really quick so I'm gonna do that and so I can set it aside to dry mostly so what we like to do is we like to use e6000 with most of our settings here it just gives you a really nice bond and you don't need a whole heck of a lot of it you're gonna see how little I'm really gonna use to secure that stone in there all right so I just put a little bit on to my post-it note then you can just use a little toothpick there and I'm just gonna get a little bit on my toothpick and I'm just gonna place it inside right in the center of that well and just kind of smush it around just a little bit there we go and actually I used a little bit too much I'm just gonna scoop a little bit out of there there we go set that aside and now I'm just gonna place that stone in there and what's gonna happen is all that glues gonna kind of smoosh around it so you don't want to coat the entire inside you'll get plenty so I'm just kind of moving it around there we go and the reason I like this nice setting you know we do have the prong settings so just you can kind of see a little side-by-side comparison so these are the prong guida settings so you can get that little style right there or you can get this sort of floating crystal style by using one of the Swarovski settings that is gonna fit that little 10 millimeter cushion stone like a birthstone color oh that would be nice yeah well you know we did some birthstone jewelry for Mother's Day so you know let's say you wanted to kind of make this your own you can do this with all kinds of different seasonal charms but yeah let's say maybe you have three kids so you want three little crystals there you can do you can do that so lots of fun little options alright so you can see I kind of started to make it as I want everything to be there and one thing that I wanted to do is I liked the idea of the pearls but I wanted to keep this a little lighter and just really silvery and pretty so I went with some crystals instead so I made some simple wire loops here so let me show you guys how easy that is to do all right so I'm just gonna take my little eye pin and I'm gonna pick up one of my little crystals it's smart to use an eye pin I tend to always just cut lengths of wire and make a bow I was like does half the work done for you so I'm just gonna come in with some round nose pliers and again these are kind of still your very basic tools so you don't need anything really heavy-duty your specific so what I'm gonna do is I'm just gonna bend that wire back at an angle and then I'm just gonna cut I always try to kind of move mine in just because I want to be really sure that I'm you know at the same length there we go and wrap it up and over the top so you're matching the size of your loops exactly yeah and you'll see oftentimes what we'll need to do is we'll need to make a bigger loop on one side or a smaller loop to sort of accommodate either another piece or a jump ring so that is why the round nose pliers are great alright so there's my little simple wire loop super nice and easy you can see that I've made some extras here and I have these little star charms because what this is gonna actually save me by having a charm there is you could end it by doing a head pin at the bottom of one of these if you didn't want to add an extra little charm but I was like well I only have eye pins for right now so I'm just gonna do only eye pins so that's gonna save me a little bit so I'm going to sort of create another one of my little links and let's go to this side here so what I'm gonna do is I'm just gonna kind of just Bend that wire so it's open just kind of same way you would a jump ring I'm gonna slip on that little star charm hmm and I'm just gonna cut it there we go and just close that up and just making sure it has a nice good closure I don't want to lose my charms all right so there's one and now I'm just gonna take another one that I have here I'm going to open that loop same way attach it to it and close it up now you can make all kinds of different little links here links link and length sound very similar so you can kind of see that I have like you know my little two on the side this one has three this one it has four you can make it really nice and long if you want I'm gonna keep mine nice and simple though alright so now the easiest part is just we're gonna kind of just use some jump rings to attach everything together but I do want to talk about something and I actually got this question from a YouTube tutorial that I did and the question was about using different sizes of jump rings within the same project for different purposes and here's what I'll say to that absolutely go for it there's no one way to do it I think sometimes for simplicity on our website you'll see that we'll use like you know five millimeter 20 gauge and we'll just kind of make that work for everything but the other thing I want you guys to think about is I've chosen the chain up here that is really it's a little bit of a heavier chain especially compared to the lighter slim Rolo chain you can just kind of see that side-by-side there but the advantage that I have with this is that the loops the holes there that I'm using are large enough to accommodate an 18-gauge jump ring so I've done that here to support the weight of the top of this so this is really where that weight is being taken at the top and also I use it at the clasp because I want that to be really secure as well now when it comes to the bottom here what I'm gonna do is I'm gonna switch that over to using a 20 excuse me a 21 gauge six millimeter jump ring so the size is the same but the gauge is different so you can hopefully see this on camera I know it's really difficult especially when they're silver here but the 21 gauge is going to be much thinner now what's going to happen is this is gonna slip through this chain where the 18 millimeter did not so I had to switch jump rings anyway so I decided to go with the 21 but I wanted to stick with a 6 millimeter because this way I can be consistent because I have this large hoop that I need to get over so otherwise I would have used maybe like a 4 millimeter or a 5 but it doesn't quite fit over this the thickness of the hoop so that's something to kind of think about and when you guys are designing one of the things that I like to have on my desk at all times as I have my little variety pack now you can get these of at beadaholique.com but what's really neat is you get all kinds of different sizes and you also get some split rings you get some oval jump rings there's a lot of applications where the oval jump rings are gonna look really nice and sleek but this is just kind of a good thing to have maybe you want to kind of create your own box of your own jump rings that your go twos that you like to have on hand but that way you kind of know and you can sort of change things up as to what you're working with to make it really fit the design but there's no you know designer thing that says you can't use you know different sizes of jump rings within the same project I think that's you know it would go for what works best for the project quick question about these variety packs I show you that you have them in silver and then you have them in gold yes I do one of each is there any variety pack we sell that has both colors of metal in one or they're just separate um yes actually we do have some that have gold antique brass gunmetal so if you kind of find yourself you know using some different metals it's a great opportunity to just sort of have that on hand and go oh you know what instead of a because sometimes with an antique gold an antique brass jump ring can actually look a little bit better than a break gold sometimes the bright is too bright and and that's one of those kind of judgment calls as you're designing you're like oh it just kind of stands out a little too bright you know so that's a good time to have that little variety pack with you it's like oh that works out nicely and then the same with a stainless steel I know people will sort of substitute in gunmetal jump rings that's very common to you know when you don't have to seeing the steel jump ring on hand it's a great little Oh this'll work so I like to mix the metals too sometimes gold and silver yeah all of it well and you'll see in my necklace design that I'll talk about a little bit later I love mixing metals that's kind of a fun thing for me I like doing a mixed metals and then just like one little pop of color like you'll see I have like the gold and the silver and then the turquoise you know really cool silver and amethyst yeah all right so I'm gonna start just kind of attaching everything I'm just gonna kind of go quickly here but this is a great like I said this is a great little technique and you know I'm using the acetate I'm using the little Swarovski crystal there and I have a little anchor charm so you know just kind of use a variety of things and this is just just jump rings so that's nice and easy and all of these guys already have their little finished things off so I didn't need to attach a jump ring to the excuse me to the simple wire loop there oh and another question that we get often is how long do I need to let the glue dry before you like you can work with it you can see that I'm clearly working with it and it's holding but I would recommend allowing it to sit for at least 24 hours before you try to wear it just we don't want you to lose your precious crystals and you know sometimes you know I I know I'll be walking along and someone's like oh did you have two earrings in and I have no idea where that other earring got lost you know and I would hate to have that happen to some of your jewelry that you've worked so hard on huh so all right so then the other thing is I'm just gonna kind of go in order of my little pieces here and just attach them to the ring this is gonna be it's gonna be fun I like these I like the crystals I also like these particular star charms they're double-sided so if you know things kind of get flipped around the only thing on this whole thing that isn't double-sided technically is my little crystal setting but the acetate is so that's a nice little swinging kind of kind of thing you want things to be able to flip around a little bit so yeah and you can also do this in gold this is this would be a great thing to do mixed metals on you know have your have your gold in your silver and I think this might be one of my favorite chains to work with the Moroccan chain you'll see it a lot in my designs on the website I just love it you know it just really it really shines and it looks like these little metal balls that's your nice weight to it because there's yeah oh yeah they are definitely solid yeah so this is fun so yeah I'm looking forward to some summer vacations and oh you know I I meant to bring out some tips here cuz people always ask me how do I travel with all my jewelry and I definitely utilize the anti tarnish pads just with so much air and you know I'm often going to drier climates I'll go to Scott still in Phoenix and you know go to Las Vegas and you know it's really really dry out there you know or especially if you're going to a place like Florida that's gonna be really humid carry those anti-tarnish pads with you and carry them in little plastic bags I always keep things kind of individualized and then I also started to use so so you can get these at like any craft store they have little paper straws and they're meant for drinking but they're really great for separating your necklaces and I wish I wish I had one here to demonstrate I'll kind of I'll walk you through it but that is how I keep all of my necklaces separated so as you're traveling that's one thing to kind of keep in mind is that you know you want to keep your jewelry looking really nice oh and while we're kind of on the topic of traveling and whatnot please do not wear any of your jewelry in the pool or in the ocean it probably will not look the same afterwards there are some cleaning techniques you can use with like just some dish soap or a polishing cloth but don't ruin your jewelry guys please I know it's tempting to kind of wear you know but even like suntan lotion and perfumes and stuff you can really kind of wreck your jewelry so we don't want you we don't want you guys to have to do that alright so here is the necklace so together really cool so I might adjust the the length of now that I'm seeing it one thing I might want to do is I might want to kind of bring up one of my charms because they're kind of all clustered there at the bottom so I might want to bring one of those up so it's it's a little higher but that's sort of one of those things that you can just sort of see as it happens so let me try to lay this down so it will that turn to hopefully kind of there we go sorry I know that camera is trying to follow me let me lay it down there we go but yeah so it's just kind of a fun little thing and you just get this little spray of charms and I think it just looks really nice and again this is one of those things where you can personalize it and you can also let's say you had this design you can switch out those little jump rings at the bottom if you wanted to you know change it out for you got fourth of July and you want to add some like a red charm there well there you go now you have your fourth of July necklace and you didn't have to make a whole new piece of jewelry so yeah so that's just a fun little thing to do with some travel charms that you might along your way all right so Alexander you're going to show us a really great technique with the acetate yeah well let me talk a little bit about what's on the table here just to show you the variety of these is Ola it's all elements acetate pendants that we have and it's a type of resin and so some of them you'll see have one hole some have two as connectors different sizes different shapes colors really fun assortment and what we've discovered is they go so nicely with these stamping blanks it's kind of like a blank canvas to work with and so over here we've got these two mini kits that were selling right now these the couple Huntley mm-hmm yeah just so neat clean fun go with anything and the long the long necklaces are great for layering summer dresses so we've got those and then up here on this form you'll see a necklace that I put together by making a couple of extra holes this piece just had one hole and so with the tool I'm going to show you I made two to facilitate this Y design and so I was happy with how that turned out and up here on this taller form what I did was put a few extra holes into a stamping blank that started out like this and so I added three holes at the bottom to accommodate the hanging of these acetate bars and so for the project I'll be doing here I'm gonna kind of do the inverse of that where you'll see here on my pad I've got one of those Ola elements pendants and this is the black pearl color and what we're gonna do is put three holes into the bottom of this teardrop using the beadsmith two hole punch and traditionally this is used for metal but the fun discovery for us was that it easily punches holes into this resin it's it's a very forgiving sort of soft non cracking material so to begin with that I'm going to bring in my caliper and I really want to get a centered mark for my first hole to make sure it all ends up even so I'm going to set my piece on there and using the edge of my caliper I'm gonna find the center down from that top hole and using my Sharpie pen we're really gonna take my time with this by the way so bear with me because I took a couple stabs in it and it just takes a little time to get it centered so with my sharpie you make a mark where I want to put my hole at the bottom that looks pretty good now with my caliper I'm going to take up and measure about I think seven millimeters is a good spacing and what I'm doing I should say is making the companion earring to this one so this is what you'll see here that we're gonna we're gonna make I love the movement of that fun texture and in movements so once I've got my spacing there again I'm gonna make another mark and on the other side again just really taking taking my time with it because you get one shot honestly there we go if you find that you end up with marks on your resin that you don't want to see you can use the opposite side of the piece when you're done as the front of your earring alright so now I'm going to take that up and you'll see that this tool has two sizes one is a 1.5 millimeter hole and one is a two millimeter hole so for this piece we're going to use the 1.5 millimeters setting and when you screw it in a little bar portion comes down that's going to punch that hole and as I go down farther and farther you'll see that this thicker screw portion starts to intrude there and that's what I don't want digging into my piece so I'm going to get a soft vise grip on this just to make sure I get the placement right and then I will get a firmer grip so kind of using both hands and peeking in there I'm matching up the bottom of the the metal screw with the mark that I made again bear with me I really want to take my time and get it centered yeah this can be tricky so yeah you just take your time nice and easy once I get the Kennedy I'm going to look over the top and see that I have that centered also overtop all right so trusting my accuracy and hoping for the best time you gonna start to rotate this and you'll see that it takes very little force very little strengthen that's the the advantage of this tool over say a a metal punch that you would squeeze like a plier now I feel the resistance there and I'm gonna come back up it's made it's made it told ya that probably would be better than a hole punch pliers acetate just because you kind of you don't have to deal with that snap that wonderful okay so I got my center hole I'm really happy with that so now I'm gonna insert into one of the side marks that I made again using one hand and holding with the other squinting it to find my my Sharpie mark in there I think I've got it I'm gonna take a peek at the other side as well I think that looks pretty good alright got my soft vise grip and I start to screw screw down and make my hole you make it look so easy I practiced a few times well I think yeah but the trick with this really is the precision of that hole and just making sure that you're kind of taking your time you know don't rush it right well on the website also in the photograph for it for the the piece it's the tool it shows a picture of leather so you could practice on some faux leather or some thick cloth say just practice making your marks and punching your holes just to get a feel for it so again I'm happy with that I'm gonna take a double double glance here at my measurement measure to make any adjustments to my previous hole and I think I think I'm getting lucky guys this is right so I'm really good oh we have a question right going in for this can you use it sure so the question is Andrea sorry she is asking if you can use an alcohol pad on the acetate to remove any marks what I might try first the alcohol might be it might be a bit harsh you know it we'll have to test that I don't want to say yes or no right now something tells me you probably can these are nice and sealed it's not like you're gonna rub off any any color it's gonna be kind of like any other resin piece so something tells me that you can all right we got it maybe try just trying to wash it off maybe with like a little bit of very mild just soap at first that'll probably be a little bit easier on the piece so you can just take that and just kind of wipe it off you might also be able to kind of get it off with a little bit of a tissue assuming it hasn't been on the piece for too long mm-hm but yeah I think that that should work I don't want to say it does officially but I think that should work well just take it close in and see what's left of that sharpie mark and the advantage with this black pearl obviously is that it has black inclusions so it kind of blends in which is nice that's true so my next step is gonna be to take these five millimeter 22 gauge jump rings and I'm going to add on some of these ten by six millimeter silver filled stamping blanks it creates sort of some nice glisteny dangles on there now those are nice and lightweight too even though they look like these well yeah the whole earring ends up being really lightweight and I've upgraded to some kind of semi precious metals with the silver filled and some sterling chain and the advantage of these lightweight pieces is that you can really you can go all out with the metals and it doesn't cost much more that's nice yeah and you have a nice longevity to the jewelry right not that there's anything wrong with silver plating we use that quite often just yeah if you go with the silver filled that's nice you know that jump ring looks a little funky I'm gonna leave that one out and that's why we have hundreds sometimes I'll just use my thumbnail to open a jump ring it's a little easier than picking up my plier depending on the thickness and the stiffness yeah I was gonna say the thicker it is harder than ya do sometimes with those lighter gauges you can do that I've got my third dango on and I'm glad I'm so glad that turned out you guys yeah all right so the next step is just gonna be to take some of this flat 2 millimeter cable chain which I like the flat because of the shine of it and I'm going to take my flush cutters bring in my ruler and I'm gonna measure an inch that's gonna be my longest length for this and what I did for the cluster effect is I actually didn't measure beyond that I just kind of went with some random lengths I'm even going to need to count how many chains I put on there to make a match just hold that up with my with my eye here engaged that length I got my inch whoops and onto a jump ring I'm gonna slide that and link and just start to make my chain cluster and bring on another end link of chain it looks like I have a couple different sections here so I'm actually gonna slide on a few at a time and after I've got them all hanging I'm gonna just I mean I it sometimes it's nice to just go with a kind of natural feeling of this oblong cluster effect so let me see how many I have 2 3 4 I've got 5 chains going yeah sometimes I can help with like a nice little glistening design and make it kind of organic I like that alright and since I've got my jump ring open already I'm gonna go ahead and slide it on to my piece and I'm also gonna slide on the loop of my earring hook I don't even have to open my earring hook which is kind of nice so I'll close that up and once I have it all assembled I know I'm going a little out of order here but I'm going organic I'm just gonna I'm gonna use my eye and clip but you know what I did I got it facing the wrong way and what I realized is you know what I did and I love that cat did a video on this I'm change the orientation of my earhook to facilitate the the frontward facing design of my earrings so just very gently I'm gripping with my plier flat on that loop and I'm ever so gently turning the earring hook so that it'll be forward for me all right so now I'm ready to attach it and here I think I will just angle that off to the side make sure my chains are going to face off to the front the way I have my other earring whoops another way there we go close that up alright so now I'm gonna look to where I have my one-inch cut and I'm just gonna bring my flush cutters in and kind of take the liberty of just winging it moving it I like it design as I go I do want to get them one at a time though I was gonna say I see that you're moving out kind of one at a time that's probably smart so what's the varied lengths in that natural look looks so delicate so now I've got my two earrings even holding both of them they're just they're really light kind of a fun design it incorporates a lot of different different elements in a fun unique way I like that and yeah you can see some of the other acetate pieces we have those beautiful chandelier findings there on the mermaid Cove earrings those are just really fun to work with yeah just over to this side it's an earring that cat put together and then over here what did you do you've got some patina yeah so I did a little patina I was inspired by the color of the year which is living coral so we have this coral patina so I wanted to put it on those little hammered coins but then just to add that extra little something I wanted to add in the acetate because I initially had just the silver circles with the patina on them on those earring post and I was like you know I just feel like it needs a little more graduation and I wanted to go for something that was a little bolder and that those ones there they actually do come with two holes so we do like Alexandra was saying we have some with the two holes when you know those are considered links and then we have the ones with the one holes and those are more pendants so we do have a lot of options there in terms of design right so again with these stamping blanks they offer a lot of variety here's an instance where there were no holes in this square and so I put one on either side and again hung some acetate with that we're also seeing a trend in this shape right here which is that Halfmoon and we love it hammered finish on that so this earring was fun to just I threw it together this morning and it actually hold it up it hangs off just a little to the side but it doesn't bother me once I tried it on and because it mirrors the face it's very flattering very lightweight yeah and it was just really a good use of tassels and a nice discovery there yeah that is such a beautiful look when you can mirror the face like that because like I was saying you know during the summer months my hair goes up so you know to kind of have that really nice shape to to the face yeah because we are making jewelry we're designing it's all about style so that's a great great thing I love that alright so if you guys are just joining us welcome welcome to our class we are doing some fun summer jewelry talking about colors and textiles and all great fun stuff and if you are just joining us I want to kind of give you a little quick peek at the giveaway here so we did talk about it earlier today so I'll go a little faster here we are doing some great hemp here we're giving you some lovely tassels and charms you're going to get some of those acetate pieces that Alexandra just worked with here we have those large rectangle shape and I love that you're also gonna get a nice little Sun stamping blank we have some sea glass for you to work with here which I'll talk about more in just a moment and then you're also going to get a great travel tool kit so this giveaway is over $50 you can win it today I'm leaving a comment a question let us know where you're going on summer vacation or what your favorite pieces that you're looking at here today so that is our giveaway I'm very late alright so one of the other summer things before I kind of dive into the sea glasses I want to talk about our brand new kits now these are exclusive beadaholique.com zin a great little box for you guys and you get the tools the instructions and we do a front to back video walking you through how to do every portion of the kits so that you have you know us guiding you all the way through so these are the mosaic double wrapped loom bracelet kits and we have four different varieties we do two and silver and we have these two in gold I can't decide which is my favorite color I really kind of like this red white and blue it's just such a such a pretty style and I love the gold but I think this might be one of my favorites I called this one Sanibel it just reminds me of the sands in Florida and just so pretty it's a little bit of a warmer tone and then we also have these two over here that are gonna be a little bit brighter we got some oranges and some great teals and purples the rabbit loon is such a great tool I remember when we first got it in a couple years ago and you've come such a long way oh my gosh it's so fun you know I I really didn't realize how versatile that tool was going to be I was like okay so you make the single little wraps with the big beads like I get it you know but then we started to realize oh you can use the little tiny 11o miyuki delicas with it that's great and then we started to incorporate the bigger beads in with that and then obviously these are the double wrap so these use the rapid loom Pro which includes two tracks so that's kind of cool so you can see just how long this is and it's a really nice lovely wrap bracelet and I'll try to kind of show you a little bit of sizing and like how that works see how so it's just really nice and delicate and this is going to be great for stacking jewelry I know a lot of people do that during the summer they just kind of get that armful and I just think these are going to be really really wonderful and each has their own little pattern in there so you can see that the pattern sort of changes so it's kind of organic style it's not you know do this get this then do one and do one and so it's you know there's a lot of different things kind of happening in with the pattern they're they're different on everyone so the cool thing is is that we actually do have the full kits which include everything you need to create this including the leather the seed beads the beads the the silk the button all that good stuff plus the rapid loom and the glue now if you already have some e6000 and you already have your rapid loom Pro what you can do is you can purchase the refill kit and the refill kit is going to be all of your beads your cord and all that good stuff it just won't include the loom or the glue so that way if you already have that stuff you don't need to pay for it again so we've kind of broken out the kit for you so that you can you know pick one and then hopefully pick another color and pick another color and pick another color that you love to make so this is a great little summer project it's really super simple it comes with a nice little twisted wire needle on the end of it so it's really easy to string on those beads so if you're like oh how do you get the Miu keys on the things it's it's all there don't worry about it we got your videos are always so fantastic and watch that and do it yeah they're you know it's it's a really fun thing to do and you know speaking of kind of more summery kits we see a lot of memory wires so these launched in May so these are on the website as well and they just come in some beautiful summer colors so we have these really nice sort of again you would get that stacked look that's a huge trend that's still happening yeah so yeah they're very popular and now what about these kumihimo are another kit yes those were those are the previous ones so these again I was inspired by that color of the year so you can see that little pop of coral in there but these are 12 warp kumihimo so these are nice little spiral bracelet so you can see again we have four varieties are to gold and to silver we like to hit everybody with our color palettes but these are really really fun if you've enjoyed a twork kumihimo this is a 12 warp so it's gonna be a little bit different so you can see there's that little spiral pop that's happening with that gold bead especially right in this one here so that is a really really fun kit and of course we have our loom kits as well so lots of fun summer kits for you guys to take a look at we have lots of fun colors so hey guys if you're looking over our kits and you're wanting to see something or you're you know maybe we make a project and you're like hey I really wish that was a kid maybe in this color let us know we listen to those and you know I have to say this orange purple and pink one this this came to us from someone out there they were like I really love all those colors together and I was like really and then we kind of put them together and I was like okay I see it I like it so this orange pink and purple kind of combo it's so bright and funky and you know what it's totally not my color palette I would have never thought of that so I'm so glad we got the suggestion to do that so it was really really fun so if you guys have some ideas let us know you might see it in a future kit one day alright so I want to talk about some sea glass so I have some great projects that are down here so you guys can kind of see just some of the different varieties of the things that we've done with the sea glass we have some strong pieces here this piece here uses some simple wire loops it's spaced out with some of that zola chain we also did some wire wrapping here and this I wanted to point out because I use again that little Ghita setting with that leverback earring but just did a nice little messy wire wrap to briolette at the top of that and these are the seaside princess earrings I thought these were so sweet I think I'm gonna make them in a couple of different colors yeah and you know what's funny is that someone asked me if I would do these for a bridesmaid and I was like absolutely so cuz we do have some other colors other than that purple there and then we also have some beautiful flat pieces here and this piece it doesn't look so great on the table so I'm actually gonna put it up I just I'm just gonna wear jewelry um but this is really fun because it kind of goes around the wrist there so you get that nice little focal of sea glass and then the curvature of this cork and again this is bringing in those textiles this braided cork really fits the back of the wrist really nicely so this is one of those pieces that I think it's just really fun this would go with a great little summer dress but it's nice nice and sort of you know just a little C glassy yeah I like that one ETI ladies yeah so it kind of kind of looks a little weird with you when you put it down it kind of looks like a little you know dear--you or something so just like I just want to put that one on for you all right and then we have some more colorful ones here and I just want to point out some of the more saturated colors so this is still sea glass here this orange so it's just gonna be really really rich and then we also have the white ones here as well as again sea glass but they sort of look very very like found little pebbles I kind of like that and so let's talk for just a minute what is the sea glass because we call it cultured sea glass sure so what does cultured mean is that the tumbled effect it is the tumbled effect it's also because these are you know man-made sea glass okay so sea glass is kind of an old thing that used to happen when sadly people would leave their bottles at the beach or factory dumps I know and yeah you know so they but what would happen is over time they would sort of get tumbled by the ocean in the sand so they would turn into like these sort of little pebble like things like you're probably used to seeing more organic shapes that would probably come out looking like that because it was just chunks of a bottle you know so often times when people think of sea glass they think of like the blue or the greens because that was like the colors of the bottles or you think of that white which is usually a clear bottle that's just been tumbled and at you know kind of over time but yeah so now it's become such a big trend and they've been able to kind of do in shape so we call it cultured sea sea glass because we've actually been able to sort of make them into beads and and kinds of other things as well so while these are not you know from the ocean they are cultured but you still get that beautiful look and you know we've been able to do some different colors with this as well like I said that really rich orange we also have some beautiful teals like rich rich teals and greens so it's really I like working with it it you know we did get a question if it was lightweight or not but they're still glass so they're not super lightweight they're not going to be as lightweight as they like the acetate but they're gonna be really really nice to work with mm-hmm so yeah but they are glass they are glass beads so yeah so this this design here this uses two really big focal pieces and you can see that I put these on a post these are the starboard earrings I put these on a post because these are a bit heavier I wouldn't want to have them on a little earring hook here so that was one thing I did and then I have this other little design here and this I just thought was really fun again like I said summertime my hair goes up so I did this really long one here it was just that little orange pop at the bottom because I just wanted something really delicate just to go with some other sea glass pieces I've been working on mm-hmm speaking of lighter weight really quick and easy earring that I did a video for with these and the fun thing about this is when you buy the supplies for these earrings it includes a sea life assortment by T recast with six charms and so you can actually make three different pairs of earrings by mixing and matching however you want I love it and you know I love the idea of mix and match earrings I think that's really fun especially you know it's summer it's fun you know we also have we have the other four terms over here so if you just want to kind of take a look so there's some other little sea sea life charms there so those are the other four that you can get in that variety so it's just really fun I mean why not say you want to do the sea horse and the dolphin I think that's great you know there's no rules tonight all right so I'm gonna do a little quick sea glass earring here and I was inspired to do something because I was like oh you know I really want to get back into chainmail but I just don't have the the time at the moment I do want to get back into it though but I thought it would be kind of fun to do a little faux chainmail sort of happening here a little - and - with my sea glass pendant first of all I love that red oh isn't that great so that's what I mean like you can really get those nice colors here so again we're kind of gonna talk about jump ring sizes one more time here so what I want to do here is I'm going to be using a 422 which is this guy here and a 521 so this is going to help kind of accommodate that but watch how this sort of creates a little faux chainmail look so what we're gonna do is we're just gonna take that five millimeter just gonna open that up and slip it on to my sea glass now I can't get two jump rings into that little hole there but I can on the other side of it so I'm gonna do two jump rings that are the five millimeters I'm just gonna open that up and I'm gonna slip one on and I initially when I was first starting this I was like oh maybe I'll just do just one jump ring all the way up and just kind of make it like a little chain and then I realized that I could double these up and it just gave it its just that extra little look there so I'm doing a jump ring in the same direction same everything is the one I just added so this is sort of that really basic two and two chainmail so now to change it up because now I don't need to accommodate that size anymore I'm gonna move on to the smaller jump rings here so I'm gonna be using some 4 millimeters okay so you're graduating a little bit mm-hmm so I'm gonna now loop it onto both of those little jump rings there and close that up and this is just jump rings this is something that you can do with a lot of things just let's say you're trying to extend something or you know one of the other thoughts here is that so these are four 22s which means they're really thin gauge so if you're trying to maybe extend a necklace you could do this technique as well if you have thin-gauge jump rings because you're kind of doubling up the weight distribution that's happening here so that's another little little tip there as well all right so I have another one so again I'm gonna stick with the fours and I'm just sort of looping up so you can see that I'm doing two and two and two and two so I'm just gonna loop and do one more here and you can go as high as you want you can do more you can do whatever you want here so I'm gonna do two sets of these and then what I'm gonna do making sure you're catching only the jump rings you want to be catching all right and now when you look at this we kind of try to get it in my pliers there when you look I have my earring hook or excuse me my earring post that is facing the same way so once you are at that point you just need one more jump ring to attach that together so again I'm going to use the small jump ring you could go back to the large jump ring if you wanted to I'm gonna stick with a little small guys here for that nice little graduated kind of mirroring the shape of the teardrop and then I'm just gonna slip that on and close that up so there you go so that's a little little faux chainmail there's not a whole lot to it but these earrings it just gives it just that little something extra there so you can just kind of see from the side just a little a little chain like but hey guys let's just jump rings yeah that's nice so super simple all right you can said about the whole size jog my memory of something I wanted to add about the acetate and the join of the asset okay so over here in this necklace I wanted to point out a hole size that I was able to change using the two millimeter side of the beadsmith two hole punch and so using the left side I came over over to this necklace here and I actually went over the pre-existing hole which was smaller and I made it bigger and then for each of the other two I made those two millimeter holes and that was to accommodate this thick textured I think it's 17 gauge jump ring by Nunn design I thought that added a neat a neat visual so that was just something I wanted to add was oh absolutely I always do that yeah just kind of expand the whole size that's yeah that's a good tip - yeah all right so get your last comments and I have one more little tip I'm gonna share with you guys but get your last comments in to win our giveaway like I said Brian's behind the camera there and he's gonna let us know who is our winner today so go ahead last little comments any last little questions you guys have if you want to see something again if you want the camera to kind of pan over one more time we'll definitely talk about that but I have one last little tip for you guys and this goes back to these sort of stacking and layering necklaces and again I end up with them tangled up all the time especially when I'm traveling - so I have a little tip here so this is a trio of necklaces that I made with the brand-new zola elements and this kind of goes back to what we were talking about at the very top of the class with you know doing some mixed metals so you can see that I did the gold in the silver and of course I have my little pop of turquoise so what I'm gonna do is I'm actually going to use a tube clasp now these are really fun so this one has three holes we do have them in you know fours and fives etc but this one is kind of cool so this has a little spring in it you can see that nice little spring but these also come in a magnetic style so if you're just you know it because this is gonna go behind your head so if you just need to kind of have that little magnet magnetic so the great thing about this is what we're gonna do is so I have this is my longest one here with the moon this is my middle one with the cross and this little turquoise one here this is the shortest one here so what I'm going to do is let me kind of move these aside is I'm gonna come in and you can do this with any necklace that you already have or let's say you're making a new trio so what you can do is you can just take your little lobster clasp and I'm just gonna hook it on to my little side there and then I made this necklace so I know that this is an open jump ring but let's assume this is a necklace that I bought so I'm just going to take some other jump rings here and I'm gonna take a nice 16 millimeter ex excuse me 16 gauge a six millimeter jump ring and I'm just gonna hook that on and hook it on and close it up oops well that latching of the lobster claw in there is perfect oh yeah I wouldn't have guessed that what's what you're gonna do haha yeah so I mean you can you can make more of a permanent style of one but I'm just gonna do this and I'm just gonna hook on that lobster clasp and then do the same for all three of these now this is a great little thing I don't know if you don't want to bring tools with you on vacation but you can switch things out this way nice and easily if you want to kind of go oh I want to wear this middle necklace this time you know so you're really only doing I mean to switch this out guys it's three jump rings so it's really super simple you could also do this let's say you didn't want to bring tools instead of jump rings you could do split rings and those are gonna be very similar to like a style that you'll do for like a keychain or something that's kind of what a split ring is I could show you what that is in just a second if you're curious but yeah but this is just a great cool the little thing that I you know stumbled upon and I thought this was just a really great way to keep your necklaces from getting SuperDuper tangled you know it's just yeah so good tip well I know you did a facebook live sometime back about layering necklace mm-hmm and that's full of great tips like this too yeah so and then you'll have all of your necklaces separated here for you so you can just kind of see how that works and then yeah so then you're all set to go they're just everything is nice and separated so you can kind of kind of see that in my hands there yeah so that's just a really fun thing and then you just have one clasp at the back and then you're good to go perfect so yeah so that's a that's a great little thing to do are we do have one more question you got it all right so Cathy's question is about widening the holes like Alexandra was just talking about and how can you do that without breaking the beads it depends on the material I would say with the acetate it's pretty forgiving and I've had a good experience with getting as close to 1/16 of an inch against the edge of the piece and it doesn't give any sign that it's gonna get a crack on me so with the acetate I think you're good too to get close to the edge and so other other materials like glass would I'm not sure it up but you could probably would again might be a little bit forgiving if you're trying to widen a bead we didn't recommend using like a diamond at all if you're doing like a wood because you can kind of file the inside of the wound or sometimes like with wood beads they'll just have a little gunk inside them just a little you know sawdust shavings yeah you kind of poke those through this is really only designed for flat flat surfaces like blanks even faux leather if you're trying to widen a glass bead please be very careful that's very easy to crack and and also I hesitate to kind of shave down in the glass or crystal with one of those like diamond files that can be a little little tricky so you might be a little stuck in those situations well I will say that the the seed glass has a pretty generous sized hole it does for instance in these marine layer earrings I am put those I think they're two three millimeter silver beads in between to kind of anchor my beads because the holes were large enough yes you can see here hopefully it's coming up on camera that those holes are nice nice and large yeah yeah so alright so yeah so we've talked about kits and seaglass and a little bit of kumihimo we have some great textiles over there don't forget paracord is a great thing to use for summer and crafting summer is always fun and yeah with our with our kits with our mini kits it's a great way to either learn a new technique or just throw together a really quick and easy project or mini kits are great for that so be sure to check that out at beadaholique.com everything you see here is in our product collection and there's even more stuff that we're gonna be coming at this is just the tip of the iceberg of summer it's not officially even summer yet so we're just getting you guys prepared for it yeah so yeah so this has been amazing so thank you so much guys and do we have our giveaway winner fantastic alright so congratulations to Carol uh Sisneros wit I hope I said that right sis sis menace it's never us that it sounds so exotic and pretty I like that so Carol says Nutr us wit I hope that is how I say your name well actually to do is give us a little email at service at beadaholique.com that's our customer service so just let us know where we can ship your beautiful prize congratulations I hope you enjoy and I hope you're headed somewhere fabulous this summer so enjoy your vacations guys bring your projects with you and we will be back here next month we do they use classes every first Friday of the month throughout the year so if you guys have a suggestion for a class or a great technique you want to see or if you want to see any of our previous live classes those are all archived for you over at beadaholique.com and I would say just send pictures of what you make I really want to see so how do they do that okay so you can do that on our Facebook page actually so we have a customer gallery so if you guys have even made one of our kits or made something else or you know maybe taking one of our designs and made it in a different colorway let us know send us a little photo or and just your name and hey like you know you can share my photo we'd love that so yeah so we have a great customer gallery so be sure to head check that out there's a lot of great inspiration pieces to you guys are really amazing we're constantly amazed so yeah so that's a great tip thank you all right thanks so much guys we will see back here at the first Friday of July all right have a great month everyone bye you

You recently viewed

Clear recently viewed