Beadaholique Live Class: Designing with 2-Hole Beads

SKU VID-1665
Designer: Design Team
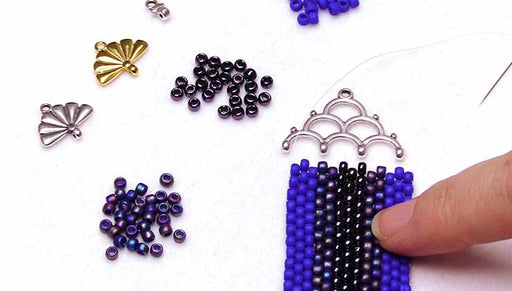
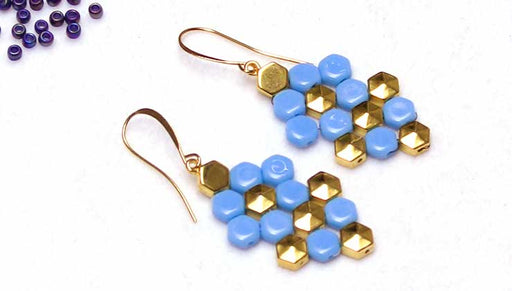
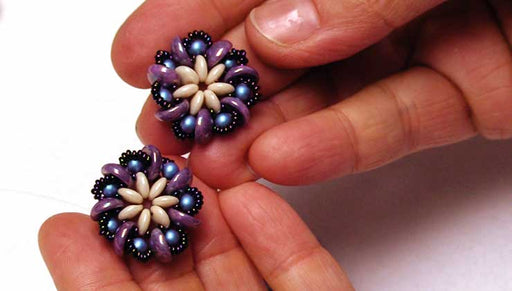
In this special live class event, Beadaholique designers, Kat Silvia and Alexandra Smith, walk you through the basics of using 2-Hole beads in your jewelry designs. See everything from stringing to bead weaving and even memory wire. Our collection of multi hole beads are more versatile than you might think. Don't be intimidated by them, our designers show you how easy it is to get started.
Audio Transcript
Note: This audio transcript is auto-generated and may not be completely accurate.
hi everyone welcome back to the beadaholique design space I'm Kat Silvia and I'm joined today by Alexandra Smith and we are talking all about two whole beads and we have some three whole beads as well but we have this sort of multi whole beads that can kind of be scary but we're gonna debunk all of that for you and we're gonna make some cool projects and it's just gonna be really fun as we kind of walk through our beautiful table here so are you excited very we've been looking forward to this class for a long time and we you know have some brand new beads that you may not be aware of we have some new kind of cool components so we're excited to kind of dive in like I said we're gonna do some tutorials and we're just gonna be talking mostly about how we design with the two whole beads because I think that's sort of one of the tougher things is how do you get started where do I start what do I do so we're gonna come up with some really basic techniques to showcase for you guys and we're going to show you how to do that so let's come in and let's take a look at our table here and you can just kind of see all the various projects that we've done over the years and some more recent that you may not have seen before but we have all kinds of different sizes and you know there's all kinds of new shapes so you know this might be some new stuff for you it might be some old stuff but you know we're kind of gonna just really talk about all that you see here I see some loose beads to give you an idea of the way that they're drilled how they look separately yeah it's all about the holes that orientation you know sometimes they're kind of offset sometimes they're right up in the middle so we're very similar so we'll talk about the differences between some of these it may look alike but they come out looking really different once you start incorporating them into a design absolutely absolutely so yeah we have lots - lots to cover in this class a lot so if you've joined us before you know that we always do a giveaway so for today our giveaway is kind of fun so we're gonna give you one of our carrier bead bracelet kits and we're gonna give you the Spring Blossom and I pulled that out here for you and this is beautiful I love these this uses the carrier beads with that little peyote so you're kind of getting a double bead weaving there and then it's a strung design using the two hole beads as kind nice little structure we're actually going to talk about that a little bit later in the class but this is one of those kits you can make this from start to finish we have a full video and you'll get all the patterns and everything you need in this cute little box there and speaking of boxes I put together a little designer mix of some of the two whole beads that you again may or may not be familiar with so let's go ahead and take a look inside here so we have some of the cabochon beads here those are two whole we have some of our s o beads we have some gem duos some honeycomb beads and those have that cool laser etching on that really funny I can't stop looking to draw you in right and then we have some Chevron beads some ginkgo beads those are some of our newest ones we have some nib bits we also have some little bar beads there and then we have some mini duo's and some super cubes so what I wanted to do was kind of give you guys a really good range of some of the beads so that you guys can start to play with them and really discover what you like about them so okay look a great inspiration here oh yeah yeah so all you need to do to win that giveaway is just leave a comment say hey I'm tuning in from Florida or wherever you are and let us know what your favorite had to whole bead is or even a question we love hearing your questions we have Brian behind the camera there so he's gonna feed those questions to us but if you guys have questions about what you're seeing or if you want to see something a little bit different let us know in the comments and we are happy to do it alright so that enters you into the giveaway and we will announce the winner of the giveaway live right here at the end of our show we usually round about 45 minutes to an hour so stick around so we're gonna be doing some fun stuff we might get carried away this time and it'll keep track of time let's get started let's get started yeah okay so I am going to be doing a little earring so this is really simple this is a great way to use the two whole beads here so I'm just gonna kind of lay this down so you can take a nice look at it you know what it's funny I didn't really intend it to look that way and then talk to you about any way that you just kind of do their feet right with it that's part of our whole thing I know so so we're gonna talk about that so yeah so okay so these are featuring the gem duo's and all these little gold components that you see there those are the new line they are called the symbol collection we often call them symbols because there's usually multiples in my designs but what these are is these are really cool little metal beads and they're designed and you know you'll kind of look on our website at beadaholique.com where you can buy everything that you're seeing here you will actually see oh these ones go with the gem duo's and you know so they'll all be listed with they're sort of appropriate bead type okay so what I'm gonna do is I'm gonna start by doing a really basic unit now what you're seeing here on this design is I have six of those gem duo's and in between if you can just kind of see where my needle is right there those little tiny beads in there are actually these little kind of doughnut shaped beads here now these are the Toho Demi routes and these aren't in the eleven oh so let me draw your eye down here so when you were talking about seed beads there's a couple of different sizes I want to point out to you that are gonna be really helpful in spacing out some of your bead weaving when you're using the two whole beads we have the 15 oh that's right here we have the 11 oh and then right next to it are those Deming round so you can just see that they kind of have it looks like they're just sliced in half they're right across the top right down the center so you have the eleven oh and the Demi round right there side by side and then moving down here we're gonna be using also some a toe beads and then we have those Demi rounds in the a toe as well so you can kind of see again it just looks like it's sort of sliced in half and these have a little bit more of like a doughnut shape and these are great little spacer beads these are gonna be so helpful when you're just trying to get something to lay perfectly these are gonna really help with those little spacers okay so what I'm gonna do is I'm gonna start to pick up my gem duo's here and I've already chosen the colors that I want I need a sixth one there we go put that one in there I love how that mix gives you a choice of which colors oh yeah this is the rainbow mix you can really see the array of colors in this and I'm gonna talk about that design in a minute but no peeking alright what we're gonna do is I'm just gonna pick up one and you can see that on the gem do is they have a little line down the center that's actually the top and on the back it's a little bit more flat so you'll just have to remember which side you're kind of picking these up on so I'm gonna pick up one and then I'm gonna pick up a dummy round and just going over and I'm just picking up and alternating one in one and one and one now it was noticing as you are pointing out the seed beads that the 11 no dummy rounds you're using they're very similar from my house over here to the 50 nose yes I think mainly what happens in the design work when you use one versus the other is the deme rounds just give you a bit more girth so they may be very similar width wise but they have a different look to them they really do yeah I think I think you can actually you know you'll really be able to see that in a lot of our designs we do use that and see I picked it up the wrong way I do that I was listening to you trying to catch you up yeah I know that's alright I you know what's so funny is that I'm often and we will talk about those two I'm often taking things apart I'm like no I don't like it cut it redo it you know - because it gets so exciting to start experimenting but then once you realize sometimes your your thread bridges will show a little bit or the beads will crunch together in awkward ways and it's trial and error sometimes you know yeah you bring up an interesting point about bead crunching that's one of the reasons why I do like to use these because sometimes like like they can fit but sometimes there's just that extra little design element so that they do you know don't well they don't have to crunch like that okay so I'm just bringing everything down to the end of my thread here I'm leaving about it in a little 8 inch tail I'm just gonna weave that in later but I'm just gonna take this and sort of tie it a little overhand knot this is very similar to like a right angle weave or something when you're just kind of creating that first little unit and you can just see how it just comes together really nicely kind of looks like a little floral pattern and this works so well for so many of these two whole beads this is a starting place oh yeah it's just you come together in a ring and then your thread path just kind of leads you to the next logical place and that's that's what I want to kind of really show you guys here so this is like just a basic starting unit now the other thing to consider is I have sick here you could do five you might be a little crunched with four but you could do seven so it just kind of depends on which design and how many openings you want because you could leave it as this but what you're seeing there is you're seeing all those little extra holes so you're probably gonna want to cover that up some way and that's when the symbols are gonna come into play alright so I'm just going to take my thread and I'm using in case you guys are curious this is a size twelve beading needle that I'm using and this is the four pound fireline I'm using the smoke color but when you're designing you might want to use the crystal also depending on how many thread passes you're gonna do you can go with the four or the six it just kind of depends on what you want to kind of see and not see and I'll show you an example of kind of what it looks like in both in just a minute here okay so all I've done is I've gone through that bottom little hole there and now what I'm gonna do is I'm gonna turn it around because we got to kind of step up to that next hole so I'm gonna go back through on that very same bead now you came through that bead again with that to hide your knot yes you know it yeah I you know if that's a little trick that I do and I always don't forget that so yeah so I just go through one more little bead there and then that kind of pulls the knot into that space that's in between there so it just kind of cinches it and then I'm good to go alright so yeah so now we can see that thread path right there and that's just my little step up that I have to do and now what we're gonna do is I'm gonna start utilizing some of these symbols so let's go ahead and I'm gonna choose to start with this one here now this is that little symbol and what its gonna do is it's just gonna bridge that gap all the way across the top there so I can just go directly into that next hole that's right there and we'll just call this the top so I'll just use this hasn't my top so you can see that it just kind of sits right in between there and it's meant to fit perfectly so this is something that is going to give a nice little structure you can add a little jump ring to that and I'll show you how to do that in just a moment here but let's go ahead and let's decide what we want to do with our next one so if you kind of look at my little example down here what I've done is this is my top and then I wanted to add the component to add a little bit extra of the beading there but it wasn't sitting and it wasn't kind of reaching all the way it was sort of teetering one way or the other so I'm gonna go back to my dummy round so I'm gonna pick up one of those guys and then I'm gonna go through the bottom of one of these little kind of butterfly looking guys and you like my technical terms butterfly thingy and then what I'm gonna do is I'm gonna create a little design element on top by picking up one dummy round one of my a toes and another of my dummy round and I'm gonna go through that hole there on the other side so just kind of creating that little decorative element right and that butterfly thingy right in the butterfly thing is a side bead right yes I did these are the symbols these are the side beads so you'll kind of this is a great way to sort of hide that thread so now I'm just again picking up one of those dummy rounds and I'm going into one of the next ones here there we go yeah I'm just kind of bringing that all together so you can see how it's sort of developing so now I'm going to use these other little symbols and again these are correctly called the side beads so these have a little kind of cool edging on the top it looks like a little fan so again they're just like the other ones we're just gonna go straight through and on to the next hole here and just pulling that through there and you've got your H on the front flat on the bottom yep so you want to make sure and then as we learned this already you want to make sure everything is facing the right way so again looking at my little example there I'm gonna add on another one of these little guys with the loops because I'm gonna add a tassel to the bottom alright and then going through and this is kind of how it works guys if you just keep adding going around making it work you will get a design that you like I think that's sort of the easiest way to describe some of these little units is that you just kind of if you just keep working at it and also you know this doesn't take very long so if you end up with something that you don't like which I often do you know I'll be like no it's just you know it's not it's not quite the look that I really wanted it's not achieving the style that I was hoping for you didn't just take it apart you know it's no big deal hmm it's not that much thread you want to get something that you're gonna like and wear and love all right so I'm just kind of repeating what I did on the other side here so while I've been chatting okay so now I'm just gonna go through and I'm gonna actually here's a good stabilization technique I go through that outside ring all the way around there we go and we're just gonna go through here and you can just see how it just kind of cinches up there and now it's getting a little more structure so the deal with the symbols guys is they are actually metal beads so they're gonna add some good weight to your piece so you want to make sure that you are kind of doing a little extra roundabout now I have the luxury of doing this because I haven't done many thread passes so we're just going to go down through and around but that's a great idea to do more thread I think I probably should have done that in my little earring that I'll be showing a couple of minutes yep learn as you go well okay so if you want to I'm all I'm gonna do is I'm just gonna keep going around here so actually if the camera wants to pan Alexandra do you want to talk a little bit about the four pound six pound and yeah keep some of those variants yeah and let's take a look here so cats using this smoke four pound fire line and you can just see right here that's kind of how heavy it the weight will hold of these of these threads so there's four pound and six pound in the smoke color and the same with the crystal and this is really a staple for us now alternatively if you're doing some loom work you might want to use the 900 thread and we'll get into that in a little bit our standard beading needles we often use our size 12 they come in different lengths and gauges so suit yourself with those and so let's actually come over here also and I can start to show you what I was talking about with this earring that I made which is a super duo medallion earring and up here this is the bead ending the symbols bead ending that's acting as the go-between and it's just such a nice finished professional look that gives it I could have stood to go around maybe the perimeter another time to really strengthen that thread bridge like Kat was talking about but speaking of I want to take some thread and demonstrate for you how to say say these weren't earrings and I wanted to just connect a couple of units for a bracelet what I would do in this case is and this is just one way to do it there are no no right or wrong again you just have to kind of see what you like as you go so I'm going to take on a couple of seed beads I've got some crystal fireline there I'm also going to take one of my symbol substitutes and this is designed specifically for the super duos you'll see there's kind of a flat side and a domed side to these so I want to make sure I'm going in the right direction that'll be facing up in my design so I'm going to slide that on and then a couple more seed beads and I'm going to take up one of my units here and if you imagine on this side I would be attaching a clasp so I want to find my correct orientation to where I'm just in between my two little silvers in the middle there and I'm going to come through the edge of my piece from one super duo through a seed bead into another so that it's sort of centered and on the other side I'm going to do the same thing where I take up two seed beads then I'm going to come up the second hole of my little symbol bead and take on two more seed beads and then bring in my other unit I'm going to find where it matches up now I also want to show you at this point how that looks with the front and back of these of these beads it's kind of this neat really clean sort of cut cut look on the back so that's how I know that's the back side I'm going to find my companion super duos here to match up my design I'm going to come through the edge of each of those with the seed bead in between set that down so you can see a little better look you know what I did I did that thing I went I went the opposite direction so let me pull it out of there this is what we do sometimes yeah I'm just redoing it yeah all right so which direction am I going I want to go get myself straight here this way so coming through the edge don't want to get too many beads yeah sometimes I try to cheat and get more beads or less than I end up going through the wrong one yes right not up okay and I'm gonna take on two more seed beads and get my my needle off so it doesn't poke me in the process here I'm gonna make a double overhand knot and this is one way to connect two units is just by sewing them together alternatively if you were to start at one end of your piece and go around the perimeter now I want to get my knot in between the proper beads here that's something that will happen to is sometimes a little seed bead just sneaks in the wrong spots you don't want it to I know I didn't you know it just happened to be a second episode so I'm getting my finger tight over there so that I know where it's going on like wrapping a Christmas package here yep okay so now my second knot that where I want it that's just one example of attaching two units and then I would I would weave in and clip my my threads so that gives you an idea of one way one way to do it I also want to bring in a few of the pieces we've got on our table that are done in different ways and then each of these have videos that will show you precisely how our designers did these and as you do that we do have a question so okay hi Cassandra this is a question we have and if she's asking can you substitute super duos for gem duo's and I will say in many designs probably it just depends it because the width is not quite the same but a lot of the two whole beads that we're gonna be showcasing here you can actually substitute them it might kind of change the design a little bit so like if you're looking at the piece that I'm creating the with the little unit going around you can absolutely do super duos but you might want to do maybe more so instead of doing six you might need to do eight but again working with the symbols that are meant for the gem do is they can work for other beads as well so you can kind of mix and match and see what fits for the design that you're doing but absolutely for the design that Alexandra is doing yeah you could do that design what you do is it's just gonna be a little bit bigger because the gem do is have they're a little bit wider on the sides as the so this is a gem do and then this is like a super do so it kind of has like it just a different profile but a lot of the two whole beads will work the same way in terms of like where their holes oriented and how they can kind of like notch together but you can't it's not a straight translation so you just might have to do a little bit of finagling but yeah I mean I think a lot of the to opiates will work in many of these different designs yes so cool all right so you were saying about aware of the other connections that be on here so and what I did was utilize both holes of that bead to really give a kind of a sense of stability and keep it from flipping and flopping around and so that here was a useful technique for me also I've got colorway of that bracelet it's one of my favorite and speaking of that I'm going to pull in the necklace and the earrings that came about as a result of my inspiration from the bracelet you realize once you get started that you have a unit and you can use it in all different ways and it just makes a lovely lovely set so well and that shows a perfect example of a different size of pearl that you use yeah and all you needed to do is just sort of add a few more super duos to kind of accommodate that size excuse me videos to accommodate that size right right oh speaking of mini and super here's the difference just held up so here's a mini duo and here's a super duo and it's really just a larger version of the smaller one now I'm also going to pull in an Esso bead which is very similar in design in the way that it's drilled but it's just a bit more kind of pillowy and it really gives a different look if you'll notice both of these pieces utilize s o beads and it's just kind of more puffy yeah they're they're like super do yeah so as opposed to connecting units with sewing with beads between there's other ways of weaving just solid designs like this one like this one and then down here you'll notice that this piece with the silky beads has been put together using jump rings and that's another clever way to go as well so jump rings were used in this necklace up here also and embellished a little bit with a couple of seed beads here and there so there's some connection methods what else do we want to talk about at this point well I'll finish up mine really fast I want to show you guys a little kind of extra technique that I have and here's also we get a lot of questions about why we like using fiberline so one of the reasons that I like to use it is you can actually use a thread zap and it's it's gonna work really really wonderful for this but what its gonna do is it's gonna seal your thread because there's nothing worse than finishing a piece and then having it fall apart on you so I'm on the back side here and I've just one more little knot in there I know you obviously can't sing it because I hid it well that's good but what we're gonna do is I'm going to show you guys how to use the threads app and if you do a lot of be viewing this is a really great tool please do because the words app has intimidated me I have to admit I will not hurt you this is run on batteries it's good it's good to take with you okay all right so what we're gonna do is we're just gonna press this up and what you're gonna see there on the tip is you won't see it heat up but that is getting hot and what its gonna do is because this is a kind of a thermal bonded fret thread excuse me say that three times fast thermal bonding right so what I'm gonna do is I'm gonna come in there and it's just gonna zap off that thread and just kind of seal it so I don't know if you can and then make sure you set that aside it's gonna be warm so what you might probably not be able to see on my finger there is that it actually kind of comes in on itself and you can feel it it's it's sealed off it's kind of burned off so what happens though is there it's gonna make a little kind of nodule on the end of the thread so it's not gonna pull through you're a little nut so it's an extra little security thing when you are doing your pieces and safety first always put the little guard back on before you set it down there we go all right so I'm going to set that aside so last thing I'm gonna do is I'm just gonna show you guys how easy this is to complete a full design and I'm just gonna take a little jump ring open it up and I'm gonna add a little tassel to the bottom because I just can't help myself you can do a little tassel you can do a little crystal all the elements you've brought into that area it really is a nice yeah yeah it's you know it's one of those things where it just kind of happened and I just ended up really liking it so I'm like I think these are going to find their way to my ears later and I'm just gonna come in and just kind of close that up all right so to what Alexander was talking about if you kind of pictured this without the tassel and the piece there on the end and let's say I used these all around the four sides you can absolutely use jump rings to link these units together to make a bracelet the other thing to kind of consider when you're designing with these is where your spaces line up so for example if you're taking this peace obviously I did across the way with my two holes here but what I want you to kind of consider is what happens if you put this component here so you kind of create a little more of a central pendant look so you can create like two pieces of chain going off here or you can create several units but this it's kind of like playing with probably dating myself here but it's like you know playing with like tangrams as a kid when you were trying to put together like all the geometric shapes and stuff but it kind of makes me think of that because you are doing a little bit of geometry here when you're trying to figure out oh well how can things fit together so if you imagine that this piece is actually replacing that one there you can create a cool little like sort of triangle-shaped focal there as well now there's nothing saying that you can't just do little thread bridges of seed beads or go down through and just kind of leave some blank there's a lot of options when you are working with two whole beads and especially the symbols because they've given us the opportunity to kind of hide some of those thread bridges because obviously on the outside you have a nice clean look there's no thread bridge right there so I do want to talk briefly and I told you I'd do this earlier so this is a little earring that I did and one of these I did in the video and one I did before the video it's a little about the theory I know right statement Soho I did this one here and this uses the crystal thread which is the color that I wanted to use but in the video to get it to show up for you guys I ended up using the smoke thread so I'm gonna kind of give you guys a little peek under the skirt here and you can kind of see you don't really see the thread on this one but you definitely see it on this one with that black thread so you're seeing those little thread bridges and I tried to hide it on some of them I added a little extra embellishment there so you wouldn't see it as much but that's just sort of how the color of the thread can really affect your design like obviously on one you're gonna see it a little bit more than on the other so that's just something to kind of take into consideration whether you want to use the crystal or the smoke now obviously if these were you know black honeycombs or a darker color I probably would have gone with the smoke so just something to kind of think about as you are working and designing with some of your pieces yeah so all right so let's I want to talk a little bit about the beaded component that we added to the cuff and you've actually done it where you added it to a hair pin as well all right so one of our designers Rachel had come up with this beautiful pedal line design and so I watched her video created it and then just sewed it onto a hair a hair comb and that's something that you can always do is diversify these designs off of one component and onto another and you can see that we have some of those caps on beads so those are the two whole cabochons be is that's the one that's in the giveaway yeah so those are really fun to work with as well they give a really cool cool design and you know it's funny as I like that they have two holes because it actually allows you to stabilize a piece yeah cuz I mean you know you're thinking oh let's it only needs one hole because I'm just gonna go through it but it actually provides that nice structure so that you can utilize that in the design so and it's got that 3d element you know very similar to like the super key apps which are more pure a pyramid yeah so it's a matter of making sure that you pay attention to your orientation of your hole as I was working speaking of super key ops on these bracelets here I found it really helpful to set the beads down on the table and actually train my needle through while they were sitting flat and that way I knew I had them facing because they're triangular and they're dimensional and yeah I have to get get the direction correct on those that's that's a good tip to kind of like I I do that too like i'll plan everything out and then i just kind of like run my needle through collecting sometimes but just just like nope otherwise i'll get lost or I'll drop a beat or forget or yeah so yeah these are this is another great example of you know working with those dimensional beads now this is kind of a cool example so speaking of little units this is obviously done as one full unit but what Julie did was she did a full piece and then glued it on to a cuff with you a six thousand mm-hmm and one of our caves that but this is this is another kind of great example of just discovering something and then especially if something doesn't really have the structure that you wanted it to have I know sometimes I'll make a piece and I'm like oh it's a little floppy earth I wanted it um so gluing it onto a cuff is a way to kind of give it a new new little life they're so great very little example yeah yeah so oh I would do want to touch really briefly on memory wire as well because we talked a lot about bead weaving and you know we're gonna talk about stringing here in a second but this is the memory wire cuff now these are the Kavala cuffs and this is something that I just wanted to do I just thought it was so neat to kind of again provide structure using these little brick beads here so you can see that the pattern just kind of keeps everything spaced and stabilized but it actually becomes just a really cool cuff to wear and it looks comfortable if you know actually it's comfortable for me I'll say that but I really I just liked that because it was just memory wire it was you know these are just 11 Oh seed beads and then I just had these little eye pins back here to create structure now you could do something else back here if you wanted to do a different kind of a bar or like a wire wrap or let's say you wanted to use those loops to add tassels or charms or something like that you could do that as well but this is kind of a cool example and then this example here it uses those caps on beads and this is just a simple two strand but this one I could do a multi wrap with because I had the you know structure of the two there to just kind of wrap around with those two hope it's know you could do this with you know those super key episodes are going to be fun and kind of dimensional but that's just another little option there if you're not into bead weaving or if you're like oh I need to take a break from that for a minute so but yeah if you are into bead weaving you might also enjoy stringing and this is a great little example of a strong piece and Alexander why don't you talk a little bit about that and how you used actually the three whole bar beads on either beam be oaks we started like in songs any versions of the barbie yes with the three holes I think I was at the point here where I had not learned to be weave yet and so it was simpler for me to play with the colors and with just a really clean contrast ii design using the three holes kind of straight straight it straight away so yeah i was happy with that and right next to it you're gonna see the same beads use like another zoom these are incorporated along the sides of this now these are kits is that right yeah those are kits yes and gorgeous I love those thank you yeah and that that uses the NEEMO thread so I know we said that we were going to talk about that a little bit so yeah so we have the Naima thread here and that's my mo size D that we recommend for a lot of our loom pieces but that works great you know when you're doing these structural pieces and you can see down the center line of those you have the two whole square beads so we really really put a lot of let's just square well yeah two whole square beads yeah we have the Tila beads which are similar okay and we have some of those here you can actually see a really and this is a wonderful example of just a really nice tight bead woven piece that design so we do have some loose Tila beads here and they also come in little heifers so we have the half Tila beads and again we're seeing those symbols as well so we have some side beads we have some of those what we call beads substitutes so you can just utilize these in your designs and it's just gonna add that little metal element to it I like the texture they put on them too yeah so some have a little texture somehow these little like brick kind of designs and these also come with little end pieces as well so you can get that nice little loop so it basically looks like and I'll kind of see if I can stand that up there we go it looks like a little Tila on the side but it has that little extra loop so you don't have to worry about creating a thread bridge with your excuse me I'm just gonna open this up so this is a great example so here's what I'm talking about where you know we always want to try to secure our bracelets and make it work so we have that example and then in this pair of earrings you can see again with those honeycomb beads I used that piece with the loop at the top because I didn't want to add any extra seed beads I didn't want to kind of clutter the design at all so if I in hand or I could have used this guy here at the very end to create that little loop finish that off but the symbols are a very new thing and we're so excited to have them I am using them in yeah so yeah so that's an example of endings and I know we are pushing the symbols which I love too this is just a really classic great way to finish off an ending awesome to get this magnetic clasp out of the way this is with a thread protector and that's another great way to go I've found them to be very useful in weeding projects straight strung projects so yeah those will show up in a lot of our happy oat exam yeah those and those are great because you know the thing is especially if you are using magnetic clasp your ear you're stressing it a little bit as you pull it apart you know link it together so I noticed that you've done that with several of your designs especially this one this is one heck of a magnetic clasp but I love that class but yeah Alexandra again she used the beautiful thread protectors because it just it provides that structure that you need cuz otherwise yeah you're gonna stress that thread and you might pull your work apart and you really don't want to do that especially if you're selling your jewelry you want to make sure that it has a nice long life right now what can we say that at this point about that pulling pulling apart because I know that tying knots and weaving in and tying off the thread is another integral part of strengthening your piece and finishing it off right so I didn't know if there might be some ways that we can articulate where and where not to tie the knots how better to strengthen the ends and you're you're just the expert cat so I'm playing the full year okay so that's great so I actually just just completed a video so it'll be out soon so this is one of the pieces that I did and as you can see this is a hefty piece there's a lot going on there's a lot of crystal in there there's a lot of those these are the gem do these the bead substitutes as well and these one are really cool they actually have little cores on them so I was able to add a little more crystal but these are magnetic clasps on the end but I wanted to use something that had a little little more structure to it so it kind of has that closed over magnetic clasp but I will caution you as you are opening stuff like this you might want to try it because if you can kind of see on the inside here and this is this is a really great little design thing that they did there's a little kind of well there so what you're gonna want to do is kind of your fingernail in ninth and kind of open it that way you never want to kind of yank at stuff but one of the things that I did with this design and I'm just gonna kind of put this down here so you can see what I'm gonna talk about so I started with thread and I left a good long tail here at the beginning and when I went back to add the clasp instead of just tying it off here at the very edge what I did is I wove it in as long as I could until I had no more threat and that got me to about here so you have this whole ending piece that has a nice structure and what I do this might be overkill you might think I'm crazy but I tie a knot leave it in tie a knot weave it in tie a third knot go through a couple beads and then I zap it off that's a little crazy but I absolutely but you know what but you know what I've never had a piece fall apart on me and and that's just my thing it's like I've put in a lot of work that's right it takes time to do these things um you know and then I did the same thing on this side and actually because I had a longer tail I was able to weave all the way so this entire piece actually is double woven hmm but it's because this particular piece is quite heavy you can see that it's it's very dense not necessarily heavy and weight but it's just very dense in terms of like all the little right angle weave units that are happening there so that's one thing that I do like I said I know it might be overkill but I just like to you know I put a lot of time and effort into these pieces so I don't want to see them go away yeah I'll let her to learn not stabilizing yeah well you know especially you know one of the things a big question that we get a lot is hey what's happening to my work it's falling apart and nine times out of ten it's probably tension or maybe you could have used a heavier thread so that's something to kind of consider as well when I know that I'm doing multiple passes through stuff I can use the four pound because I know I'm gonna like reinforce the whole thing if you don't want to do that because it is tedious go for a six pound is specially if you're doing a right angle weave maybe you want a 6-pound maybe you're just gonna go around that unit once and like through one or two of the beads twice you know cuz like you kind of work in these little units and these kind of like little figure 8 pieces so you're not always going through every single bead twice so if that's more your speed more what you want to do you just want to kind of whip it together totally fine but go for the six pound I think you'll be much happier with the result yes particularly if you are stringing and restringing also because that will give a little bit of wear and tear yeah on your thread yeah absolutely oh yeah so I wish that people could feel these cuz that's part of what I know him like I love about these thicker banded bracelets is the way that they feel all of those beads together and just the work that you know went into it so and this piece in particular cat pointed out to me something really clever speaking of thread bridges and the weaving there is that the thread bridge comes behind the tip of these triangles which I don't find off-putting at all I think that's awesome to be able to see how this was constructed because it incorporates three different par polka bees is that right yeah the key up spar coca tea no spark polka and the art goes right so we have that we do have a question as we're continuing to talk here oh sure okay Andrea from YouTube hi is asking if we can use if you can use other types of thread yes so we talked about the NEEMO which is a little bit more it's a little bit of a softer thread so you can absolutely use that you can also use and I'm gonna actually be talking about Griffin silk here in a moment but yeah fire line works great we also have a nano fill those ones I would definitely recommend going up and doing like a six or an eight sometimes you can do four but again you're probably gonna want to do several passes there's a lot of different threads you can use the only limitation is the size hole of the the beads that you're working with a lot of these beads have small holes each dimension is listed on our website so if you're curious about something it'll tell you like oh it can accommodate this gauge or this size you know given millimeters often but that's really your only limitation so if you I know someone asked if they could use embroidery floss with these and I was like that might be a little thick but you can try it but as you can see we've actually used beading wire with a lot of these as well so it can accommodate that so that's your only limitation is the size of the hole but yeah feel free to use any kind of thread or anything that you want the only thing I would caution especially with the NEEMO is it does have a little bit of give to it so you might want to definitely take a time to reinforce it because especially with the loom pieces those go back and forth so you're kind of working off that even though you have your warp and your weft threads when you're going back and forth it reinforces that structure so it stays nice and tight oftentimes with some of these other designs it might not be as forgiving in that way or as strong I think that the fireline is a little bit stronger yeah speaking of the griffin and the back and forth and what do you have on your rapid loom there I want okay so this is another thing that we love to do with the two whole beads is I have a rapid loom here so what I've been doing here is I've actually been using some Mookie delicas here and I've been using some Tila beads but what I wanted to do is I wanted to find a way to include a little metal element because I have and I'll just kind of take it off here for a second I have my metal element with my but a great way to tie in the button for the rabbit loom pieces so I wanted to include a little bit more gold in my piece and this again this goes back to like it just feels so cool and these you can you can wrap and wrap and wrap and these are wonderful so this uses that little Griffin silk that I was talking about and this is because it accommodates excuse me the 11 o delicas accommodate this thread and what it's gonna happen is I'm gonna actually show you how to do one of the two whole beads and it's really guys it's pretty much just the same so when you're looking at a two hole bead here we're gonna put it so that the holes are coming to the sides there so I'm just going to go through the top hole there and pull that through these are the the Tila substitutes and they have a front and a back mm-hmm this particular design does yeah we have different designs some are just straight straight beads as opposed to the kind of patterned ones all right so I'm just kind of setting it in there and it just sort of fits right there and then I'm just gonna take my little threads here go through and you just kind of go down and around that leather and don't worry if they there we go I'll just fix you there we go all right so now instead of adding another feed all I'm gonna do is I'm gonna kind of tip that up so that I can sneak through that second hole there and just go the other way so all you're doing is you're just treating that to whole bead like one hole so it's just like a like a brand new bead which is really really kind of great and yeah again you know if you wanted to use a thicker Griffin slug this is a size four if you wanted to use a thicker one you can absolutely do that but that's how easy it is just to kind of put these in here so I do have some other ones that I did I did a super do one so you can see that this is really dense and talked about feeling really cool it's like very snake-like I like it but yeah again you can do this with multi holes so when you're doing it or excuse me Multi multi hole beads you're just kind of going through and it's kind of as though you were just weaving back and forth going down and down and down but you're just Criss crossing your threads every time so if you kind of take a look at the front here you start with that one hole and you want to kind of taper it out but as you get out especially in this third row let's see I might be able to show you this way um you kind of have there we go so you go through the top hole the bottom hole the top hole the bottom hold the top hole and then you come back around and you're doing the bottom the top the bottom the top the bottom you know so you're kind of just using and you're just going back and forth and criss crossing those all the way down and if you're curious about this particular design this does have a full video showing you exactly how to do this we love our tutorial videos for you guys because it really just gives us a chance to explain some of the ins and outs of how some of this works now I have to ask what I know people are wondering is is that a kit or will it be what a great design maybe a movie kit I don't know you guys let me know in the comments below would you like a kit of this we can come up with some really fun color ways so clever with that Chevron it it fits perfectly with the way that the rapid loom is shaped the way the beads are saved is so clean and lovely well and you know it this is a really I love doing colorways of stuff I know you either showcasing one of your colorways I like doing color is because it really becomes a totally different Alya I feel like these are two very different people who would wear these designs you know and there's something kind of elegant about that I just love that but speaking of kits if you are interested in the rapid loom we do have the kits with the honeycomb beads and these are gonna use some seed beads in there as well just this a little metal pop but these are great if you want to do that and for all of our kits we do have the full video that'll walk you from start to finish and it's a great way to kind of get started on you know maybe some of this stuff and you especially if you're not sure what to buy not sure what thread and size and all that stuff we've taken all the guesswork out so you just pick your favorite color and go right now should we point out on the table just so that we cover oh yes the carrier beads and speaking of that before the camera runs away on me I'm gonna showcase the giveaway one more time so if you guys have been tuning in and if you've watched this before you know that we always do giveaways so what we're gonna talk about next is we're gonna talk about these carrier beads here but we're gonna give you the kit and it comes in this great little box and you're gonna get everything that you need to create this from start to finish it even comes with the needles and all the patterns here and this is a really unique kit because what we've done is we've actually created eight separate patterns for you so you can choose the six that you like which is which I think it's kind of cool when I first thought that bracelet and the color combination of the patterns you guys had done my jaw dropped I just thought that it's amazing and I love these I think I'm just gonna wear now I think it's just a really nice bracelet and it just shows off the two whole beads the carrier beads really really nicely yeah so the other part of the giveaway here and I was kind of pop this open we're gonna give you guys a nice little sample of some of the two whole beads that we've been talking about here you're gonna see some of those cabochon beads we got some gem duo's some honey combs the Kinko's and Chevron so there's just a lot in here to play with and this will give you a little bit of an idea and to kind of have and you'll get the box too which is I think really neat for organizing all those pretty beads yeah so yeah so let's go ahead and let's talk about these carrier beads so you have a couple of the other karat colorways over there so speaking of color variations so over here are a couple of these I mean just stunning look at these look at the contrast and just the craft that went into designing these I had no part of and so I can appreciate I think a little more than Kat because she was so involved they're just just so beautiful and so in between each carrier bead which is a two hole bead in itself there are some Swarovski pearls and also the par polka the T knows he knows I know there's so many yeah and it was finished off with a magnetic clasp just gorgeous so over here Katherine got a couple of gorgeous necklaces she came up with just so fun I get carried away with the carrier beads I gotta be honest neither that's why they are called carrier you just get carried away um so here's a couple of different necklace designs now this one it uses the carrier beads now we have two different sizes and I'll go over that in a second but this uses a carrier bead and then you can also see how you can utilize them without the bead weaving so if you're like no cat I just want to string them go for it you don't have to add the bead weaving here but I did is just a little design element and you know what it was funny is I actually have the other two beads with the fold design work and I strung it together and it just looked to be too much to myself and say is including the they're like a blank canvas that showcases your art yep and they worked really well with the blacks for offski pearls and the little peridot shine I just love it and I think it was you know it just was too much for me so that's something that is always a design challenge for myself is that sometimes I have to edit and this was one of those examples and I am really pleased with the result but yeah I just I had to take it apart I was like you know what I can't I just may just don't work and yeah so anyway so feel free to use those little carrier beads as a little blank beads and then over here in this example I actually use the carrier be it's a little bit of a different way is what I did is I covered the Baker carrier beads and it not quite as wide of a panel see in this one you can see that it covers the whole bead and this one you kind of have a nice little stripe down it and with these guys I wrapped the peyote around it the opposite way so I could still string through it but it's wrapped the opposite way so I did the two different sizes there to kind of get that plays well with in different directions everything is going it works it really works yeah and how I got this curves you can kind of see that I had to play with some of the small beads up there at the top and some of the large beads at the bottom and then again I just wanted to kind of I was gonna do a whole strung piece like I had done on this piece here but I wanted to just add chain to that instead so just another little kind of designing tip there yeah a couple of other beaded Fogle's that we have over on this side sorry we're jumping all over the place I use two pieces here and so you can beat weave the focal and then just up the back put your chain or in this case with these little piggy beads on the piggy pinwheel necklace make a pendant and I used a bit of wire to make a bail for that and just put it on some curb chain so yeah I bounced over here to this side of the table what else do we wanted to discuss oh I wanted to show you how including a two hole bead in place of a single hole bead can just pop a design into a whole other dimension which I discovered with the Shalini spiral and a couple of variations the pendant here and also up top one of our kits is the chilena spiral bracelet utilizing the super duos i wanted to be sure and show you those and again the videos that go with these really break it down they take a lot of the mystery which does not take the magic away yeah it's a very unique tool that we provide here to have those those videos and we want to make it easy for you guys to kind of get started you know and and realize that it's it's not quite as hard as you think there was the end result is it great but sometimes you know it's just like no just like oh oh that's how it's done yeah and then you can start to see other designs and go oh I see how that was kind of put together and you know like I said it's kind of like geometry you just sort of go oh okay so this goes here and then that goes there and then logically I can go over here so you can kind of just create the little pieces together that way and I want to show you guys so when we call them unfinished objects or UFO's around here this is a piece that I did maybe about two years ago no joke and I never knew what to do with it but it just honestly it kind of got away from me it started this like this little center unit and then it just kept going out and out now so these are the super key ops and a little key ops there and you can also see the the T nose in there and I kind of put those tickets sandwich them together and this is just beat embroidery so it's gonna look kind of messy on the back sorry but this is what I started with and I was just like you know it just kind of kept growing and growing and then I edged it and then I had no idea what I'm gonna do with this if anything ever happen but you can also sew these down into bead embroidery which is why I wanted to bring this out and I just wanted to be totally transparent which I have no idea what this is guys I don't know am I the only person who does that maybe but here's my here's one of my UFOs that's just kind of been sitting in a drawer for awhile I'll I think you can pyramids with aliens I think there's a connection right you know this flat piece reminded me that we wanted to get back to yes what you had done there so talk a little about this so as yeah so obviously we've been talking a lot about units and creating stuff and we can get that out of camera frame so you can see again that we kind of start with that same little unit and here's what it looks like without those little dummy rounds in there so what we're going to do is just kind of go all the way around and then what I did is I did that same step up there and I kind of started to add and two more gem duis so that you can see that they kind of fit in there in that little quad right there that's heard they're designed as building blocks and so naturally they lend themselves to just fitting together like puzzle pieces yeah so I did so I added two and I went all the way around and I was like okay so I really like that but then I wanted to kind of get around to this side and I was like you know what I'm gonna do another little step up and I'm just gonna add one to the outside so you can see that I started to do it starting today this one and yeah and then you can kind of see that it starts to just create a little focal so you can go and just all the way out so this is a little example here that I did where I started with that center unit where I was just like oh that's really neat but no what do I do and then I just discovered that I just wanted to run it out to the sides so that's another kind of little thing that you can do is just kind of create a little focal and then use the stabilization of the two whole beads just to run it out so you know you imagine that this is sort of here on top there you could run these two little beads that little pattern and kind of just keep working your way out people came out and see that in a project oh alright gonna finish that you know what hey if the comments say so then I shall but yeah and so that's just kind of structurally how you can do a lot of things now if you're still doing or if you know you're still nervous about starting to do something like that may I recommend something a little bit more like this and these both have videos again but what happens here is that you can just kind of run down and run back and run down and run back and just kind of go all the way down through how to slightly slip when I saw that and I haven't seen your video nor have I done the back and forth so much I thought it was going this way and this one goes away you just kind of go so there's a you know again this is just a couple of options if you just kind of want to get started you just want some of the two whole beads and some seed beads we make it really super simple and then yes you can just go this way or you can go all the way long ways so lots of different little an option songs that fire line that is fire line yeah every time I personally I love working with the fire line but there are a lot of great options out there for for what you might want to once I work with time I know we are all good to wrap it up for today so we're gonna announce our giveaway winner here in just a moment but if you guys have any other questions if you're watching this after our official live broadcast keep those comments coming we do monitor those throughout the weekend if you have questions about specific pieces leave it in the comments and we'll connect you with the videos that are associated the opponents absolutely and we have a link above that will take you to our designing with two whole beads there's a nice product collection there so you're gonna see a lot of the projects so if you're curious about one you're not quite sure how to call it out would be like oh the one with the thingy and the thingy check that first because that project is probably right there and once you get to the project page you'll see that whole video so if you're looking there that's great so you can head over to beadaholique.com everything that you see here these have been such a joy to create that's that's what we love to do or so on and you know they're always coming out with new to whole beads and we're very excited to kind of work with them and just see how they tie together mm-hmm exactly all right so do we have our giveaway winner all right congratulations to Sharon Cote Congrats so all you need to do Sharon is leave a comment or message us at service at beadaholique.com actually that's the best way to do it send us an email service at beadaholique.com and we will get your shipping information and send this beautiful giveaway out to you so congratulations Sharon Cote and I hope I'm saying that correctly Cody Cody all right thanks so much for joining us guys and we will be back here next month we do these every first Friday of the month for our beautiful classes so if you want a topic or something that you want to see it let us know and we will maybe accommodate that all right thanks so much guys and we'll see you back here next time at beadaholique you

Customer Reviews

Based on 4 reviews Write a review

You recently viewed

Clear recently viewed