Note: Components and tools listed within this INSTRUCTIONS box and the printer-friendly PDF, if available, may have been discontinued since
this project was published. Refer to the PURCHASE COMPONENTS and TOOLS AND OTHER SUPPLIES sections for current availability.
- While making this bracelet, you may need to tie off and add new thread. If you are not familiar with how to do this, watch this video before you begin.
- You will be bead weaving the 2-hole brick beads together in a kind of cross between ladder stitch and peyote stitch. This video will show you how to weave them together.
- With about 6' of Fireline thread on your beading needle, weave the brick beads together as demonstrated in the video, creating a strip of beads three brick beads wide. Continue until this piece contains 102 total brick beads.
- Place a thin line of E6000 glue around one side of your channel bangle, just inside the lip. Leave about 3/4" with no glue. Be sure not to use too much so it doesn't seep out when you add the beads.
- Working quickly while your glue is still wet, wrap your strip of bead weaving around the bangle over the line of glue. The edge should be flush with the lip on that side of the bangle, and the ends of your weaving should be at the spot with no glue.
- Gently push the sides of the beading forward until the edges of the beginning and ending beads meet flush when you lay them against the bangle. Use your needle and thread to zip the ends together as demonstrated in the video. Tie off and weave in your threads.
- Make sure your beading is flush against the edge of the side of the bangle, and set aside (with the beaded side down so it doesn't shift) to allow the glue to dry.
- In the meantime, weave a second strip of brick beads as you did the first. Use the same procedure to attach this strip to the other side of your bangle bracelet, leaving an empty channel down the middle between the two strips. Allow the glue to set before continuing.
- Cut a piece of cup chain that is 38 links long. Run a thin line of glue down the empty center channel of your bangle. Place the cup chain into this channel, arranging the two ends to meet.
- Allow all glue to dry thoroughly before wearing.
WHAT YOU'LL NEED: (scroll down for purchase options)
- CHA-2028 - Austrian crystal Gold Plated Rhinestone Cup Chain 32PP Crystal - BY THE FT.
Project uses 9 inches. You will need 1 package.
- JB-2671 - Nunn Design Antiqued 24kt Gold Plated Round Wide Channel Bangle Bracelet - 2 3/4 Inch
Project uses 1 piece. You will need 1 package.
- BCP-10614 - CzechMates Glass 2-Hole Rectangle Brick Beads 6x3mm - Opaque Pale Jade /1 Strand
Project uses 204 pieces. You will need 5 packages.
- XTL-1054 - E6000 Industrial Strength Glue Adhesive (0.18 fl oz)
Project uses 1 tube. You will need 1 package.
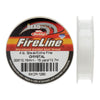
- XCR-1280 - FireLine Braided Beading Thread, 4lb Test and 0.005 Thick, 15 Yards, Crystal Clear
Project uses 1 spool. You will need 1 package.
RECOMMENDED TOOLS:- XTL-3006 - Beadsmith English Beading Needles Size 12 (4 Needles)
- XTL-5700 - Fiskars 5 Precision Tip Scissors - Super Sharp
- XTL-5600 - Xuron Sharp Flush Cutter Pliers - Wire/Soft Flex
- XTL-3001 - Mini Bead Stopper Tool- Stop Spills/Hold Beads In Place (x8)


 Earn Reward Points with your purchase of project components or tools.

