Audio Transcript
Note: This audio transcript is auto-generated and may not be completely accurate.
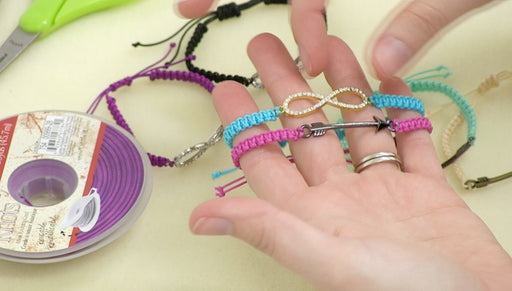
Hi this is Megan with Beadaholique.com and today I'm going to show you how to make a beaded macrame wrap bracelet and this is the version with the beads on the inside. So these are two of our exclusive kits and there is another version with the beads running along the outside. So make sure that you are watching the right video for the kit that you have and the materials that come in your kit are a tube of size 6/0 seed beads, a spool of waxed linen cord and a button. So you've got a couple of different options here and you're going to be able to make however many wraps you want on that bracelet. So here's an example with two wraps I'm gonna show you just one wrap for the purposes of a demonstration so some other things that you're going to need is a pair of scissors and a ruler and you're going to need some way affix your work to your work surface. You can either use a macrame board it's a really handy tool or you can use a clip board or you can just simply tape your work down to your work surface as long as you've got a work surface that you're not worried about damaging go ahead and use a tape that's not going to leave any sticky residue on your piece because you're gonna tape right across that at some point so I'm just using masking tape. So the first thing we need to do is figure how long our cord needs to be what you're going to do is decide your desired the wrist measurement. You can either use a standard size like seven or eight inch for a woman or you can measure your wrist add about half an inch I'm going to just do mine for seven inches. Then what you're you're going to do is multiply that measurement by the number of wraps that you want I'm just doing a single wrap, so that means that I want my bracelet to be seven inches and then you will subtract one-inch for the clasp which means that the number I'm going to work with is six inches if I was gonna do the double wrap I would be doing seven inches times two wraps is 14 minus 1 inch for the clasp which is 13 inches would be my number but for the single like I said we're going to work with six inches so you're going to cut two pieces of waxed linen cord going to cut one piece that is ten times your measurement. For my six inch bracelet I'm gonna cut sixty inches which is 5 feet 2, 3, 4, 5 and you're going to cut another piece that is four times your measurement plus a foot so four times six is 24 which is two feet and then I want one more foot now we're going to take your longer cord you're going to string it through the button. If you have a button with a shank you can just slide it right through if you have a button with a holes you just work it up through one and down through the other one. I like to have it the finish bracelet you'll notice the button kinda has a cup-shape I like that facing up so I'm going to hold it up when I thread my cords through. If you want it facing down just hold it the other way. Bring your ends even so that you have the center of the cord at the button. Then you're going to take the shorter cords, string one end through each hole of the button and do the exactly the same thing so you want the center of both cords at the button and then you want all four of the cord ends coming down separate the longer cords and get them to either side of the shorter cords and hold that straight in a line so it doesn't have any twist in it first a few inches. Then we're going to make an overhand knot by putting a cord into a loop pulling the button through the loop. You want to tighten that knot and pull it down so that it's about half an inch from the button Now we need to secure our work to our surface so I'm just going to use a whole mess of tape when you're taping if you use tape be very careful, you don't want your tape to come below the surface of the end of that knot there because that's where we're going to have our knotting so I've got my tape going just to the edge of the knot but not passed it try to make it as secure as you can. Now I want to separate our cords. You want to have the longer cords on the outside with the shorter cords to the center and make sure that they don't have any twists now hold the center two cords together with the waxed linen you can actually get them to stick together You're going use them pretty much as one through most of the knotting on this bracelet stick them together and leave them right now we're going to make macrame square knots to do that you take your left outside cord you take it underneath the center cords then you take the right outside cord bring it underneath that cord that you just had over the center cords and through the loop on the left bring it down to that loop and grab both of the outside cords and pull to tighten and you do want to also pull your center cords down. You don't want them to get twisted or get bunched up pull that up all the way to the knot, that's half of a square knot next your gonna take your left cord go over the center cords, then you take the right cord go over that, under the center cords and up through the loop pull that tight that is one square knot. It's important to alternate when you start taking your left cord under and over if you just keep doing your knots the same way they're going to twist and that's a different kind of knotting you want nice square knots that sit flat. You need to alternate so we're going to now make one more square knot take the cord under the center, the right cord under that, over the center and down through the loop and finished that square knot play by taking the left cord over the center take the right cord over that, under the center up through the loop Now we're going to add our first bead so take one of the seed beads, holding your center cords together slide the bead onto both cords and slide it up until it sits just below the last knot. Now we're going to make two more square knots take the left cord under, right cord under over, through and you want to pull that nice and snug so that the cords sit flat to the sides of your bead. We're going to finish that square knot over, over, under, through one more square knot here, under under, over and through over over, under and through we're going to add another bead and slide it up under the knot. You're going to keep adding one bead and then making two square knots, so under, under, over and through over over, under and through and I'll make one more square knot here. Under, under, over and through and over, over, under and through. So just continue adding a bead and two square knots until you've reached your desired length so I'll keep doing that until I have six inches When you have you're knotting completed you wanna go ahead and move your work up the table because now you're gonna be working at the end If you're doing two or three wraps you'll probably gonna need to do this as you work anyway. So go ahead and and tape it, scoot it up and tape it back down and like I said you wanna make sure you're using masking tape, painters tape or something that's not gonna damage your bracelet if you're using tape you can also use a macrame board, a clip board you can even sometimes if you're careful you can pin it to your pant leg. There's lots of a little tricks for that so whatever you find easiest okay another reason that we cut an extra foot right on our center cords were so that we would have a decent amount of cord leftover when you're done with your knotting. So you should have about a foot on both of your center cords, Split your center cords and now you have your two left cords and two right cords. Take the left cords put them to the side we're gonna work with just the right cords for now. What we're going to do is use the center right cord to tie an half hitch knot onto the outer right cord tie an half hitch knot. It's very simple. We're gonna now call this the left cord and that right cord. Take the left cord and lay it over the right cord with a bend so that it makes a number four then you're just going to take the tail and bring it up through that loop pull it up until it's snug. I'm going to continue and make a whole strand of these knots bring it over and then bring the tail up through you want to pull these nice and snug so that you don't have a lot of extra wasted cord in this part because the looser you leave it the more the more of this cord you're going to use up. These knots do tend to twist around, spiral around the good thing about the waxed linen cord is it's pretty moldable so you can just pull it straight, if it starts getting twisted just straighten it back out. You're going to continue until your half hitch knotted piece measures about an inch and a half and as it spirals around just straighten the knot out you can also kinda stretch it a little bit. You want to make sure you don't see gaps in your cords there but as long as you don't see gaps you'll get a little more out of it by pulling on it gently You want to measure from the very end of you're knotting do the end of the half hitch knots and you want about one and a half inches. You have that go ahead and take your work off of your table. We're going to fold that piece back. Right now your just going to use your thumbnail to hold that down nice and tight take the button and make sure that that fits if you think you need to add another knot or two go ahead and do that otherwise if you're good you're going to lay down those cords of those half hitch knotted pieces parallel with the bracelet take the other two cords and bring them around from the back to the front tie a surgeon's knot in these cords and it's gonna cover over these and kind of clamp them down. Now surgeons knot is just like a regular basic knot. In a regular knot you take your cord, bring it around through the loop. On a surgeon's knot take that through one more time, bring that right to the base of those other cords and you wanna pull it really snug. Then we're going to take our other tails here wrap them around all the way bring them back to this side. You wanna keep the knots on one side so have one side that's cleaner it can be the front. Now we're going to make a surgeon's knot in these two cords. Again just bring your cord around and through the loop one more time and then tighten that surgeons knot the waxed linen is pretty sticky and it's pretty moldable it will stick to itself and kind of glue those knots in so you don't really need to use glue all you do is trim the tails off about a sixteenth of an inch away do it on both sides and then you'll just use your fingers to squish the tails in and you can see with that waxy finish just squishes right in and you don't see it and then you have a nice clean wax side on the other side slide the button into the loop and you're all done. Go to www.beadaholique.com to purchase beading supplies and to get design ideas!