Instructions for Making the Beaded Kumihimo Wrap Bracelet Kit

SKU VID-0988
Designer: Julie Bean
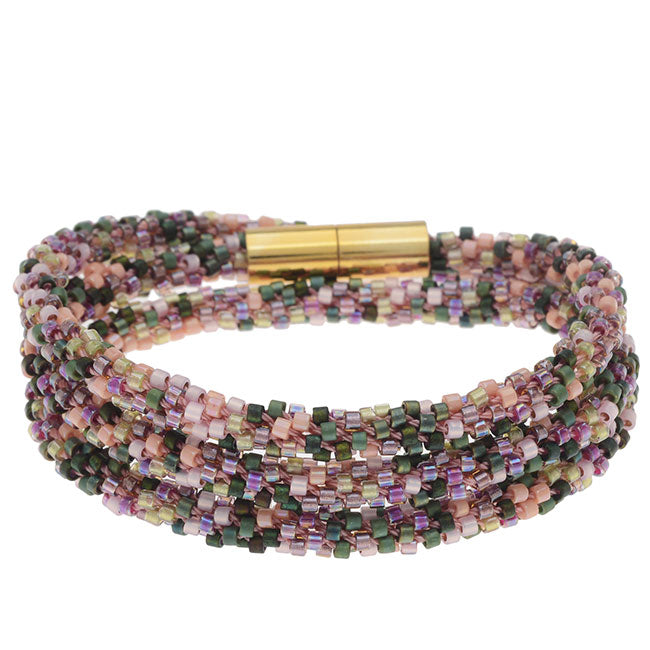
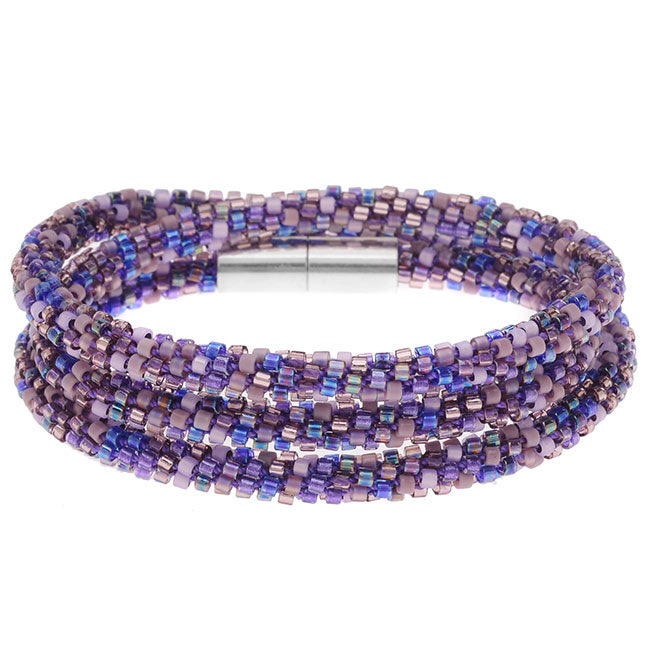
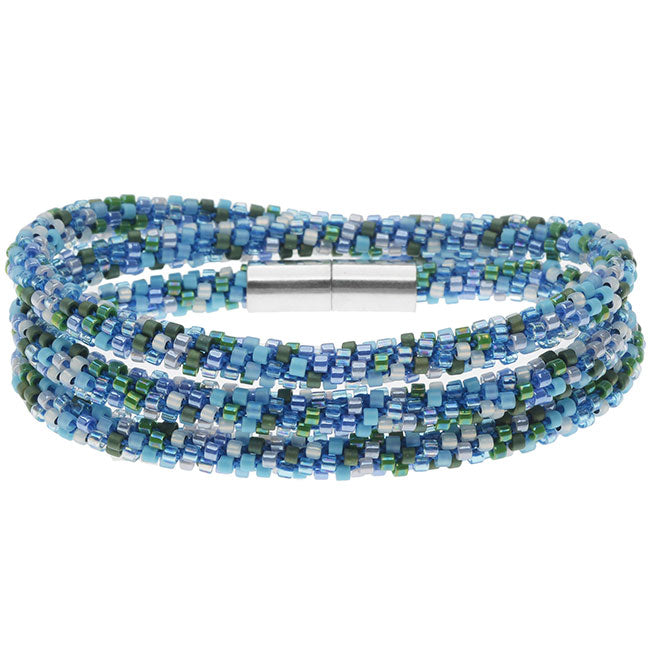
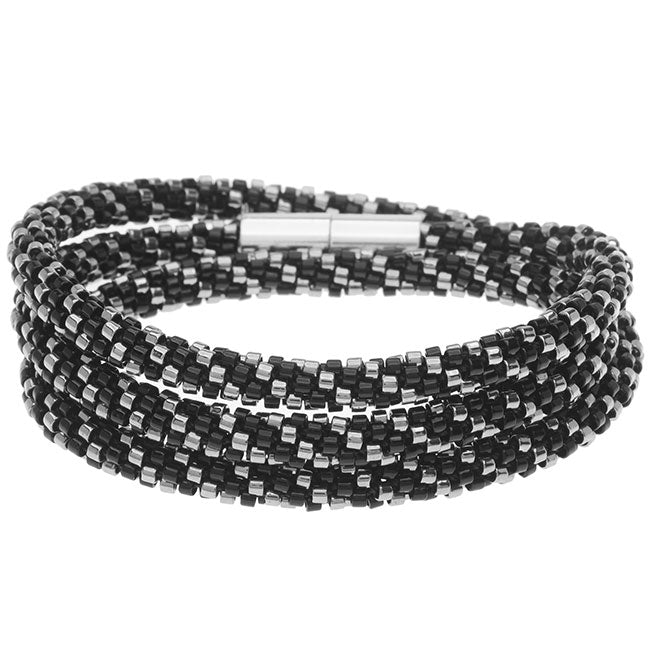
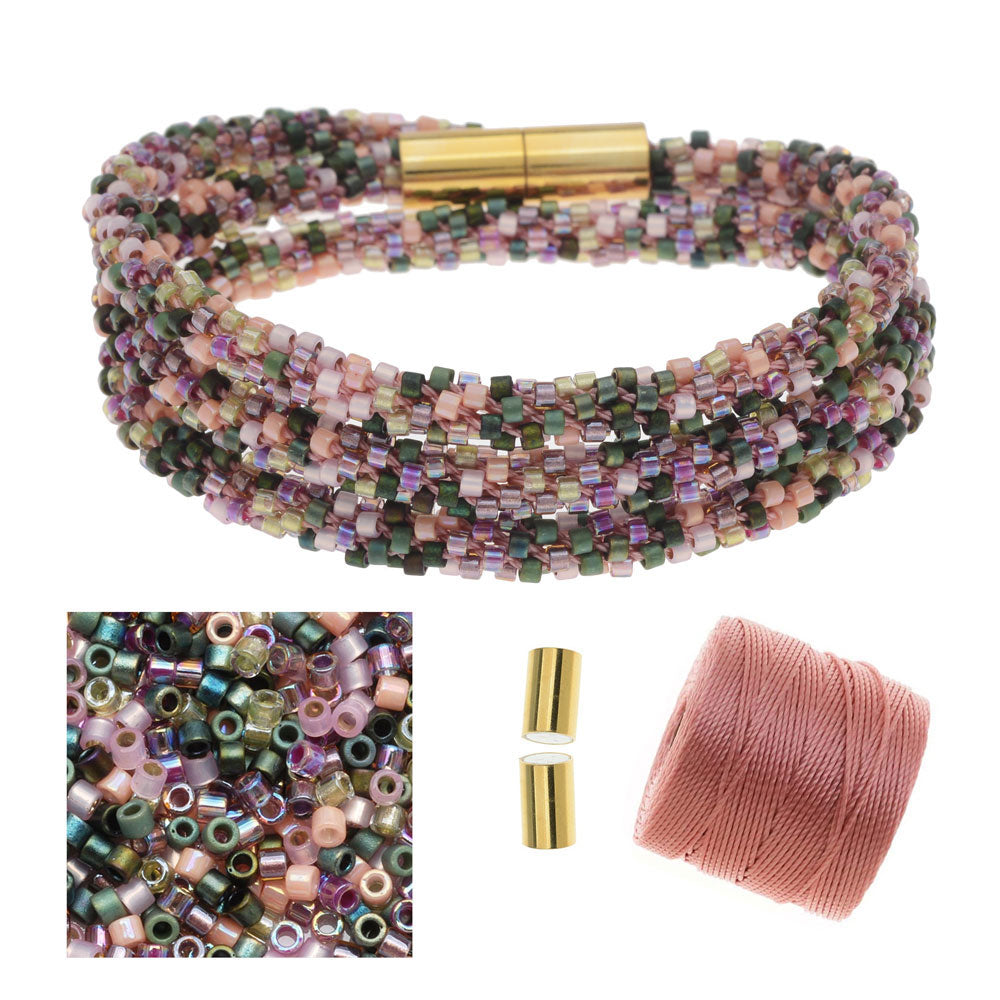
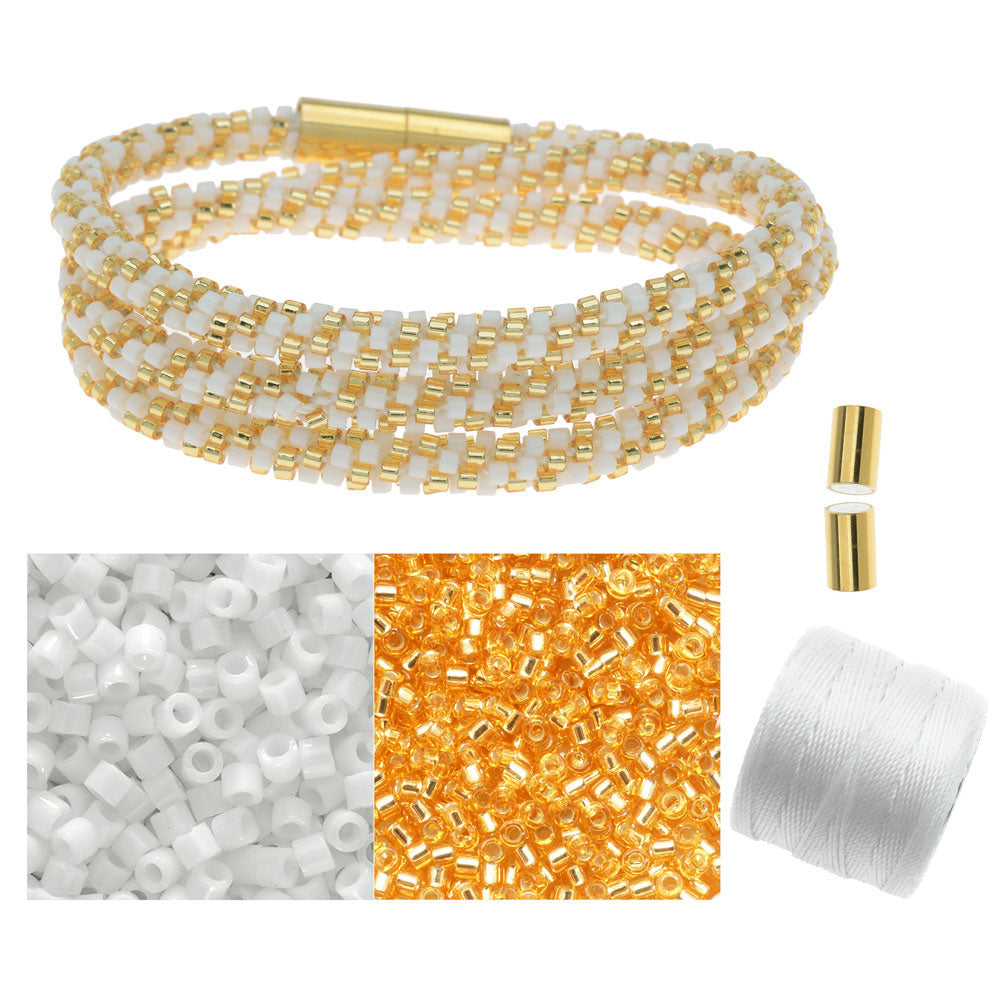
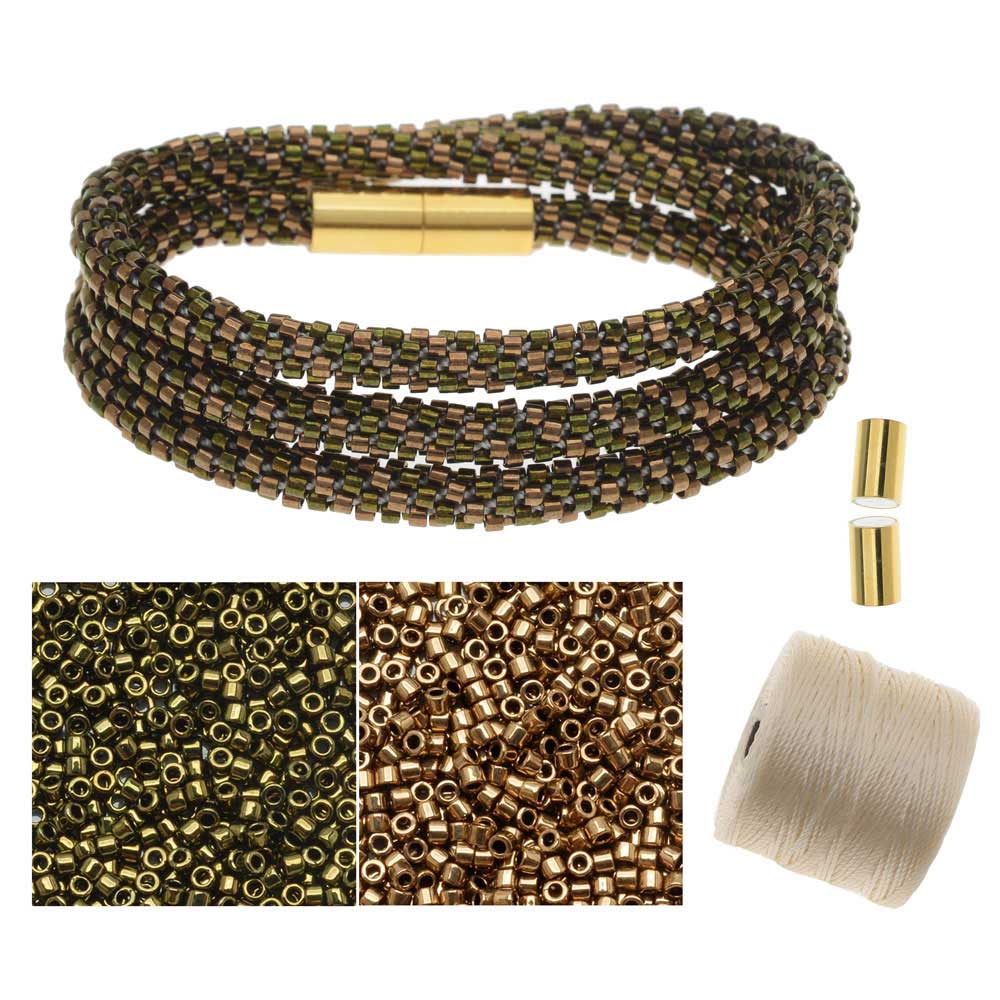
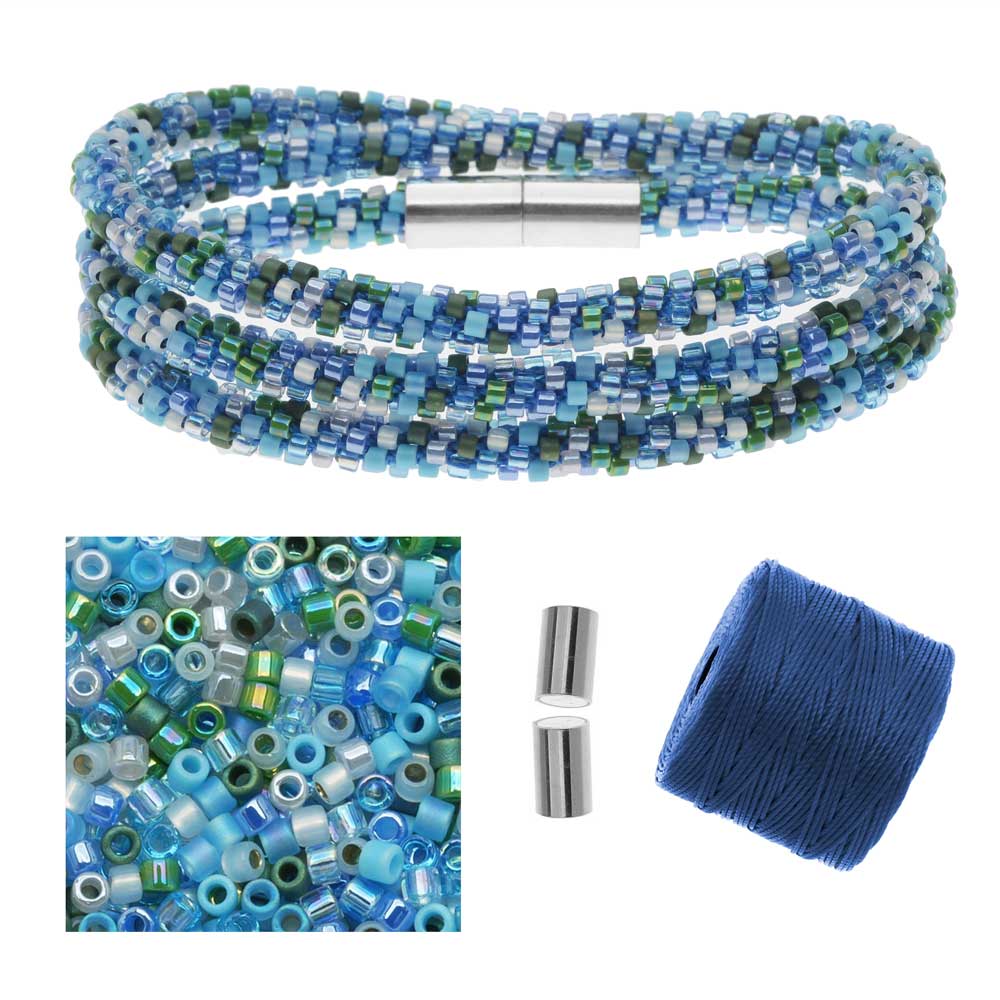
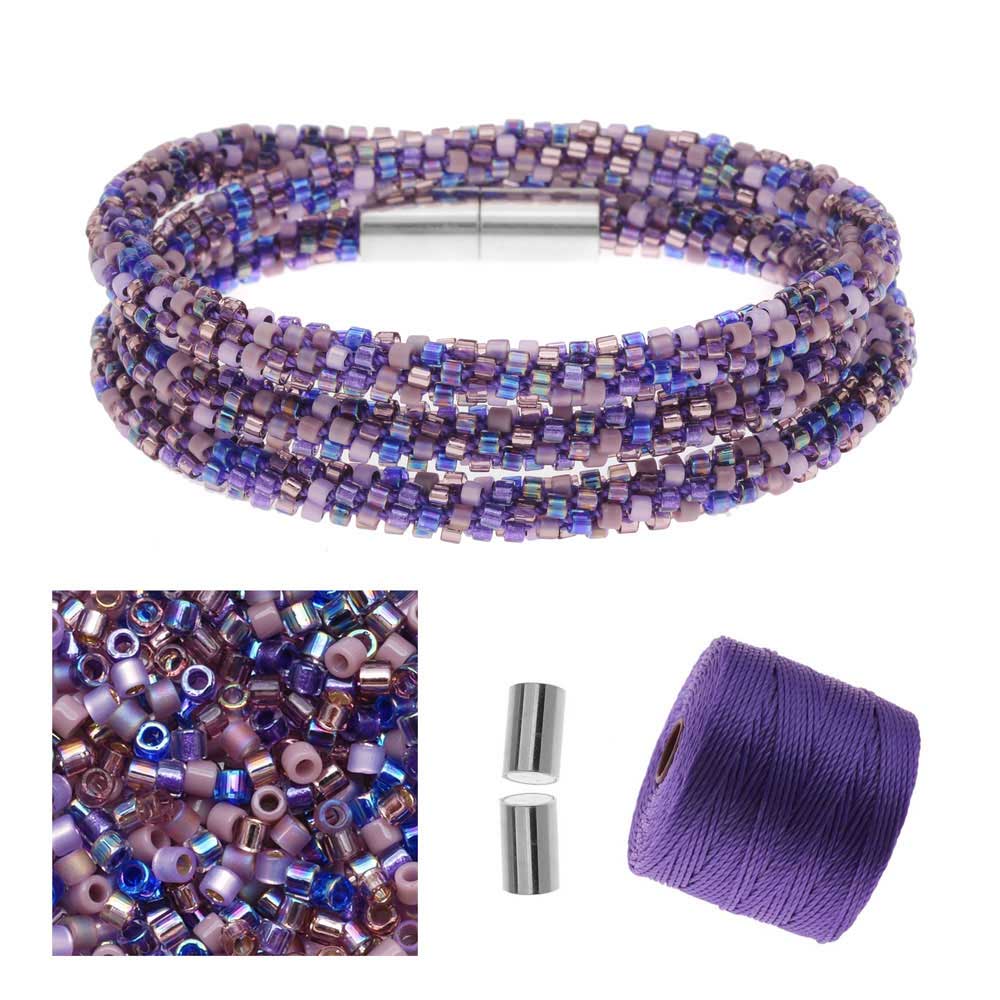
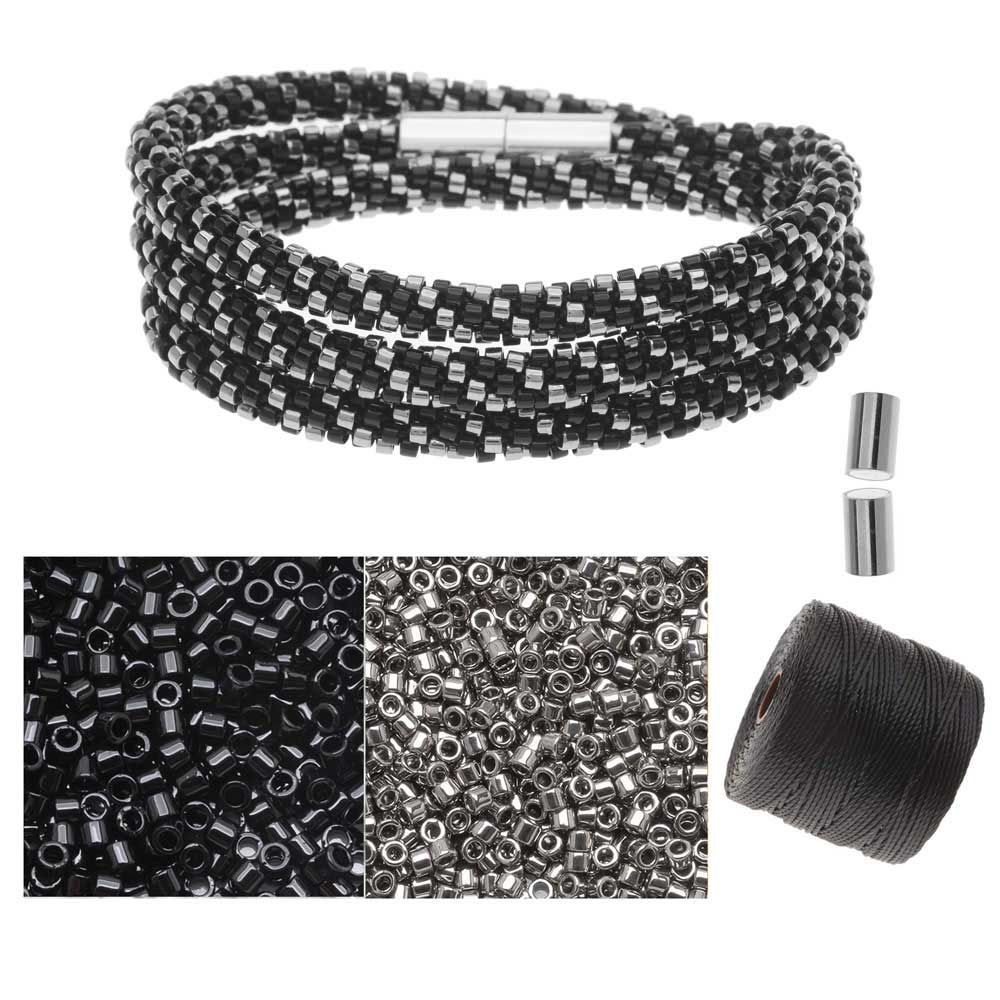
[2023 Update: Please note that we have increased the number of beads provided in this kit. After you have braided all the initial beads that you loaded onto your bobbin, please test wrap your bracelet around your wrist. If you want a longer braid, simple load more beads onto your bobbins and continue braiding until you reach your desired length.] In this video, you will learn how to make the Beaded Kumihimo Wrap Bracelet Kit. In this exclusive Beadaholique kit you will receive all the components needed to make a gorgeous braided triple wrap bracelet adorned with beads. This video shows you how to create a spiral pattern with your beads, which you can choose to do or leave them random. The kit includes not only the beads, cord, glue, and clasp, but the actual kumihimo disk and bobbins too. Refill kits are available as well. View our entire selection of jewelry making kits.
Audio Transcript
Note: This audio transcript is auto-generated and may not be completely accurate.
Hi, this is Julie with beadaholique.com beadaholique.com there's two different styles there is the striped version and then the multicolor you can see they come in a variety of colors now the striped version and the multicolor use the exact same technique which I'm going to teach you here just with the stripe you pay more attention to where you place your threads on the disc so when you purchase a kit from beadaholique.com we provide you with all the supplies you need to make the project in this case you're going to get some s long cord and get a whole spool of it to full tubes of my yuki seed beads now these are size 10 o a clasp we're going to be using a sleek magnetic tube clasp with an insert that you can put your Kumi braid into so it's got a nice well and then some e6000 glue to glue your braid into that well now with the Kumi kits we also give you the disc as well as eight bobbins so we really do try to give you everything you need to make these projects now in terms of the other supplies you're going to need most of them are just household items you're going to need a pair of scissors a little scrap of paper or a post a note some type of applicator for your glue some tape and then a kumihimo weight now this is an actual Kumi weight and it's going to help with your thread tension and your braiding if you don't have one of these at home you can make one using a binder clip and the little bag of pennies or some other little heavyweight to attach to the binder clip so let me show you how to make this kit kumihimo is a really fun technique it's actually quite addictive I find so I'm going to clear these away actually real quick I do want to show you how this looks just on because it's a really pretty design it is a triple wrap bracelet and that's how it looks when you wear it so let's go ahead and make one we're going to begin by cutting eight lengths of our cord and they need to be 5 feet long each so I have a ruler here so they're going to be five feet and five feet each will equal an approximately 22 inch beaded braid so you'll have a bit extra because you always want a little bit extra you don't want to have a situation where you run out of your cord so one two three four and five so there's five feet and you need eight of these so what I like to do is I just then use my first cut piece as a measuring tool for all the remainders line up the ends and slip we finish cutting our cord so we have 8 equal links and this is how much of the actual spool that is left so you can use this for another project there's quite a bit left over so it's time to go ahead and put the beads onto our cord and wind them onto our bobbin so the way the bobbins work is you pop them open by pressing in their Center and then they open up and you're going to wind your cord and beads into the center and then pop it closed now whenever I'm working with a thinner cord like s LAN as opposed to satin rattail which is much thicker and especially when I'm going to be using beads I like to tape the end of my cord into the middle of the bobbin just to hold it in place so I'm going to do that right now just a little piece of tape put on the end pop open the bobbin and just secure it in place just a little added measure of security that will help later and you know it doesn't always pull out with your beads but just when it does it's very frustrating so I like to do that to start with now you have two tubes of beads and we need to string these onto the eight cords so four cords with this pretty bronze color and four chords with the green and start with the bronze and you want approximately equal amount of beads on every chord now a really easy way to do this because we're not going to count all these beads I like to make a pile like so and eyeball the halfway mark and divide it into two piles those look pretty even and then I like to take those and divide them in half as well that looks pretty good this guy here looks like he has a few more than he needs just going to scoot that over that looks good to me so I've got my four piles now what's nice is because these are my yuki beads and they're a size 10 oh their holes are quite large so we don't need a needle to be placed onto our cord so we're just going to actually and it might be easier to see this on my hand because I know this is a light colored cord on this white cloth but I'm just going to be picking up the beads like so and then scoot them down and I'm going to do this whole pile onto this one strand if you have a big eye needle at home you can definitely use that for this project as well but not needed you can see our strand of beads is actually quite long which is nice because we are going to be making a triple wrap bracelet so what you want to do is slide most of your beads down towards the base of your bobbin you can start winding your thread on your bobbin and then wind it with the beads as well but you do want to leave a good four or five inches of beads outside of the bobbin as well and then also a bit of the actual cord itself that doesn't have beads on it so then snap your bobbin shut and you can see that the bobbin itself is preventing the cord from continuing to slide if you do find that your cord slides you can put a little extra piece of tape right here which we'll see if we want to do that later in the project but this is what we've got and you'll want to do all eight bobbins in the same way so for with the pretty bronze bead and then for with the green beads and then we'll be ready to line up the threads on our disc and start our braiding once you have all your bobbins loaded with beads and thread you're going to take the ends and line them up so all eight of them and we're going to tie an overhand knot with the ends so just gathering them all together and tie an overhand knot you want to tie it fairly close to the ends maybe an inch or so away from the end take this knot thread it through the middle of your kumihimo disk and at this point is when the kumihimo weight comes into play we're going to actually just go ahead clip the weight or if you're using a binder clip onto the knot now we're going to line up our threads on the disc so you'll notice the disc has a series of numbers from 1 all the way around to 32 and it's got these little notches in the disc and this got four dots so when you're holding a kumihimo disk you want the 32 to be up top and the 16 closest to you and what we're going to do is we're going to create a striped pattern so we want matching colors at the 32 and 16 and then matching colors at the 8 and the 24 and that's going to create the stripe now if you're doing one of just the multicolor designs like this is not going to matter which strands are by which number so it's only if you're doing the stripe so here we've got a green one so I'm going to put this to the left of the 32 then we have another green one so this is going to go to the right of the 32 then we have let's see here's another green one so we want this one down by the 16 and now we got a pretty bronze color one coming up I'm going to put that over by the eight let's see kind of just work these out as you go so here's another pretty bronze just going to go over to the other side of the eight here's our last green it's going to go down to the other side of the sixteen and then the two remaining bronzes are over by the 24 and you'll notice that there are no beads on the top here the beads are just hanging below so at this point pull your threads so that the knot with the kumihimo weight is in the center and then you'll see what we have here we have all of our bobbins hanging below now these are a little bit long a couple of them so I'm just going to wind them up a little bit and you have the really long ones so now we're ready to start braiding and the way we're going to do this is we're going to begin by pulling the cord out of the knotch to the left side of the 16 and pulling it up top to the left of the 31 so you have the three threads together up here and now we're going to go to the right side so the thread this to the right of the 32 we're going to pull down to the right of the 15 so left up right down and then rotate counterclockwise one rotation two you end up with your next set of two threads so on here we're going to pull the left thread out of that notch to the left of the 24 and pull it up to the left of the seven and then we'll go to the right side and pull the right one that's to the right of the eight down to the right of the 23 rotate again counterclockwise so left up to the left and right down to the right and rotate and what you're going to end up doing is you're going to stop really paying attention to these numbers you're just going to remember that you take the left one and go up to the left so left of your cords are up top and the right one down to the right and rotate if you ever need to pause pull the left one up and leave it like so you can now put it down walk away for an hour a day a week whatever it may be and when you come back and look at your disc you'll always know that where the three threads are up top that's where you left off and you need to pull that right one down and then rotate and continue as normal so right now we are actually creating the braid and we're doing it without beads so this is a non beaded standard eight warp kumihimo braid so left up right down and you want to do this for about 3/4 of an inch of braiding without beads and at that point we're going to add beads but it's really important to have that non braided portion because that's what we're going to put into our clasp left up right down rotate you just need to remember that left up right down rotate and it becomes very zen-like it's a really peaceful process so just keep braiding until you have that 3/4 of an inch without any beads I'm going to say we're ready to start adding our beads so since I've paused my three strands wrap top I'm going to show you what we have so far this is our braid and you can see is a really tight braid and that's really because as Kumi weight is helping with the tension of the threads so now we want to add beads so I'm going to take the left I'm sorry the right thread and pull it down and then on the next sequence I'm going to start with beads when you want to add a bead there's no change in the actual technique the difference is you take a bead from your length of beads you slide one up and you let it slide down into the well and you catch it under the nearest thread bridge just like so and then you just continue pulling your left thread up to the original slot you were going to put it in anyways if you had not added a beat so same thing with the next thread we're just going to slide one bead down let it fall into that well make sure it catches under the nearest thread and you pull that right thread to its original destination and then rotate you just keep repeating this so same thing we're going to take that one bead let's slide down you really do often times need to guide it under that thread bridge so left up to left let me pull it to where it should be from the start slide down another bead rotate and we keep doing this and you're going to want to be doing this until you've braided for this particular project about 22 and a half inches of beaded kumihimo so not including the non beaded portion and that's going to give you a nice length for a triple wrap bracelet I'm going to do this a little bit on camera because I want you to be able to see the spiral start to materialize so I'm I probably do a good half an inch or so and the rest I'll do off camera because it does take a little bit of time it's really fun and enjoyable it's something you can do as you're just relaxing or you're talking with friends which is a really nice aspect of kumihimo I am just slipping that bead under making sure it catches and then placing my thread where it should go so you do want to keep your threads nice and tight that's going to help it so that is one an even braid but also help you with the catching of the bead under the thread bridge okay I'm going to pause on this one and see what we've got up there you can see our stripe starting to show and the beadwork is coming along nicely if you had missed a bead where it didn't catch under the thread bridge you'd probably see a little hole where the bead should be so just do make sure that your beads catch and then the goal is to have a nice long length of spiral beadwork so I'm going to do this off camera and then I'll come back when I have just a few more beads to place and then I'll show you how to do the rest of the non beaded portion at the other end and how to attach the clasp and then your bracelet will be finished I pretty much finished the beaded portion of my bracelet I want to show you a couple quick things so the way to tell how long you want this to be is you can just take your length of beadwork and wrap it around your wrist a couple times and get a good tension and see how long you want it to be now I braided about 22 and a half inches of beaded kumihimo which is going to equal a little over a seven inch triple wrap bracelet but you can also see I do still have a lot of beads left so I could definitely make it longer as well but since I'm happy with how long I have it I'm going to take this last little bead slip it under that thread bridge carry it to where it needs to go rotate it and now I need to create another non beaded braid portion which is going to allow me to attach my clasp so I'm not going to worry about these beads here I'm just go let them be but I'm going to continue doing the braiding just the way I had started without beads so even though those beads are still there I'm just not paying any attention to them I'm not slipping them down I'm just braiding as normal without beads and I'm going to create about a three-quarter inch length without beads now that we finished our braiding we need to remove all the strands from our disk and we need to finish our chord ends and attach our clasp now the easiest way I find to do this is to take your weight whether it's a homemade one or the one that's specifically for kumihimo braiding and take it off your tail and then you're going to grab the top part of your braid and place your clip or your weight right there and that's going to secure it from unraveling when you do this and we're going to pull off all our strands and we're going to just cut them at this point those can be set aside and used for another project the bobbins here is our bracelet in progress and now we need to attach the magnetic clasp a quick tip whenever you're using magnetic clasp always separate it to glue in place because if you were to glue it attached like this when you put glue in here whoops you put glue in here and you put glue in there the glue could potentially seep through and actually glue your clasp shut so always separate it out and for this we're going to need a little scrap piece of paper or some type of applicator our glue and we're going to need two more links of our cord about 12 inches long each and because this is a little bit of a lighter cord I'm going to pull over a little darker swatch of fabric here because I want you to be able to really see what I'm doing so we've got our class path and got our strand now you'll notice that the well the diameter of the well of the clasp is actually quite a bit thicker than the diameter of our non beaded braid and we want to bulk that up so that when we glue it in place it really has something to grab onto to bulk it up one really easy way to go about this is to take an extra strand of your cord and tie it around that braid so you can tie a couple knots like so we're just trying to bulk up that area so then you can go around it and under it you want to be pretty close up to the beaded portion could wrap it around a few times you want to pull pretty tight okay so this is what we have now you can see that we've added some extra width right there okay so then you're going to take your glue if it's an unopened bottle the way to open it is there's a little pointed object here on the inside of the cap you just turn it upside down press is going to break through that seal the glue is going to come out the top put the glue on your post-it and replace the cap and then for this we're going to cut off our little extra thread here and we're also going to cut through our braid and below the area that we've knot it and actually I can take off the weight at this time take your glue put it on the inside of your clasp and be pretty generous because you not only want to get the sides but you do want to get the base a little bit too you want to get around all the sides because you really do want to make sure that you're not just gluing to that extra knotted area but you're also gluing to the braid so take your braid end when we do it over this darker fabric so you can see a little bit better and I find if you just twist goes in very easily and just keep pushing and if a few beads go in great looks really nice and finished so now we're going to go do the exact same thing on the other side okay we've bulk that up nicely so now we're going to trim it and we need glue and trim our braids and you just kind of eyeball it make sure you're not trimming it too long here whoops is magnetic again be really quite generous with that glue in there there's a very strong glue but you do want to make sure it touches as much as it can there we go we're going to put this in here and again we're going to twist it just tuck it in and twist and there we go and we have completed our bracelet and I'm going to let that dry overnight before I wear it but just to show you again a finished piece I'll put it on my wrist I'm a magnetic clasp is really easy to work with but that is what it looks like done again this is the kumihimo wrap bracelet kit which is an exclusive kit from beadaholique.com you

You recently viewed

Clear recently viewed