
|
The Beadsmith Kumihimo Braiding Kit For Beginners - Easy To Learn! SKU: XTL-6107 $37.99 |

|
The Beadsmith No Tangle Flexible Plastic Thread Bobbins For Kumihimo Or Macrame 1 7/8 Inch (8 Pack) SKU: XTL-6103 $4.99 |

|
The Beadsmith Silver Plated Bullet Findings Kit For Kumihimo Braids - Fits 8mm Cord SKU: FCL-4880 $6.25 |

|
The Beadsmith Digital Caliper - Measures Inner/Outer Diameters In Inches/Millimeters SKU: XTL-9030 $23.99 |

|
E6000 Industrial Strength Glue Adhesive (3.7 Oz) SKU: XTL-1050 $12.99 |

|
Beadalon Large Beading Mats - Prevent Bead Rolling 13 X 18 Inch (Set of 2) SKU: XTL-9935 $6.75 |

|
Fiskars 5 Precision Tip Scissors - Super Sharp SKU: XTL-5700 $7.45 |

|
The Beadsmith Satin Rattail Braiding Cord 1mm Lilac Purple Mix 4 Colors - 3 Yds Each SKU: XCR-3003 $7.99 |

|
Toho Round Seed Beads 6/0 267 'Crystal/Rose Gold Lined' 8 Gram Tube SKU: JSF-0089 $2.55 |
Related Videos

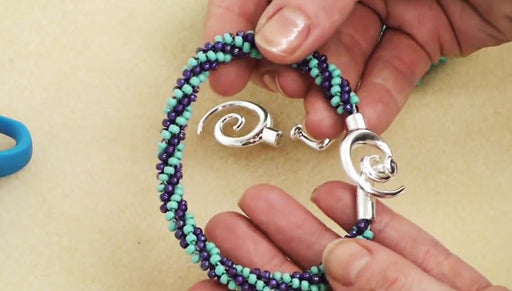
How to Braid Beaded Kumihimo and Make a Bracelet
In this video, see how to add beads to your Kumihimo braid. You will 'pre-load' your bobbins with beads and add them into the weave as you go. Very...
View full details
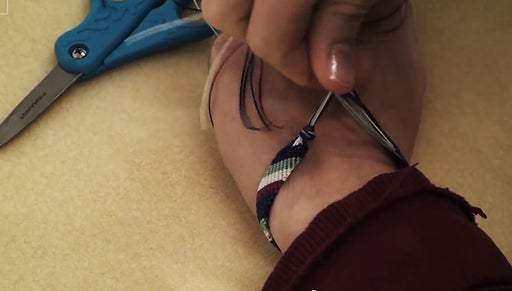
How to Make a Friendship Bracelet
Learn how to make a basic striped friendship bracelet out of nylon cord in this video. A super trendy, simple project that's easy to learn.
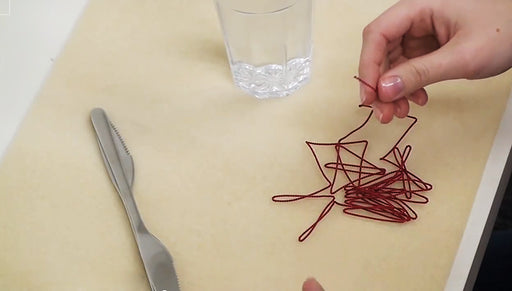
How to Stretch Silk Cord for Use in Jewelry Making
Store Closing, Limited Stock
In this video, learn how to properly prepare silk cord for use in jewelry making by stretching it. This process will also remove the kinks in the c...
View full details