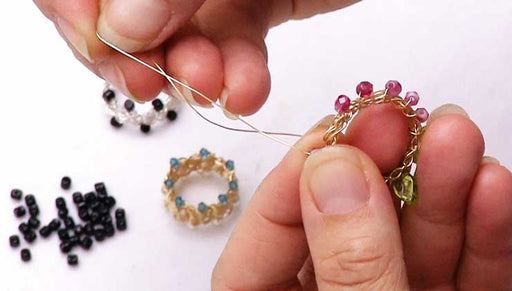
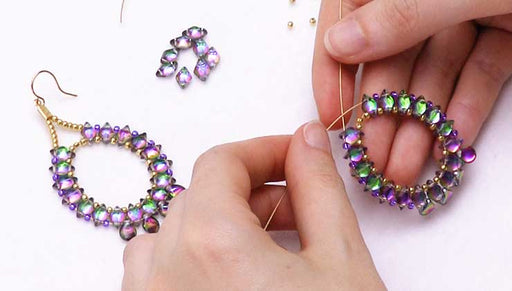
How to Make the Hodge Podge Honeycomb Bead Earring

SKU VID-1302
Designer: Julie Bean
In this how to video, learn how to make the Hodge Podge Honeycomb Bead earrings featuring 2-Hole honeycomb beads wired together in a geometrical pattern. Also learn how to make wrapped wire loops and suspend the honeycomb focals from chains and a pretty earring hook.
Audio Transcript
Note: This audio transcript is auto-generated and may not be completely accurate.
Hi, this is Julie with beadaholique.com i comb earring so this is what you see here and it features two whole honeycomb beads if i pick one up you'll see that they have two parallel holes and they are a hexagon shape that measures six millimeters and this particular collection that i'm drawing from it's a hodge podge collection which features these wonderful swirls of blue orange and seafoam colored glass so a bunch of different shades of it and different patterns of those swirls so really fun for this particular earring you're going to need two different colors of honeycomb beads you're going to need to cut lengths of chain these measure about 30 millimeters so just a little over an inch you're going to need some jump rings and earrings hooks I love this earring hook really fun nice design to it very modern and you're going to need a couple Cup links about five inches each of 24 gauge gold craft wire now for your tools you'll need two pairs of chain nose pliers to be able to open and close those jump rings a pair of cutters and I'm going to be using a wire looping plier a round nose plier would work as well let's go ahead and begin and the first thing we're going to do is I'm going to teach you how to make a wrapped wire loop at the end of a piece of cut wire so this is something that you'll be able to use in your other jewelry making projects too so starting about an inch down from the end I'm just going to place the wire between the two noses of my pliers and I'm going to squeeze and you see that that's already starting to form a nice bend in my wire I'm going to go ahead take that short end and wrap it around the round part of the nose and then rotate my pliers up towards the top and continue so I've made a nice full loop now I want to make a wrapped wire loop so I'm just going to use my finger and using my hands I'm going to wrap that wire around several times the nice wraps pull it off trim the tail and then go ahead and tuck in any rough wire parts so we have a very nice wrapped wire loop we're going to do that with the other piece of wire as well so I love the wire looping pliers if you've seen our other videos you'll see that we use them quite a bit because what's nice is I'm able to really grip the floor I'm able to hold on to it while I'm doing my wrappings which is such a handy aspect of this plier to have that good solid grip okay so we've got those two ready to go they're prepped and primed and we're going to start by putting onto one of them five honeycomb beads okay and you'll notice if they're just on here they do kind of naturally end up doing this kind of um Oh jagged appearance so they kind of fit together which is nice so that's what you really want you don't want them all like this where you would have the gaps where you see the exposed wire you really do want them to do this alternating honeycomb effect so you can scoot them down towards the end and now we're going to make a wrapped wire loop on the other end so make sure they're all nice and tight together and pressed up against your wrap wire loop and now we're just going to take our pliers we're going to make a wrapped wire loop on this side right where the wire exits the bead and the more wraps you do the tighter this becomes and if you want it to actually be pretty stiff because you don't want these flopping around so you might be making two wraps you might be making three and try to make it so that your loops are facing the same direction that feels good to me I'm going to trim it and again I'm going to tuck in my tail okay we got that part done now with the next one got our piece here we're going to thread it through the first honeycomb and now we have to slip in one of our alternating colors of honeycomb so here's this one and you see those two holes right there okay so it's going to go through it and need to go through the honeycomb next to it and this could be a little bit tricky because you are using a 24 gauge wire which is not the stiffest wire in the world so you have to just kind of work with it until it pokes through that honeycomb next to it if you don't have a big gap to kind of look and see there we go and we want to do that again so pull it X is hiding in the bead slip this guy down where you want him make sure it goes through his hole - it was just a little fiddling with it there we go good calling okay and then once you've got it through that honeycomb you need it to go through the last one so just keep fiddling with it till it does it once you've got it through you can take it can be a little tight at this point so you go ahead and you can take your chain nose and just pull it through there we go and now we need to make another wrapped wire loop this is the only tricky loop that you're going to encounter because if you just pull this off to the side and try to wrap it around you're going to end up with this guy in the way so just go ahead and work it so that it goes between the two loops and again do as many as you need or as few as you need to make sure that this is a nice tight panel there we go okay you've got your loops facing the same direction and now we're going to go ahead and just connect these with a jump ring you really don't need to for structural purposes but I think it looks a little bit better to not just have those loops hanging out there so you're going to open a jump ring by grabbing up on either side of the open slip and then just twisting put it into the loop and close it make sure it's a good nice type clothes and pick up another jump ring and do the same on the other side and another jump ring so what we're going to do with this jump ring we're going to connect it to the top lips that's the bottom of the earring the top loop as well as one of your cut lengths of chain and you want to go to the end chain link close it on up go to the other side do the exact same thing you can put your chain on there first if that's easier for you link it on to that loop close it on up ok so we are ready for our last jump ring and our earring hook and we're going to connect them all together so what I like to do is I just like to grab that little last link walk it over to the other side you've got that put on the earring hook close it on it and you've got your earring so that wasn't very hard to do and it's a really fun geometric shape so it's very graphically interesting and we have so many colors of these honeycomb beads and so many different chains you can really play around with this design end up with quite a lot of variations to it you can even add more rows to of the honeycomb beads if you wanted to it using the same exact technique that we did to secure these first two rows together if you liked this video please subscribe to our You Tube channel and also check out our website beadaholique.com you

You recently viewed

Clear recently viewed