Alternative Uses for the Create Recklessly Tool Kit with Melissa Cable

SKU VID-1051
Designer: Melissa Cable
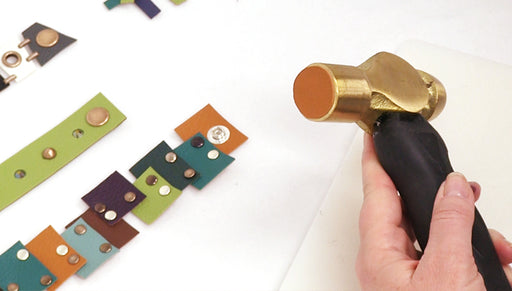
Beadaholique guest designer Melissa Cable shows off various alternative uses for the Create Recklessly tool kit. Ideas demonstrated include using the corner rounder tool to cut out oval shapes in faux leather and turning spots into findings with loops on their underside. Find Create Recklessly faux leathers, tools, and hardware for sale at Beadaholique.com.
FEATURED IN THIS VIDEO
Audio Transcript
Note: This audio transcript is auto-generated and may not be completely accurate.
hi I'm Alyssa cable with create recklessly and I'm here to talk to you about some alternative ways to use the create wrecklessly products the first thing I want to talk about is the tool set the tool set absolutely will work on setting any of the crate wrecklessly hardware from eyelids to snaps to spots to the cap rivets into metal so you can attach metal to metal cold connections however it's really important to note that none of the piercing tools everything at the top of the container should never be used in metal instead you can use a power or mega punch which has all the same hole sizes as the create wrecklessly toolkit to punch into your metal that way we know these edges are always nice and sharp and ready to cut into your leather the next thing I want to do is show you a couple little tricks with a few other tools this particular head is one of my favorite it's the flaring cone because I also do a lot of metal work at home I like to use it to flare out tubing to make my own eyelets another thing I'll use it for is to flare out the ends of eyelets so that I can attach things to it for example here we have an eyelet and it's on backwards upside down so the front of the eyelet is on the back of the faux leather and the back is on the surface and what I'll do is simply strike the flare tool a few times and you'll see I've now slightly flared the edge of this eyelet and now I couldn't come in there with my hammer and flatten that out what this provides is a nice space in here that I can wrap wire in I can wrap so leather cording in just about anything without it sliding off because I have a little lip if I was to use my setting tool it would be more rolled and I'd have a hard time controlling how big my space is here so I love the flaring tool for flaring out the ends eyelets when I want some space in there for connecting and other reasons another tool you can use in an alternative way in the tool set is the corner rounder the nice thing with this tool is if we put the tool side-by-side let's lift it up and do another one making sure our tips meet we're gonna cut out an e to oval shape this gives you a chance to have a decorative cutout now let's take a look at some of the hardware in the line in different ways that you can use the hardware one of my favorite things about spots is their flexibility and in our hardware video where we talked about how to apply spots I talked a lot about them and the different ways you can use them well here's a whole nother way if you take the prongs and you use a pair of round nose pliers you can roll them to the outside like this here create a nice loop or you can roll it to the inside like this one this allows you to create a slide that you can slide on to two pieces of beading wire and load beads between you can also hang it from ear wires and then dangle other materials below it and same with this one this one really makes a nice link between jump rings to create your own little chain or an interesting earring effect so don't think of these just as spots but also as components that you can customize another piece of hardware that can be used in a different manner are are snaps they work really well with our newest product the artist concrete by Robert Danzig because we can use them as bezels and fill them up with the concrete but you could also fill them with resin with polymer clay just about anything that you would not use a normal bezel for to apply them to leather you simply place a cap rivet through the leather with the receiver on top and then put the cap rivets cap right on the post we'll take our anvil place the whole component on top and use the rivet setter to set the cap rivet and now you can see we have a really open bezel ready to fill and it's very clean and smooth on the back thanks for watching there's all sorts of ways you can use the create wrecklessly tools and hardware these are just a few I hope you experiment on your own you

You recently viewed

Clear recently viewed