
|
Beadalon Beading Mats - Prevent Bead Rolling 12 x 9 Inch (Set of 3) SKU: XTL-9930 $3.99 |

|
Wildfire Thermal Bonded Beading Thread .006 Inch - Black - 50 Yd SKU: XCR-8935 $12.99 |

|
The Beadsmith 5 Inch Big Eye Beading Needles (Set of 4) - Easy Needle To Thread SKU: XTL-3164 $3.99 |
Related Videos

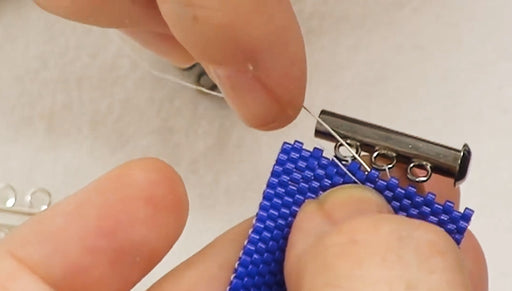
How to Attach Tube Clasps to Peyote Bead Weaving
In this video, you will see two different methods to attach a tube, or multi-strand, clasp to a piece of Peyote Bead Weaving.
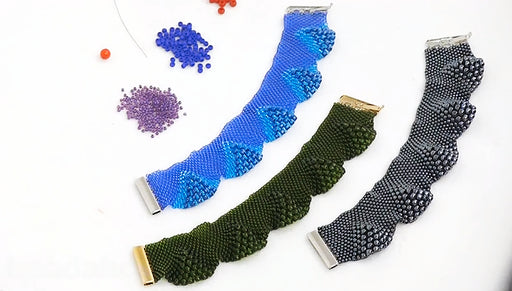
How to do Peyote Bead Weaving with Various Sizes of Beads
In this video, you will see how a wave-like effect can be achieved by using various sizes of seed beads in the same peyote stitch. This technique c...
View full details
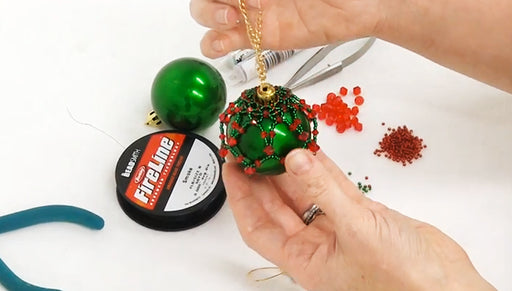
How to Make a Beaded Christmas Ornament Topper
In this video see how to dress up a plain ornament with an ornately bead woven topper. This project uses seed beads and crystal bicones to make a s...
View full detailsCustomer Reviews
Based on 2 reviews
Write a review