How to Wire Wrap Austrian Crystal Round Beads on to a Headband

SKU VID-1463
Designer: Kat Silvia
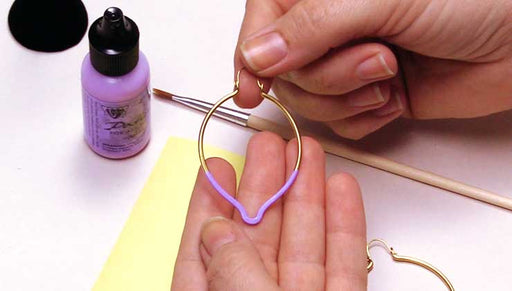
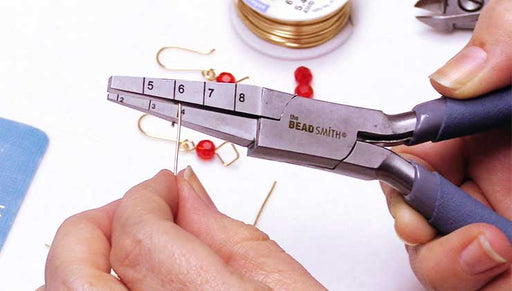
In this video you will learn how to wire wrap beads on to a headband. Austrian crystal round beads are wonderful for making this an elegant yet understated hair adornment. Choose your favorite colors to match your evening wear or wedding colors.

The brand name for the crystals shown in this video is no longer available. High quality Austrian crystals are now available under the PRESTIGE™ Crystal Components line.

Audio Transcript
Note: This audio transcript is auto-generated and may not be completely accurate.
Hi, this is Kat with beadaholique.com and so we're going to be using some artistic wire to wrap our swarovski round beads onto our headband and i have an example here that i already have done now this uses four millimeter beads and those are going to be that lovely pink color there and then I used six millimeter beads I just alternated the beads to give a little bit of a beautiful little kind of crown effect so in the video today that I'm gonna be doing I'm just gonna be using six millimeter beads just so you can kind of see how different it can look now there are a lot of variations to this and I just don't kind of wanted to talk about a few of them so I brought out some extra colors of beads now this is just a very small selection of the beads that we have here at beadaholique.com but I just wanted to kind of talk to you a little bit about the possibilities so you could do this couple of different colors in Swarovski rounds and these are six millimeters and I just wanted to kind of point out that if you wanted to do something where you graduated the four and the six a great option is to choose the same color but do it in both sizes you can also add just a lovely little crystal just to give it a little bit of an extra sparkle there and I mean this really just shines and shimmers it's really really gorgeous and you can also choose some of these slightly more saturated colors and of course I'm gonna provide links for all of this down below so if you're curious about any of the colors that you see here or want to find out more about some of the other Swarovski crystals be sure to head over to beadaholique.com to do that so today I'm going to be using the fuchsia beads here and we're gonna be using artistic wire in 26 gauge now - sort of already sprung off the spool there but if you're good and keep your wire tight it will stay nice and tucked underneath there so I used silver on this one so I'm gonna do a version of gold here and I think that'll help you guys see it just a little bit better and then the only tools that you're going to need is you're just going to need a pair of flush cutters and then you're going to need a pair of wire straightening pliers now this is sort of optional it's just in case your wire gets kinked but it's always good to kind of have on hand and then you're gonna need a ruler because we're going to be measuring the amount of wire now depending on where you want to start around the headband you could also just do a little focal at the top or you could go all the way around so it just depends on you but I will say this so by looking at my example here I'm about let's let's go ahead and measure that just so you can kind of see I started this one to be about two inches or so from that little bottom piece there and the reason I chose to do it that way is because this is the portion that's gonna sit behind your ear so you wouldn't want these beads kind of knocking into the back of your ear I think I would make it a little uncomfortable and I'm gonna show you how to kind of tuck that wire up and underneath there when we start and finish so that you really don't have any wires poking you but I will say that you do want to do this all in one final swoop with one thing of wire that way you don't have to kind of add on new wire because I can be a little bit difficult alright so if you have all of your supplies we are ready to go ahead and get started alright so I am using like I said the 26 gauge artistic wire and I'm just gonna kind of gently sort of untwist some wire here now for this video I'm gonna do a nice little focal that's kind of gonna sit on top of the head like a little crown and this is great to choose colors and this would be perfect for Bridal or prom evening bridesmaids flower girls there's just a lot to a lot of options here and a lot of different colors of Swarovski crystals now you can do this with other beads as well but for today I'm gonna be using those crystals and let's just make sure my wires not getting kinked or anything all right there we go just trying to straighten my wire here and I'm just using my hands now because I don't want to use those wire straightening pliers at this point all its gonna do is kind of work harden that for me alright so I'm gonna get my beads out of the way here bring in my ruler and we're gonna cut off about let's try 5 feet of the artistic wire so it's 3/4 and five all right so I'm just gonna clip that with my flush cutters and then I'm gonna set my little spool of wire aside and my cutters alright so now is when we're gonna want to take our pliers there and just kind of run it down just once through just to help straighten that wire and you can see that it's still saying it's staying in that nice little big loop there but I just want to kind of run it down just to make sure that we're gonna get any of those little kinks but don't worry because you're gonna be handling this wire and it is fairly thin and why are the higher the gauge the thinner the wire all right so I'm gonna kind of I know you won't be able to see that but I kind of have my wire hanging off my table here just to kind of get it out of my way alright so what I'm gonna do is I'm actually gonna create a nice little focal here at the top so go ahead and go on to the back side of your wire see it has this or I'm sorry the backside of your headband and you can see that it has these nice little sort of ridges so what we're gonna do is we're gonna put our wire facing the top there and kind of wrap it around just before where we want to start so I'm gonna kind of so I have my wire in a kind of little L shape there if you can kind of see that so what we're gonna do is we're gonna wrap around and catch that wire all right now this is the hardest part anytime to kind of start wire wrapping so you want to give yourself a little bit extra so you could just see I just flipped it around a little bit alright there we go I'm just wrapping it again going up the length of the headband and I'm actually going to grab that little piece of wire there and kind of pull it so it's a little snug you know I'm actually gonna start that over again I don't like the way that looked and this is why I always say have extra wire alright so I'm just gonna take that little piece off okay let's try again mm-hmm alright while you're wrapping can be difficult but you just kind of using artistic wires a great way to do it it's a really nice soft wire and it's it's really great to use because it's tarnish resistant okay so there we are with our little L one more time and now I'm just gonna try to hold it a little bit tighter and I apologize if my hands are in the way but all I'm doing is wrapping it around that headband right just like so and I'm gonna try to wrap it again in here I'll show you I'll turn it around just a minute once I get it going all right so now I have two wraps on the inside there and on the outside I'm getting those wraps started so I'm just gonna kind of push that together there all right this is why you want to start with a couple of wraps just to get it going and you can see that I'm wrapping going up towards the center top of that headband and I'm just gonna keep going around and around I'm keeping good tension because I don't want it to look slack and just make sure that your wires are coming on top and you can just sort of push it together there alright so there we go so now we started our wrapping so you're always going to want to continue going in the same direction there and making sure that it stays nice and tight alright so now what I'm gonna do is I'm gonna go to the back and I have my little tail here and all I'm gonna do is I'm gonna cut that little piece off and I'm gonna do one or two more reps just to cover up that little end piece there there we go alright so now we're ready to start adding our beads so I'm going to bring that wire I'm gonna come up towards the top the outer side of my headband here and what I'm gonna do is I'm gonna reach over here and I'm gonna add on a little bead and go ahead and slide that all the way down there we go and now because the bead is so high it has such a high profile you're gonna want to kind of take it out to the about a quarter of an inch or so and kind of bend the wire so that you create this little place for it to sort of sit right there just like so and then what we're gonna do is we're just going to wrap once over and for my design here I'm just gonna do twice over until I want to add my next bead slide all the way down now it's tough to work with this much wire so just be patient just try not to get it kinked and you'll be doing just fine and again let me just show you that again so we'll kind of go up and we're gonna kink it a little bit to give it that nice little profile there and then we're gonna wrap it around once wrap it around twice and then we are ready to add our next bead alright so I'm gonna continue to do that all the way across the top here just giving a nice little focal there and then I'm gonna show you kind of how to finish it on the other side so but it's the same technique it's really fun and easy and again this is something great to do you could sort of do this with various different beads around gemstones would also be really lovely to do this with and the gauge of the wire is just something that you know I prefer to use 26 because you're doing enough wraps where it's gonna be secure enough like you can just sort of see how nice and secure that is they're not moving around at all if you went with something a little bit lighter to try to accommodate let's say the size hole of a pearl or something you might be compromising some of the sturdiness of the piece but just play around with it and like I said artistic wire is really really wonderful they have 28 gauge they have 30 so there's a lot of options there as well you could of course use a thicker gauge wire but just remember that this is going to be sitting against your head so you don't want to have too many lumps and bumps down here with that wire alright so I'm going to finish this up and then I will meet you back here on the other side all right so you can see that I've done a nice little focal and this is gonna be a great design if you're ever doing an updo and you just want to kind of set that into the hair and have a nice little sort of a little piece of sparkle on the top because if you go all the way down you you know and you have an updo you risk it kind of getting caught in the hair and nobody wants to try to take that out at the end of the night alright so we have this beautiful little focal here so I finished it off and I've wrapped as though I was gonna add another bead so what you're just gonna do is you're just gonna kind of take and wrap a couple more times here and what I'm gonna start to do is I'm gonna start to loosen a little bit of my wire work there just because I want to kind of create a little gap on the back for my wire to kind of stick through so I'm not wrapping quite as tightly I know it's kind of hard to tell on the video here but you just want to wrap it a few times just to kind of really really secure it and then on this last one here what I'm gonna do is I have a little extra wire so I'm gonna kind of trim it off just a little bit there we go so I have just about six and just kind of sticking out there alright so I kind of have my last little wire wrap a little further open actually I'm gonna do one more here and kind of leave it in the back and I know this is a little difficult to see but I'm going to show you here in a second so we have a nice little sort of gap in the back there and what I'm gonna do is I'm gonna kind of thread that wire down through that first little wrap and it's kind of in essence creating a little wire knot so what I want to do is just kind of bring that and really just sort of pull it pull it pull it tight and just make sure that that wire wrap is gonna sit nice and tight there on the edge and this again is another spot to use those little pliers there if you just kind of pinch it and scrunch it down there that'll keep that wire on the back and out of the way all right and then you can just take your flush cutters and get in there nice and tight and just trim it off there we go so now we have a nice clean little sort of finished and and you can just again with your pliers just kind of squish it together because like I said we made those loops a little bit looser and you can also use a pair of chain nose pliers to do this step as well all right there we go alright so that is how you just sort of wire wrap beads on there like I said you can go all the way around you can start halfway down you can create a nice little pattern to create a little tiara or a little crown so lots of fun things to do with this very easy technique of wire wrapping you just go around and around and you can create beautiful pieces for prom evening and Bridal wear I hope you enjoyed this video you can get all of these supplies and see even more videos at beadaholique.com you

You recently viewed

Clear recently viewed