How to Use Beadsmith's EZ-Rivet Tool

SKU VID-0451
Designer: Julie Bean
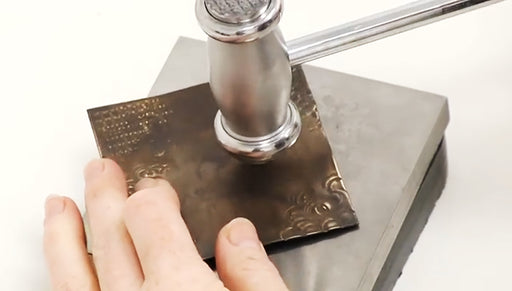
In this video tutorial, see how to use the new EZ-Rivet tool to apply rivets and eyelets. This tool allows you to make cold connections easily and without having to use a hammer and bench block. One side of the tool punches a hole while the other secures the rivet.
Audio Transcript
Note: This audio transcript is auto-generated and may not be completely accurate.
Hi, this is Julie with Beadaholique.com and today I'm going to show you how to use BeadSmith's new easy rivet tool and I've actually made a couple of examples already of what you can do with it and what it is it's a really easy and quick way of riveting objects together. So here's a little pendant made. I'm not sure it's going to be an earring yet or if I'll put it on a chain, it becomes a necklace but I've used the islet ones and that's what this what these look like right here and they come in three different sizes, they come in 1/16 of an inch three thirty-seconds and 1/8 of an inch you can see it has a hollow center, a hollow core and then it has a islet on the other side. So those are what I used to create this piece and then another option you can take something that is a hollow rivet like right here. So it's a hollow rivet on the inside of the core they've got a flathead which is really good for different uses and I've used that one right here. So comes in three different metal finishes for the ones with the Flathead the islets are currently just in the brass but for the ones that are Flathead you have aluminum which is this nice steel color, you've got brass, you've got copper and you've got them in the 1/16 of an inch which is pretty much purely decorative. You're not to going to be able to sandwich much together with that so you might want to use that if your gonna do something like this application here where you're gonna go ahead and just add a little decorative element and put a jump ring through it to act as a bail. Then you've got the three thirty-seconds which is gonna be better if you're sandwiching two items together and that's this length right here which I used to connect two items and then you have the 1/8 inch which is going to be more for three items which is what I did here so it's all going to depend upon the thickness of your items you're sandwiching together. So those are general estimates of what you're going to be able to do but just keep in mind to take note of how long your rivet is and how many items you're going to be sandwiching together. So now after much talk about rivets let's look at the tool itself so it's got two T-bar sections to it that work as handles the first one is gonna be a hole punch. I'll show you how to use that in just a second but this is gonna give you the exact size hole punch you need for the rivets both the islet ones and the flathead and the other side is actually the riveting tool itself and it has a flat head here but it also comes with a domed head as well if you're doing a ring or piece like a filigree perhaps it has a dome-shaped to it and to switch out the head it comes with this little handy screwdriver and you can switch it out that way. I want to actual put together a project so you can see how this works. I'm gonna make another color variation of my pendant I'm going to first take, now these are all Vintaj stamping blanks. This is the Artisan thin copper one and these were just a Vintaj natural brass and I used patinas on them. I'm gonna put that where I want it on my stamping blank and I just take a pen and just make a mark where the hole is. So now you take this put it into the hole punch side line it up just over where my mark was. If you have a fine tip Sharpie pen you might want to use that, it may be a little easier to see and then I'm just going to twist clockwise the handle and you can feel the moment it goes through, when it actually punches and then to release it just unscrew the handle and sometimes I find that it actually doesn't go up to the top and it just releases and now we have a nice size hole, the perfect size for our rivets and I'm going to use the 1/8th rivet because I am securing multiple pieces. Now I find it's a little easier to pick up these guys with a pair of tweezers now this is just the right size. I wouldn't want that hole to be any bigger because it would fall through. That's going to secure that so I'm going to layer the pieces on top of each other and then I'm actually going to use the tweezers, they do come in handy, holding that in place I'm gonna find the hole in my stamping blank and put that through it they're all sandwiched together with it coming out the back so where we use the hole punch when it was in this position we're going to use the riveting tool with it upside down. You can see there's a little tiny little peg in the middle of the riveting tool and we're gonna wanna secure the hollow core on top of that little peg unscrew it enough with my object in the upright position. Put it on top of the little peg. This is probably gonna be hard to see because I can't twist it too much for the video take my thumb now, sitting on that little peg I'm twisting the T-bar handle to move the tool forward and it's caught now. I can show you a little bit so it's actually sandwiched in the three pieces between the two sides of the tool and it's caught. I'm going to twist. You don't wanna over tighten this because you don't ever want to crack your rivet just do it so it feels secure and tight and then unscrew it and that's what we have. Now on the backside we have this great little rivet and on the front side we have our flowers which are secure and sandwiched together and they're not going to go anywhere. One quick tip with this tool is it does take a little bit time to get used to how it works so I suggest starting with some practice material, some inexpensive stamping blanks, not going right into the project that you're going to spend a lot of time on but practicing a little bit first getting the hang of it and then going forward. So that is how you use the new BeadSmith easy rivet tool. Go to www.beadaholique.com to purchase beading supplies and to get design ideas!

You recently viewed

Clear recently viewed