|
The Beadsmith Kumihimo Braiding Kit For Beginners - Easy To Learn! SKU: XTL-6107 $37.99 |

|
The Beadsmith No Tangle Flexible Plastic Thread Bobbins For Kumihimo Or Macrame 1 7/8 Inch (8 Pack) SKU: XTL-6103 $4.99 |

|
The Beadsmith Silver Plated Bullet Findings Kit For Kumihimo Braids - Fits 8mm Cord SKU: FCL-4880 $6.25 |

|
The Beadsmith Digital Caliper - Measures Inner/Outer Diameters In Inches/Millimeters SKU: XTL-9030 $23.99 |

|
E6000 Industrial Strength Glue Adhesive (3.7 Oz) SKU: XTL-1050 $12.99 |

|
Beadalon Large Beading Mats - Prevent Bead Rolling 13 X 18 Inch (Set of 2) SKU: XTL-9935 $6.75 |

|
Fiskars 5 Precision Tip Scissors - Super Sharp SKU: XTL-5700 $7.45 |

|
The Beadsmith Satin Rattail Braiding Cord 1mm Lilac Purple Mix 4 Colors - 3 Yds Each SKU: XCR-3003 $7.99 |

|
Toho Round Seed Beads 6/0 267 'Crystal/Rose Gold Lined' 8 Gram Tube SKU: JSF-0089 $2.55 |
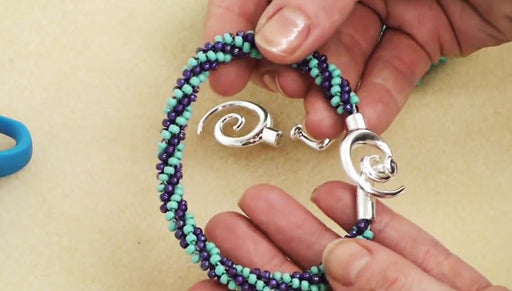
Hi, this is Julie from Beadaholique.com Today I want to show you how to finish off Kumihimo ends and attach a clasp. So I have this necklace I've made. I've done a combination of regular 8-warp Kumihimo and then also braided Kumihimo. And now I want to finish my ends. I have one end of the knot and have the other end which is still attached to my Kumihimo disc. So what I need for my supplies, I'm going to show you two different ways to finish your ends based upon what your needs are. You need a pair of scissors. I'm gonna show you how to finish ends one way which uses like a thread and I got some super long cord right here. You can use whatever you like. You're definitely need some E6000 and an applicator to apply it, a scrap piece of wire or a toothpick to work great. Another way to finish your ends is using some tape so I have to tape right here. I've got caliber to measure my braid in one moment and then I've got a series of different finding sets for Kumihimo. I want to show you how these look like. These are the exact same design but they're all in different sizes. So I've got an eight-millimeter here. You can see it's quite large. The smallest one I have is a three millimeter. See that's quite small and I got a six and a four. So first off when you're ordering supplies you need to determine what size you need for your particular project. So this is where the caliper comes in. So I'm going to measure my braid. I wanna see what the diameter is. I'm going to start at zero. Gently pull it out. My braid is about six point three millimeters. So I'm going to need to round up because the six millimeter one is going to be too small. So that means I need the eight-millimeter set. Place these aside and open this up. You can two cord ends. These are glue-on They have a nice large well in the inside. I've got a toggle clasp. I've got two jump rings which are going to allow me to attach the end of the toggle to the glue on cord end and I also got a slide bar if I wanted to use it for my design but for this I'm going to need that piece. I'm going to show you the first way of finishing the cord end and that's going to be by first you're going to grab you braid. You're going to pop off your strands. Pull that through and then what we're going to do is take our cord our string or whatever your using for this and wrap it around. Right up at the top your braids and strap it around. We're going to do a knot with. It might be a little hard to do this one-handed I've been known. to use my teeth There you go. I've got one knot and I'm going to tie another knot just so that it's secure. Then I'm going to just cut my strings just so I can put this part away. So now you can look and you can see the size of your glue on piece and you can see this going to be too large. It looks like it might actually be a little bit of extra space here and I want it to be a perfect fit. I'm going to use the fact that I'm using strings to my advantage I'm going to go over the area. I just added a knot on to balk up that area. To add a little bit extra thickness. You don't want to do too much. You just want to eye ball it. See if it will squish down. I don't want to cut my threads yet. That's looks like it's going to look about right. I'm going to tie another knot. At this point what I can do is I'm going to trim my cords. I'm also going to trim what I used to tie it with. That's all secured. I'm going to make sure that this actually fits You can tell I'm seeing a little bit of the pink under so I'm just going to scoot it up a little bit. Now I'm ready to glue it. This is a Magic Pick. I actually find the tail end of it to be very handy for applying E6000 but a tooth pick would work well as well. I'm going to take the glue put it over the top cords for sure but also a little bit on the area that I wound. I want just a little bit more glue. I'm going to take my glue on piece. Put it over then if need be I can go back and trim up anything that shows underneath. There's one end. It's glue on and secure now. So that's how to finish one way and that's good if you do know you're going to have some extra space that you need to fill in between a glue on piece and your braid. So the other way is we're going to take a piece of tape I'm just have that ready I'm going to undo my knot holding it I'm going to let that unravel place your tape over your braid. So I'm placing it just a little bit over the start of the braid and also the cord which are not braided. There we go. We're gonna cut this so it's about a fourth of an inch just like so. Now we're going to take our glue and put it over the top and take your glue on piece and place it over. So that is two different ways to finish your cord end. It's going to give you the same results, just different preference of what you would like to do and then also if you do want to add a little bit more space and balk it up. Then all you need to do is take your jump ring attach it there to attach your toggle clasp/ You are set to go. That's how you finish your ends of you're kumihimo braid. Go to Beadaholique.com for all of your beading supply needs!
Related Videos


How to Braid Beaded Kumihimo and Make a Bracelet
In this video, see how to add beads to your Kumihimo braid. You will 'pre-load' your bobbins with beads and add them into the weave as you go. Very...
View full details

How to Make a Friendship Bracelet
Learn how to make a basic striped friendship bracelet out of nylon cord in this video. A super trendy, simple project that's easy to learn.


How to Stretch Silk Cord for Use in Jewelry Making
In this video, learn how to properly prepare silk cord for use in jewelry making by stretching it. This process will also remove the kinks in the c...
View full details