Store Closing, Limited Stock
SKU VID-1683
Designer:
Alexandra Smith
In this video, you will see from start to finish how to create this design using beading wire, crimping beads, and crimping covers. First you will see how to string the beads in the order shown. Then you will see how to attach a magnetic clasp to your bracelet. You will also see a wide selection of Czech beads that are compatible with this bracelet design.
FEATURED IN THIS VIDEO
Audio Transcript
Note: This audio transcript is auto-generated and may not be completely accurate.
hi this is Alexandra at beadaholique to so you how to make the sweet tweet bracelet featuring Ravens journey check beads so we'll be using some 11 millimeter disk beads here with these darling little beads on them kind of a rustic and tiki look to those and these beautiful pastel sort of rainbow 5 by 2 millimeter rondell spacers I've got my magnetic clasps and crimps and caps we'll be using and four tools some cutters and crimping pliers as well as the beadalon strain wire I first want to start off by showing you this amazing selection of beads that we have curated by Ravens journey so starting up here these are some table cut beads that look almost like stained glass there are 11 millimeters wide and then these are some disc cut hibiscus beads in 8 millimeters really beautiful rainbow selection of those they come in this larger size up here eleven point five millimeter as well there's these sort of abstract tree or blossom beads really unique and these are some more of the bird beads like we'll be using they come in an owl variety and then just off to this side we've got some three millimeter faceted rondelles and another wider selection of the five millimeter by two millimeter rondelle's like we're using in our project so let's get started I've pre-cut a foot of beading wire and I'm gonna bring in a paperclip now this is a good tip if you don't happen to have one of these handy bead Stoppers I'm using the bead stopper for holding my beads in place because I've got them all in this beautiful order that I want this strand actually came like this I wanted to preserve that so since I don't have another bead stopper handy I'm gonna use this clip and that's if you have one laying around the house it's great okay so to begin I'm actually gonna bring my ruler in and just design as I go I think what I want to do is place my beads about every inch or so whatever the length is for preserving too Rose of rainbow beads so let me see what that is I'm gonna transfer these over if you've seen my videos of stringing before you know I love to do this I love to make my life easier by getting my beads ready ahead of time so you know that's just about an even inch so I'm gonna go ahead and do two rows of rainbow and then I'm gonna bring in one of these beautiful tierracast leaf caps it's a size is it 5.7 millimeter and I found that that fits nicely along the tip of these disc beads so that was gonna be my design I'll put a cap on either side and then pull in another couple rows of rainbows now this is just a quick and easy straight strung project using these beautiful Ravens journey beads these birds are ten ten millimeters across possibly 11 I'll double-check that we have all my beads at once here slide them on to do very many for the length of a bracelet probably have beads left over I'm gonna get my Birds facing the same direction it's gonna be coming just up to the right length I think if I need to I can remove beads from either ends to make it symmetrical but in order to make a six six inch bracelet I think that's about right if I wanted to make it longer I may add a few more of the rondelle's on either side I think I'm gonna keep it about six inches though so let me take up one of my crimping beads two millimeter crimp bead then I'm going to slide on the loop of my magnetic clasp this is 8 millimeters in diameter double back through my crimping bead pull it up snug but not too tight I want to leave some play there for my clasp I'm gonna take my crimping plier try not to fight the magnet too much here and I'm gonna slip that crimping bead into the back trough of the tool and crease the bead by squeezing and then in the front trough coming crossways I'm gonna fold that bead over now I will clip the tail and I'm gonna put on one of these 3 millimeter crimp covers just by slipping it over my crimping bead you can actually use the front trough of your crimping tool to get that round bead in and just give it a squeeze to close it up I'm gonna take it at a couple angles again I'm fighting this magnet a little bit there we go get a better grip there let's close that flush one more angle there okay now I'm gonna bring my beads down and just do the same thing on the other side take out my crimping bead grab the other side of my clasp and string through that loop double back through the crimping bead if you want you can use thread protectors we have a nice video and how to utilize thread protectors at the end of a piece if you want to check that out but it's not always necessary so I'm just making some adjustments here to get my crimp up tight against the loop leave enough play and I don't want a lot of extra cord so you actually pull this apart make sure now you see when I hang this it's actually got some extra cords so that's why I wanted to separate it and make some adjustments here I'm going to slip it down toward the beads and give it a little bit of a tug here get the sizing just right all right I think we're good I take up my crimping plier again and make that crimp creasing with the back trough folding over with the front clipping the tail and adding on the crimping bead cover bead cover okay bring my tool in here give it a little squeeze around the bead there we go so there's a quick and easy project utilizing these wonderful new beads by Ravens journey Czech glass beads all of these are available at beadaholique.com and please also subscribe to our YouTube channel for all the latest updates thanks for watching
hi this is Alexandra at beadaholique to so you how to make the sweet tweet bracelet featuring Ravens journey check beads so we'll be using some 11 millimeter disk beads here with these darling little beads on them kind of a rustic and tiki look to those and these beautiful pastel sort of rainbow 5 by 2 millimeter rondell spacers I've got my magnetic clasps and crimps and caps we'll be using and four tools some cutters and crimping pliers as well as the beadalon strain wire I first want to start off by showing you this amazing selection of beads that we have curated by Ravens journey so starting up here these are some table cut beads that look almost like stained glass there are 11 millimeters wide and then these are some disc cut hibiscus beads in 8 millimeters really beautiful rainbow selection of those they come in this larger size up here eleven point five millimeter as well there's these sort of abstract tree or blossom beads really unique and these are some more of the bird beads like we'll be using they come in an owl variety and then just off to this side we've got some three millimeter faceted rondelles and another wider selection of the five millimeter by two millimeter rondelle's like we're using in our project so let's get started I've pre-cut a foot of beading wire and I'm gonna bring in a paperclip now this is a good tip if you don't happen to have one of these handy bead Stoppers I'm using the bead stopper for holding my beads in place because I've got them all in this beautiful order that I want this strand actually came like this I wanted to preserve that so since I don't have another bead stopper handy I'm gonna use this clip and that's if you have one laying around the house it's great okay so to begin I'm actually gonna bring my ruler in and just design as I go I think what I want to do is place my beads about every inch or so whatever the length is for preserving too Rose of rainbow beads so let me see what that is I'm gonna transfer these over if you've seen my videos of stringing before you know I love to do this I love to make my life easier by getting my beads ready ahead of time so you know that's just about an even inch so I'm gonna go ahead and do two rows of rainbow and then I'm gonna bring in one of these beautiful tierracast leaf caps it's a size is it 5.7 millimeter and I found that that fits nicely along the tip of these disc beads so that was gonna be my design I'll put a cap on either side and then pull in another couple rows of rainbows now this is just a quick and easy straight strung project using these beautiful Ravens journey beads these birds are ten ten millimeters across possibly 11 I'll double-check that we have all my beads at once here slide them on to do very many for the length of a bracelet probably have beads left over I'm gonna get my Birds facing the same direction it's gonna be coming just up to the right length I think if I need to I can remove beads from either ends to make it symmetrical but in order to make a six six inch bracelet I think that's about right if I wanted to make it longer I may add a few more of the rondelle's on either side I think I'm gonna keep it about six inches though so let me take up one of my crimping beads two millimeter crimp bead then I'm going to slide on the loop of my magnetic clasp this is 8 millimeters in diameter double back through my crimping bead pull it up snug but not too tight I want to leave some play there for my clasp I'm gonna take my crimping plier try not to fight the magnet too much here and I'm gonna slip that crimping bead into the back trough of the tool and crease the bead by squeezing and then in the front trough coming crossways I'm gonna fold that bead over now I will clip the tail and I'm gonna put on one of these 3 millimeter crimp covers just by slipping it over my crimping bead you can actually use the front trough of your crimping tool to get that round bead in and just give it a squeeze to close it up I'm gonna take it at a couple angles again I'm fighting this magnet a little bit there we go get a better grip there let's close that flush one more angle there okay now I'm gonna bring my beads down and just do the same thing on the other side take out my crimping bead grab the other side of my clasp and string through that loop double back through the crimping bead if you want you can use thread protectors we have a nice video and how to utilize thread protectors at the end of a piece if you want to check that out but it's not always necessary so I'm just making some adjustments here to get my crimp up tight against the loop leave enough play and I don't want a lot of extra cord so you actually pull this apart make sure now you see when I hang this it's actually got some extra cords so that's why I wanted to separate it and make some adjustments here I'm going to slip it down toward the beads and give it a little bit of a tug here get the sizing just right all right I think we're good I take up my crimping plier again and make that crimp creasing with the back trough folding over with the front clipping the tail and adding on the crimping bead cover bead cover okay bring my tool in here give it a little squeeze around the bead there we go so there's a quick and easy project utilizing these wonderful new beads by Ravens journey Czech glass beads all of these are available at beadaholique.com and please also subscribe to our YouTube channel for all the latest updates thanks for watching
Related Videos


How to Make Herringbone Wire Wrapped Drop Earrings
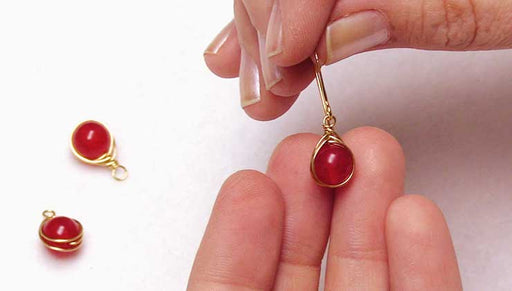
In this video you will learn how to use 24 gauge Artistic Wire to wire wrap a single bead in a herringbone weave to make a pair of earrings.


How to Make the Oceana Bracelet
Store Closing, Limited Stock
In this video you will see how you can create a simple sea inspired charm bracelet using TierraCast components from their Oceans collection, Austri...
View full details

How to Set Multiple Austrian Crystals in Prong Gita Jewelry Settings
Store Closing, Limited Stock
In this video you will see how to set multiple Austrian crystals in Prong Setting by Gita Jewelry. You will see some helpful tips using a popsicle...
View full details


