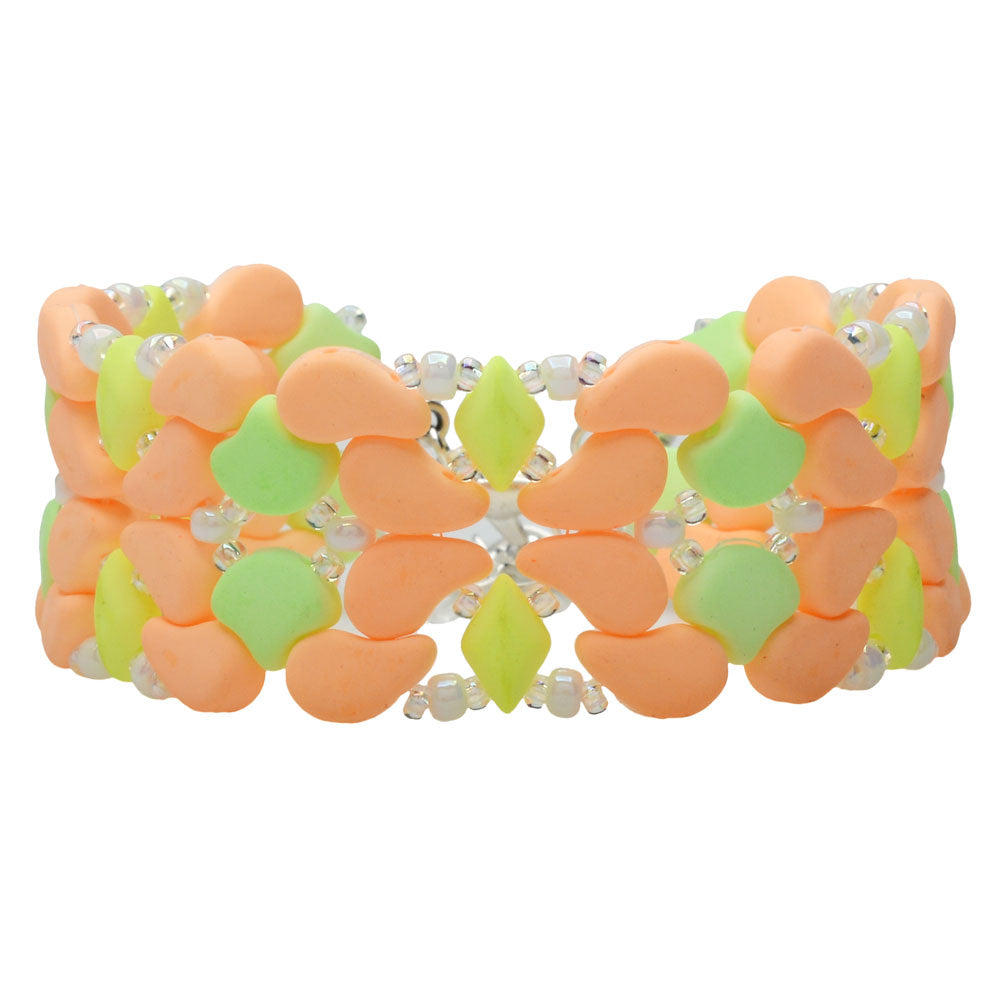
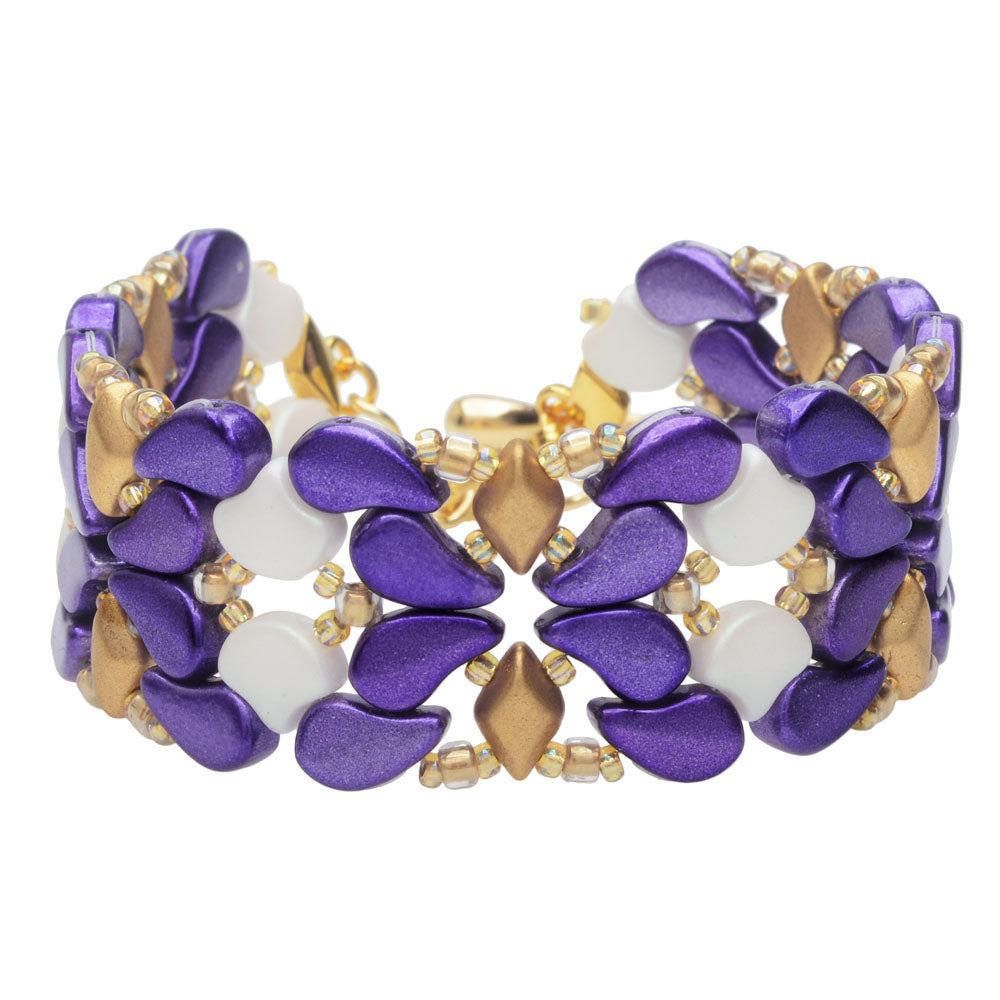
How to Make the Paisley Princess Bracelet with Czech Glass Paisley Duo 2-Hole Beads

SKU VID-1772
Designer: Kat Silvia
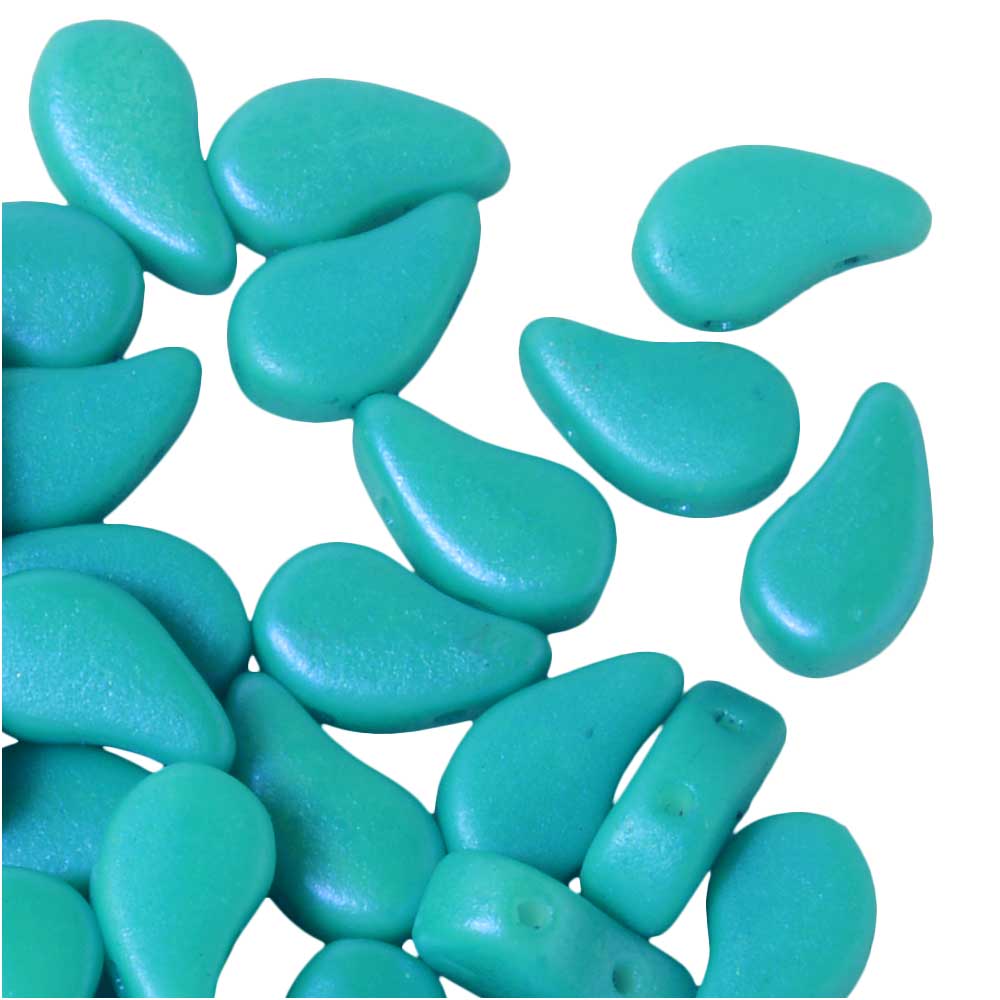
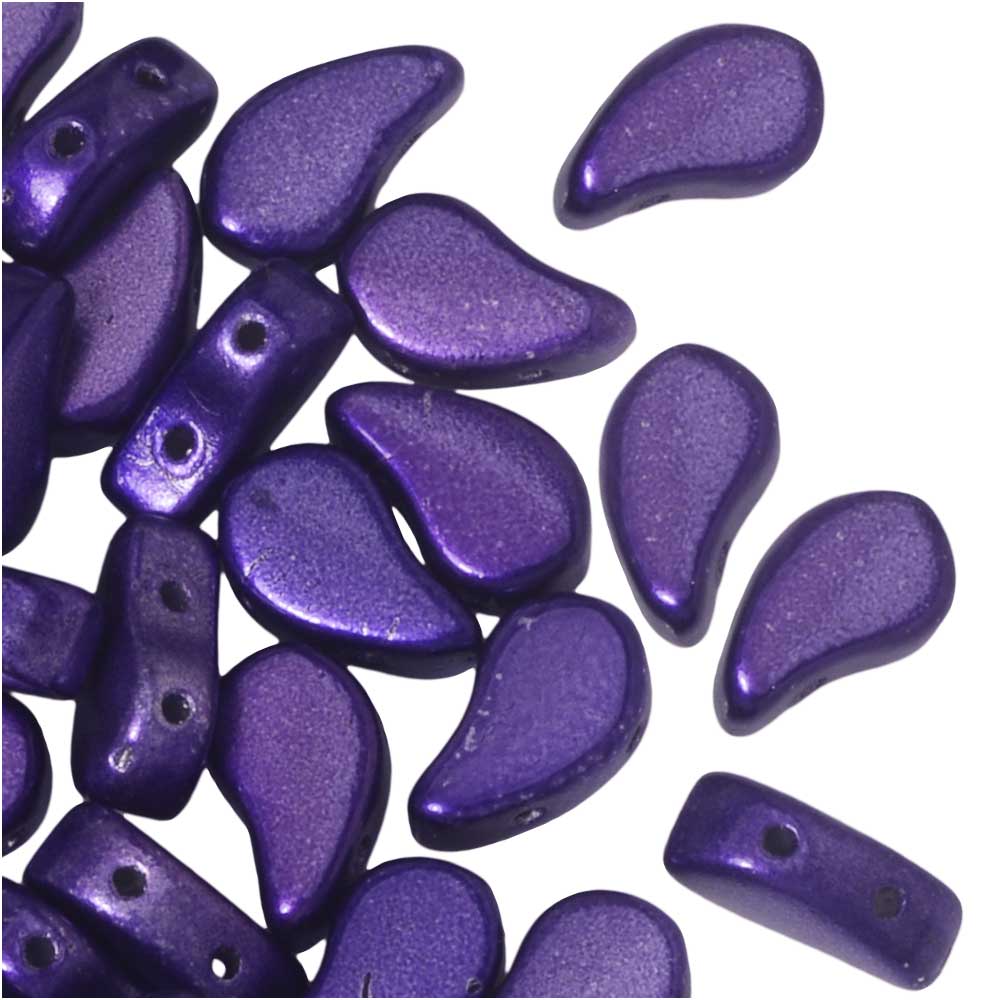
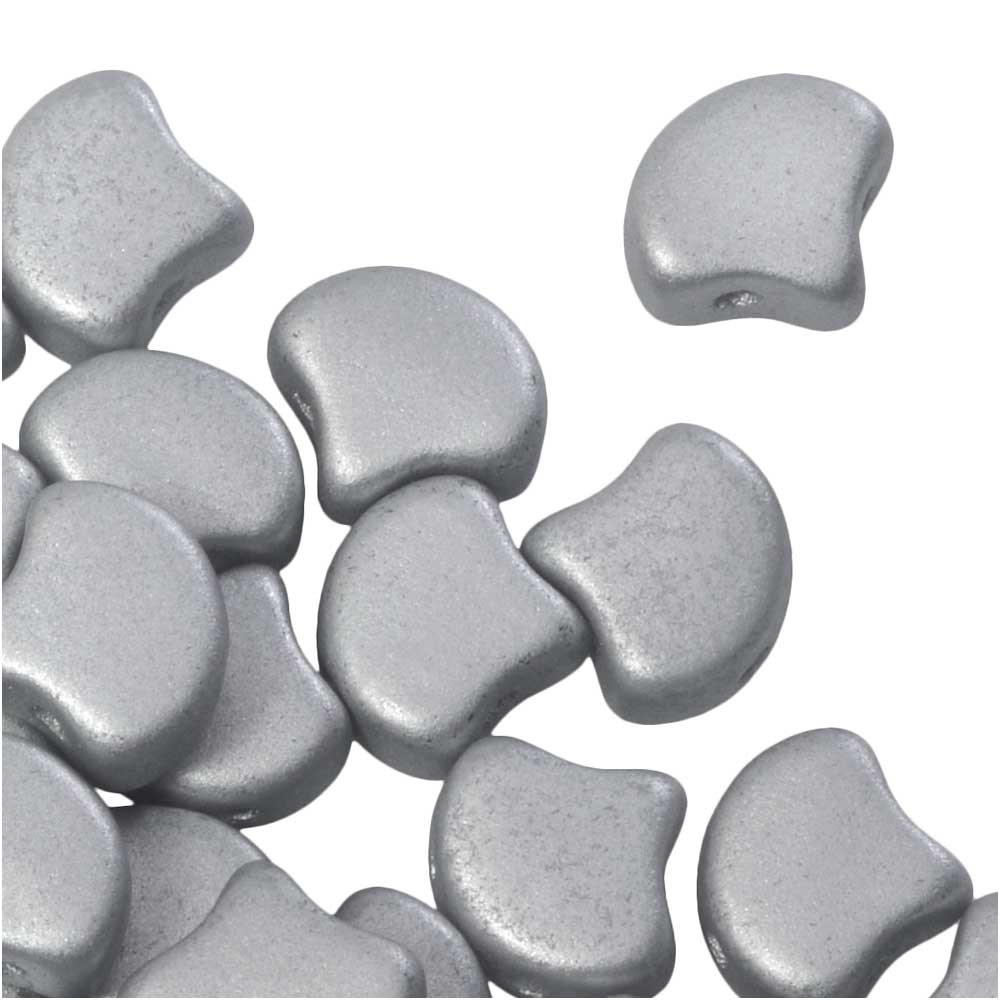
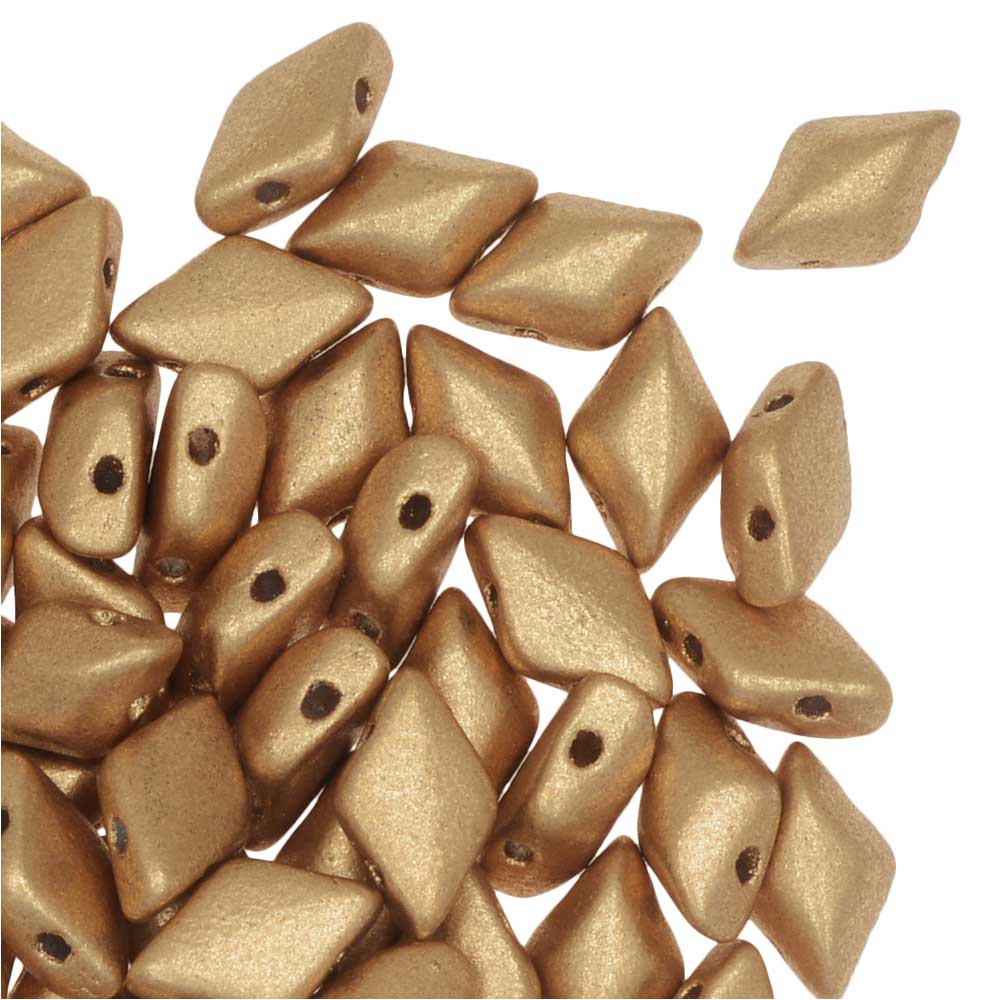
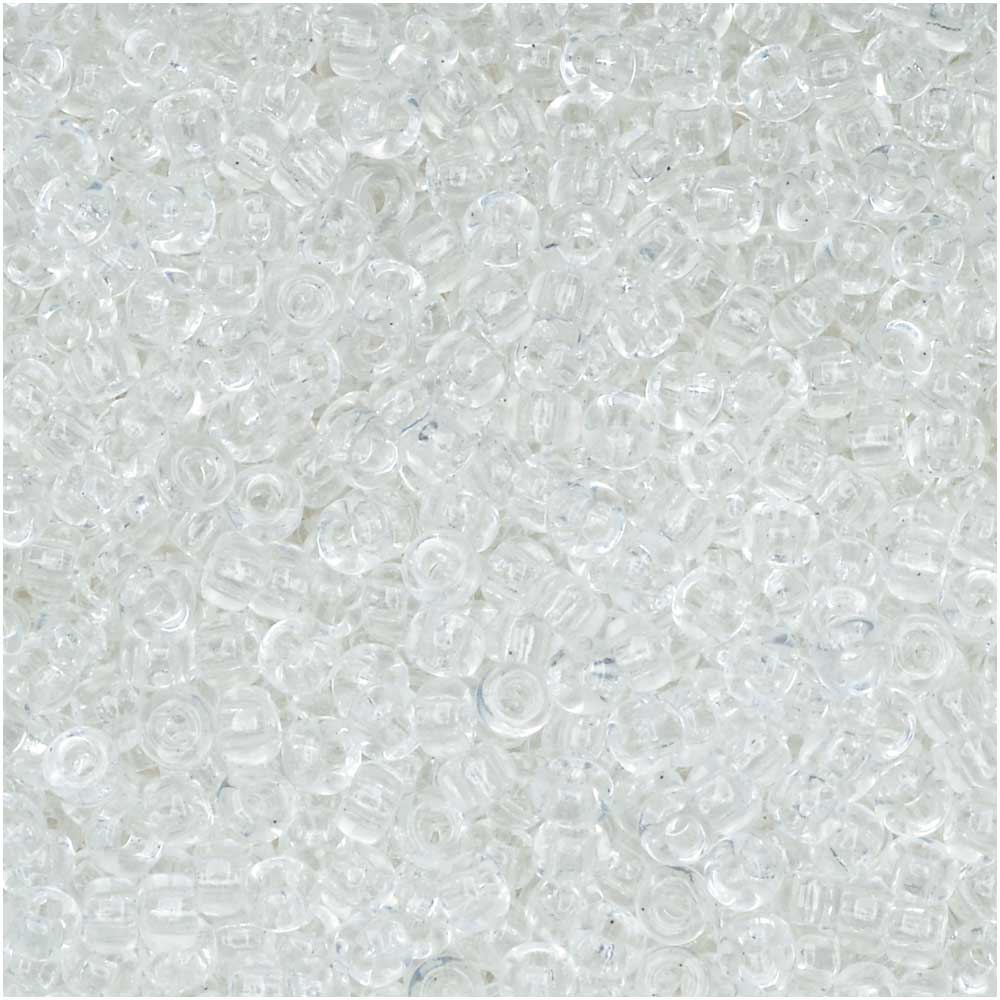
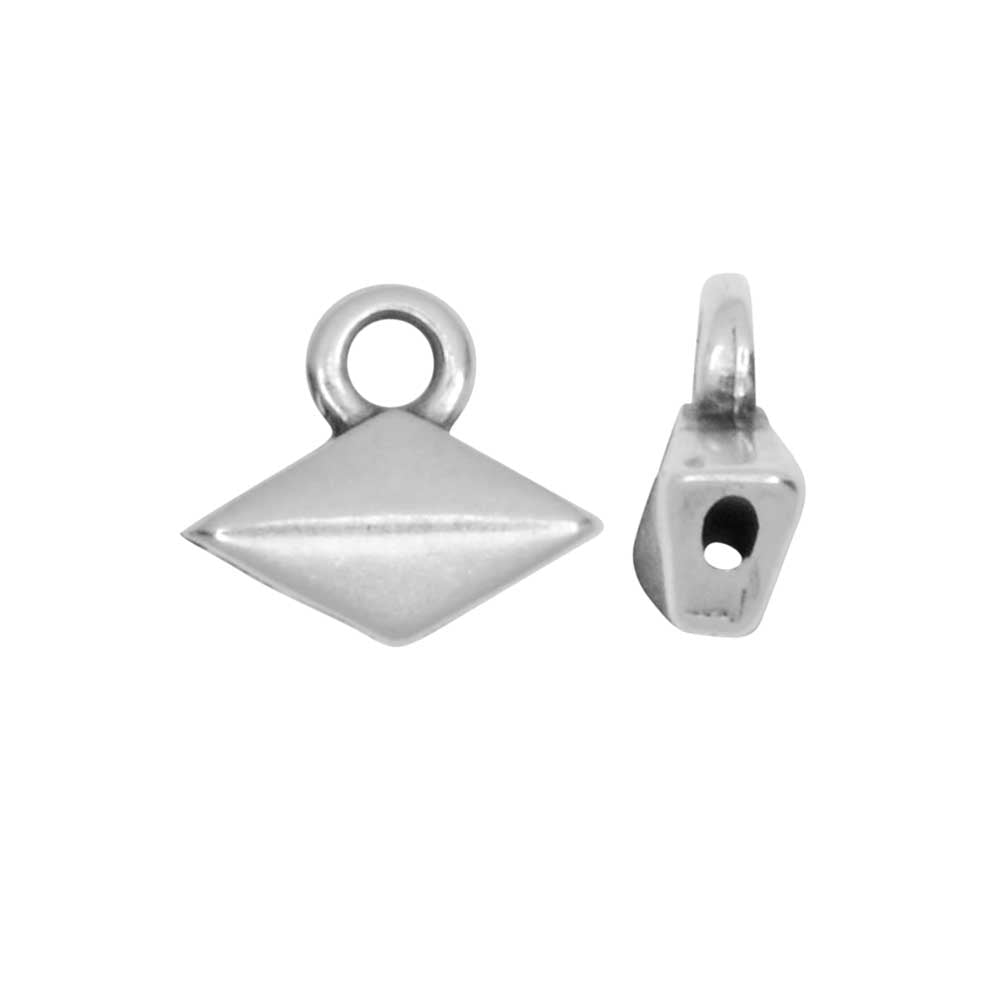
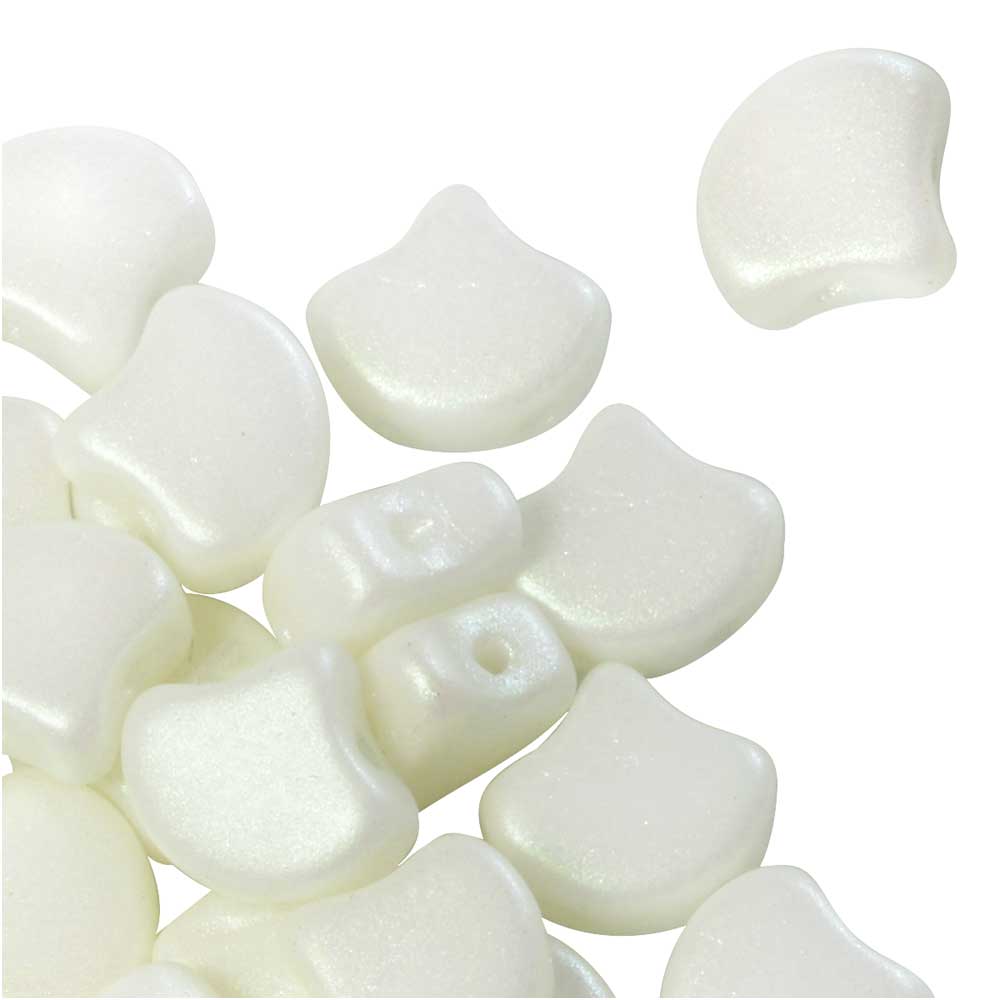
This woven bracelet combines three different two-hole bead shapes: Paisley Duo, GemDuo, and Ginko Beads. The design also uses Cymbal Bead Endings for a professional and clean finish. You will learn how to create the bead woven unit that makes up this bracelet as well as see some helpful sizing tips to personalize your design.
FEATURED IN THIS VIDEO
Audio Transcript
Note: This audio transcript is auto-generated and may not be completely accurate.
hi this is kat with beadaholique.com all laid out for you so you can really see the beautiful rainbow of colors for you to choose from to make this bracelet alright so let me draw your eye back down here so we can talk about the supplies that you're going to need to make this bracelet so for this bracelet I have used a chain extender a couple of jump rings now these are four millimeter 20 gauge jump rings I have a lobster clasp I have two gem duo cymbal bead endings and then over here for beads we're going to be using some two whole ginko beads some of those to hold gem duo's of course are Paisley duo beads and then I have some 11 OC beads and I have some eight o seed beads one tried to run away and I have two different fire lines out here now for these projects I actually used the crystal fire line but today I'm going to use the smoke so that it's going to show up nice and easily for you as I'm doing this but go ahead and choose whichever thread color best fits your design so if you're using some darker colors you can use the smoke and of course the lighter colors we recommend the crystal and this is that four pound all right over here I have a couple of pairs of chain nose pliers that are gonna help me out with my jump rings and I have a thread zap that's gonna help me seal off my threads and trim them okay so I have a size twelve beading needle that is all ready to go with some smoke fireline but before we get to that I just want to bring out a ruler cuz the first thing I always like to discuss with people is the sizing of the bracelet so here's my ruler so let me bring my purple version down here because this is the one we're gonna be doing here today okay so when you look when I stretch it out along my ruler from end to end you can get a good eight and a half inch bracelet now you will have enough beads to make extra units and if you really look at this we're working in little units that look like this so what we're starting with is we're starting with her two whole gingko beads we're making a little unit here and then we're moving along any little units so you can see for this example I have five that are done okay now I do want to point out and let me bring out my other version here and this is important when you're choosing colors now when you look at this version you see a little something different and it's because there's been an illusion that's been done here so on the purple version the purples look like little X's right and that's what you see first now on the green version here you see little O's right you see that it is the exact same pattern so when you look at it from here it's exactly the same but because I've used lighter beads inside there I've created negative space in between those different units so when you're looking at these bracelets they are exactly the same but just knowing that you can play all around a little bit with that negative space and where you put some white or some clear beads or even some silver beads all right so that all said and ready to go let's go ahead and get started so we're going to start by starting at one end of the clasp and this is going to make it really easy for you when you want to go inside so that you can just add on more units and units and units right okay so we are gonna start with our symbol bead endings now this is a gem duo bead ending and what's really cool about it is it actually has one hole and it goes straight up through the side there so what I'm gonna do is I'm just gonna string that down and leave myself at a love to say about eight inches or so just because we're going to want to tie that off later alright so now what I want to do is and I'm gonna kind of show you on my table here by sort of flipping over all the little beads and getting them ready to go so I have my ginkgo beads and they're gonna sit like this and then I'm going to use a couple of the eleven OC beads so what I'm going to do first is I'm going to go up through this side of the ginkgo bead and just slide that tone all the way to the end and now I'm going to pick up an 11 OC bead slide that down so that it sits right in the little crook there now without going back through the seed bead I'm going to go back through the ginkgo bead and all the way out to the other side of that symbol bead and what that's gonna do is that it's gonna trap that little seed bead right up top there we go there we go all right so now I'm just gonna repeat that on the other side so I'm gonna go down through my gingko bead picking up my little seed bead there making sure that slides all the way down and now I'm just gonna go back through just the gingko bead and I'm actually gonna try to see if I can do this all in one step go all the way back down through it's because I wanted to do in one step of course all right so now I'm getting both of those trapped in there and I went all the way back through and trapped that in just like so all right so I went all the way back through that whole thread path now I'm just going to go back to n once more through just that gingko bead and now what I'm gonna do is I'm gonna create a little thread bridge I'm going to turn it around and I'm going to come up through that top gingko bead okay so let me put that down so what we did is we went up through we trapped our bead we went all the way down we trapped this bead we went all the way back up here looped one more time and then came down and now we're coming out this gingko bead here okay so that is how you're gonna start now let's talk about the Paisley duo's so the Paisley do is have these great little shapes here and they're the same on both sides so you don't need to worry about which side is your front and back we will need to think about that when we get to our gem do is but not for the Paisley duo's you just need to figure out which hole you're going into and which way it's gonna kind of flip and be faced which is why I'm going to do my best to kind of keep my work on the table here so you can sort of see what's happening okay so we're going to go up through the top larger side of the Paisley duo because it's gonna sit nicely right in the crook of my gingko bead right there okay now I'm gonna turn my thread around and go down through that Paisley bead there we go so up and over and down and then now I'm gonna take another Paisley and I'm gonna go through the larger side here so this is that little side facing this way and bring that down just like so and now I'm gonna do another Paisley but I need it to be facing the opposite direction there so they're gonna kind of sit together just like that okay oops you know I'm so sorry I forgot one very important step eeeek just kidding all right so sorry sorry sorry okay here we are so we've got this bead going I'm gonna add on an eight-oh seed bead I'm so sorry I forgot about that so now we are going to go down through that bead I apologize alright so now here's what we got going because we want to give a little extra space okay and now finally we're going to sort of mirror what we did on the other side there and go down through the small side of that Paisley and we're going to go back up through our gingko bead just that first one okay so the reason for that 8'o seed bead in there is because now we're gonna kind of cinch all that together but what we're going to do is we're going to pick up one 11o seed bead go into that 8 OC bead pick up another 11 OC bead and we're gonna go in through that gingko bead so it creates a nice little sort of diamond shape in there so you see how that kind of cinches everything together so don't forget that a tocb mm-hmm okay now we're gonna go up through one more time and down only through that first Paisley bead and now we're going to turn our thread around and we're going to come out the tip of that top one there just like so okay so now we're going to start working with our gem duos so let's go ahead and bring these little guys in here now these guys do have a top and a bottom so the top side is gonna be that beveled side and the back is going to be flat so this is where we do definitely want to pay attention to which hole we're going into okay so I'm gonna pick up one 11o seed bead and I'm gonna go across the bottom part of it this gem do let's pull that all the way down there we go I'm gonna pick up another seed bead let that come all the way down there and now what I'm going to do is I'm going to start to form the second side so I'm going to mirror what's happening here so I'm just gonna have my two little Paisley duo's there and I'm gonna go through the small sides so that they're kind of back to back there let that string all the way down and now again picking up one seed bead now I'm going to go through what it's going to feel like the top side of that gem duo picking up another seed bead and now we're gonna go all the way back through so this is kind of similar to like a right angle weave or something that you would do when you're creating like that little center unit okay so now we have this going so far alright so what we're gonna do is we're gonna string through the top part one more time going through that seed bead through the gem duo and through that other seed bead and I can do it and one step there I'm gonna go all the way through that very first Paisley bead there and kind of cinch that up alright so now I'm just gonna take a second to adjust my attention there there we go I'm going to turn my needle around and go through that Paisley bead right there okay so now we're ready to add on the other two Paisley beads so if you need to just kind of just double check that you have them where you need to be it's gonna look like that so we're going to go up through that little small side there and when we turn it around we are going to have our gingko beads ready to go so if you are just following along with what you're mirroring there you're going down through the gingko bead and here's where it's going to get kind of interesting so what you're going to do now is you're gonna pick up one 11o seed bead 1 8 OC bead and one 11 o seed bead and what you're gonna do now is now you're gonna go into your gingko bead on this side going down and down through this bead on the larger side remember okay here we go and now what we're gonna do is we're going to turn it around go up through and now because we already have our 11 o's on this side all we need to do is go through and sneak and catch just that a toe and go back up through that other Paisley bead right there and now you have created one part of the unit so now what we need to do is because this is going to be a little floppy we're gonna add some beads to kind of finish off that little circle there so we're going to pick up one 1101 a toe and 111 oh and we're going to go through that top side of that gem duo this is going to create a nice little frame for our beadwork and repeating that again an 11 oh and a toe and 111 Oh going down through and you can just kind of fish this all the way down through here but what you're going to want to do is make sure that you're coming out of through that bead just see if I could I can do it all at once perfect going all the way down through that last Paisley beads so we're coming out that second hole you don't want to make sure that you excuse me you don't want to wiggle it too much that you're coming out this hole here you want to come out this hole right here and then same thing 11:08 Oh eleven Oh stringing her across one more time and down through all right now here's how you're gonna get to starting the next unit you're gonna wiggle all the way up through here so this is why we use the four pound thread because you're gonna create a lot of little thread passes in here but now you can see that I pull it and it's just much tighter alright so now we're gonna go down through this Paisley down through the gingko bead and now we are ready to start our next unit okay does that make sense so now let me pull out the second one here so you can just see so now again you're gonna start with the same process of adding those beads if you get lost just follow along with your first little example there or you can just kind of visually look at the look at the photo and kind of you know get back on track in case you get lost okay so let's think that if we've gotten all the way to the end of our units here this is about where you should be now sometimes I will say that if you've gotten turned around at some point just make sure that you're coming out at the top or the bottom of one of those little kinko beads you can come out either side it doesn't matter it will not screw you up for this next little bit okay so let's go ahead and add on our last little clasp so what we're gonna do is we're gonna pick up one of those little seed beads slide that down go back through our gingko bead pick up our little symbol bead there go through the gingko bead and now we're just gonna pick that up go back through I like to reinforce this as it is the clasp but it's going to see the most tension and again just really take your time make sure that you're kind of wiggling your thread making sure that everything is nice and taut you might need to pull down on some sides and just there we go cinch it up okay go through that little bead there and go back down through and here's where you can either go back and forth a couple of times or go ahead and weave through and this would be the same on the other side you just go to the back weaving around make a little loop tie that off and you can always weave weave further into the into the beadwork if you want if you can kind of get your needle you can see that I'm sort of trying to bend the beadwork back a little bit just because I don't want to create extra space but I just want to make sure that everything is nice and nice and tied off there all right so let's say that it's good enough for me so all I'm gonna do is kind of come in here with my little threads up and remove this there we go zap it right off let's assume I've done that on the other side there so I'm just gonna zap off this thread as well you can weave it in if you want I think you should but just for time sake here I'm just gonna zap it off there we go it's like it's not lining up for me there we go okay so this is a very tiny little bracelet but to end it let's movie just show you how to add on that clasp so we're gonna take our jump rings here give them a little gentle twist and like I said earlier these are four millimeter 20 gauge jump rings I like to use a little bit of a thicker jump ring this is not a heavy bracelet but you know we have some metal elements and some glass elements happening in here so we definitely don't want to use a 22 I think that might be too light you can use a larger jump ring on one side if you'd like if you do not want to use the chain extender that is what I recommend so you can use like a four millimeter 20 gauge jump ring because you can just put that together without adding the extra length or you can also trim this too if you just decide that you need an extra inch or so and not two inches let make sure my jump ring is closed and that is my little sample swatch but that is how to complete the bracelet and all you'll need to do is just to continue to create those little units there so they just keep forming and forming and forming and you can choose from all the different colors of the Paisley duo's that we have but that is how to make the Paisley bracelet I hope you enjoyed this video you can get all of these supplies and see even more tutorial videos by heading over to beadaholique.com

You recently viewed

Clear recently viewed