How to Make an Austrian Crystal Bracelet with Cushion Stones and Settings

SKU VID-1408
Designer: Julie Bean
In this jewelry making tutorial video, learn how to make a dazzling Austrian crystal bracelet using Austrian crystal cushion stones, cushion stone settings, Toho demi round beads, Austrian crystal faux pearls, and an Elegant Elements clasp. This video teaches you how to set the cushion stones into the pronged cushion stone settings as well as how to string your bracelet, crimp a crimp bead, and apply crimp bead covers.

The brand name for the crystals shown in this video is no longer available. High quality Austrian crystals are now available under the PRESTIGE™ Crystal Components line.

Audio Transcript
Note: This audio transcript is auto-generated and may not be completely accurate.
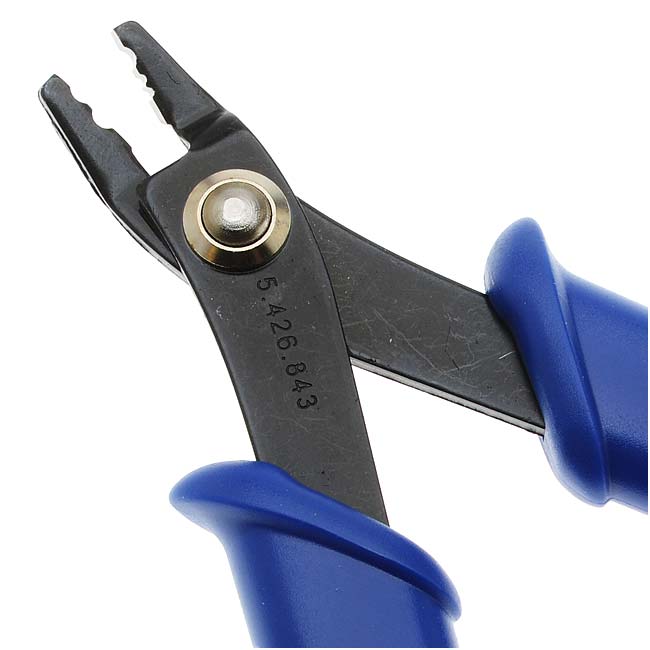
Hi, this is Julie with beadaholique.com and stones and their settings and some wonderful other beads as well so if you look at these cushion stones or 12 millimeters this one here is tanzanite that's one I chose to use in the project is slightly pointed on the back and it's just beautifully faceted it really catches the light I pulled some other colors as well so you could really do this project in whatever color palette you like they're just beautiful stones and what's nice about them is they have these settings that you can purchase with them and everything you see here can be purchased at beadaholique.com if you look at these settings they are pronged they give some depth so when you set a stone into them like this it fits just perfectly and that little pointed back is protected and has actually got two holes that you can string through so you can either choose to use just one hole or you could use both holes and I'm going to show you how to set these stones and how to make this bracelet so here I had started my little pattern and I usually do this this is a little tip I like to kind of lay out my pattern on the stringing material before I actually apply the crimp beads or anything and that's when these guys are handy these are bead Stoppers and you just go ahead and squeeze them together to spread them out and then you connect them to your beading wire and it acts as a stopper so this is the little pattern I've come up with I've got the tanzanite cushion stones I have the cushion stone settings and then between them I have a toe demi rounds in gold and I have iridescent pearl Swarovski faux pearls in four millimeters I'm going to be using an elegant Elements clasp the two strands so I am going to be doing two strands on this bracelet crimp bead covers I have some crimp beads and then I have some beading wire as well in a gold color I'm gonna be for the most part covering the beading wire with my pretty beads and my crimp beads but you'll see it just a little bit up near the so I'm gonna match the gold to it and then in terms of tools for the cushion stone settings I'll show you this in just a minute I'm just going to be using a popsicle stick to set them a pair of cutters and a pair of crimping pliers so let's go ahead and begin first off I'm gonna slide this out because I did not set these ahead of time this was just my pattern and having fun experimenting so you'll notice I've got two strands of beading wire and each one measures 16 inches I'm gonna place a bead stopper a few inches from the end of both of them and then I'm going to string on a crimp bead and then in this case I think I'll go ahead and string on a pearl because this is gonna be what its gonna be up near the clasp and a demi round and that is getting that first strand ready I'm gonna do the same thing on the next strand pearl and a demi round now if you are absolutely sure of how you want your pattern to be you could start by just adhering it to one side of the clasp so we would just crimp our crimp beads and start as this being our bead stopper I'm gonna go ahead and keep it with the actual bead Stoppers in case I want to alter it at the end make it a little longer do anything like that but that is totally up to you so we're ready for our first cushion stone and setting so we need to set it so we've got those prongs you'll notice that the shape of the setting mimics the shape of the cushion stone is a little bit squared off so we're just going to carefully set it down in there until it just rests within there now holding it down with our hand so we're squeezing it together we're gonna take a popsicle stick and I chose a popsicle stick because it's not gonna crack or scratch your crystal and we want to just fold over these tabs so we're just gonna use a little bit of pressure and that tab down over the stone and then we're going to go to the opposite end so the one across from it and push it then the other two okay and then once I've got them all nice and curved over I want to make sure that they're really flush against that stone so what I'm gonna do is i'm going to take my popsicle stick and i'm gonna push it but i'm gonna kind of roll it upwards so i'm pushing it up up and over because i want to make sure these pretty crystals are really set in there okay so that stone is now set you see how the prongs are just going over the top of it I had already done one right here but now I'm going to do all of them and for this particular bracelet I'm going to be using eight so I'm going to grab all of these guys okay and now I'm just gonna set all of them before I go any further on my bracelet so then it just becomes a stringing project after this part is done I finished seven of them I actually wanted to wait to finish the eighth one cuz I want to show you how our thread path is gonna go with the beading wire once we're actually stringing these so we're gonna string them with all their stones already set but I wanted to show you what is going to look like on the inside so we do have these two parallel holes on either side of the cushion stone setting and so basically our wire is going to go through one and out the other so that it's going to be going underneath this stone so now let me set this last one and then we will begin our stringing all right let's start our bracelet now now that the work is done so it doesn't take too long to set those and I think they do look really pretty how they are now we're got the crimp bead we've got the purl and we have the demi round and now we're gonna string on one of our settings and so we're just gonna go through the one hole and it takes a little bit of fishing sometimes but it does come out the other hole on the opposite side and I'm gonna actually string this bracelet with both strands at the same time okay so slide that guy down if this gets a little wobbly down here you could always take off one of these like this and clamp both together using the same bead stopper so you can do that as well so then we want a demi around we want a purl and another Demi around and we want to go through another setting now so look at this one this one actually Criss crossed underneath so I went through the top one and it came out the bottom one so I'm going to pull it out and just slip it through that top one so pay attention to where your beading wire is going and make sure it's going in and out of the right holes now you can make this bracelet longer or shorter based upon how many of these settings you use you could also put more pearls and Demi round at the beginning and at the end of near the clasp to extend the length as well and when this bracelet is all done I will show you its measured full size using 8 of the cushion stone settings so we're just going to repeat this pattern so it's going to be a pretty stone setting with the Demi round pearl Demi round combo between it on both strands that's what we have so far and this is what I'm start to look like on your wrist and I'm just gonna keep on stringing and adding my pieces until I've used up all my settings so now that we've got all of our cushion stones on we're ready to string our last couple beads before we add our clasp so I'm gonna make this side here look identical to our starting side so that means I need a demi round remember these are size eight oh and you can find more information on them at beadaholique.com where you can purchase some but you can also find other specifics on them as well if you want more details on the beads and so let's go ahead and also add another Demi round and another Swarovski pearl and then we need our two more crimp beads so one on each side there we go alright now if you are going to stop this project at any time and come back later I highly recommend securing your other end with a bead stopper that way you can pick this up it can get jostled around and it's going to be okay actually this is a good opportunity to show you what the back looks like actually it's really pretty from the back to the settings are very nice okay so now that we've got this I do want to go ahead and add the clasp this would be my opportunity to change any of my pattern if I wanted to add more pearls or more demi rounds to both sides I could easily do that because I haven't crimped any crimp beads yet but I don't think I'm gonna do that I'm gonna go ahead and just add the clasp so I'm gonna take the bead stopper off of one end and I'm gonna separate out my pretty little clasp and I'm going to replace the bead stopper on one of the strands while I work with the other one so I'm going to go through the loop that's okay if this twists around I do have that bead stopper on the other end okay I'm going to go back down through my crimp bead so I looped around that loop back down through my crimp bead through my pearl and I will say can be a little bit tricky to get two strands of the beading wire through the pearls but it is possible there we go it's coming out the other side I don't know let it go through the deme around - okay so now slide it up so you just want that little loop and you want to keep making it smaller and smaller and smaller until it just has enough room to be flexible you don't want it too stiff now we're gonna take our crimping pliers if you haven't worked with crimping pliers before there's two notches there's one that looks much like a crescent moon shape and another that looks more oval shape the crescent moon which is closest to your handle is what you're gonna use first so you're gonna sit your crimp bead down into that notch and you're gonna squeeze and it's going to make that shape that's much like a crescent moon or a kidney bean and then you're gonna take the oval portion and you want it to actually stand up right in the oval and squeeze and that folds it over onto itself so that is what we've got for that one and that crimp bead is now crimped and I actually forgot to let you guys know you're also going to need a pair of chain nose pliers so I'm gonna get my pair of chain nose pliers alright I had to go to my work table and get my chain nose pliers you can need these guys sorry about that try to pull all my tools when I start my videos so I have a crimp bead cover and it looks much like a C and so I'm grouping it in my pliers with the opening facing outward and I'm doing that so that I can come in here and slip it over my crimp bead and then squeeze but now it looks like a bead instead of it couldn't be that's been crowns so we've got that one done now so now we're gonna go ahead turn this around okay so here we've got our clasp and you want to at this point envision how your clasp is going to go so it's going to go like this so it is the right-side up and we can just go ahead and remove our bead stopper make sure our lines are not Criss crossing I can cut off this tail right now so you can see a little bit better maybe so you don't have three strands you're looking at just gonna crimp it I'm just gonna take it off right where it exits a demi around okay so this is what we've got you want to make sure your strands are not tangled and your clasp tab is facing upwards we're just going to repeat the crimping process over on this side oh my god and make sure it goes through that pearl and if you want it can go through the Demi around as well right now the Demi around is gonna slip and slide until we tighten it on the other side pull that all the way up make that little loop smaller just enough room to give you some movement and we're gonna crimp it same process as before it's gonna crimp in the back not first squeeze it so that it makes that crescent moon shape and then put it in the front notch standing upright so it folds over onto itself grab that crimp bead cover slide it over your crimp bead and squeeze so it again looks like a pretty little bead now at this point let's trim off that tail as well so we've got one half of our clasp attached we've slid all of our beads down and all of our settings so that they're resting up against this part of the clasp that we've already attached you don't want any large gaps because when we do this side of the clasp is going to be finishing off our bracelet so the tab is facing upward here so in essence the clasp is going to go together like this so for attaching this one you want to bring it to this side and make sure it's upright and in that direction so that means this end here is gonna go to this bottom loop right here so let's put our bead stopper back on the end that we're not working with right now just so all of our beads don't come off now we're gonna go up through that loop back down through our crimp bead and our pearl and I'm just gonna have it go through the pearl on this one the crimp bead yeah it wanted to go through the deme round that's okay so instead of sliding it up like I did the last time I'm gonna pull it down because I need it to rest against the beads that are all nice and tight and aligned so here we go we're just gonna keep pulling it down now pull in the tail here and that's what's pulling it so we want it to be together without gaps but we don't want it so tight that it's really pulling on itself so this is good because we're going to want it to be able to bend and move let's grab our crimping pliers we're gonna get in here you can see us in that back knotch crimp so it bent it in half and then we're gonna fold it over and then right now we're also gonna go in and do our crimp bead cover I like doing the crimp bead covers at the same time that I do the crimp beads because they do add just a little bit a fraction of a millimeter of extra space and so I'd rather have that space accounted for right from the start versus going back later and adding it and trim my tail just one more to do back down I'm gonna try to get through that pearl as well just gives an added little measure of security and pull it now again double check for any gaps make sure it's tight but not too tight and you want it to be nice and even which we have and this is gonna be the trickiest one cuz you need to get in there with your pliers it's definitely doable but you just gotta be able to get kind of in that middle section crimp that crimp bead and then fold it in half alright one more step just adding the crimp bead cover and trim in that tail I guess that's two steps here we go I try to do this so you can see my apologies if my hands are obscuring this one a little bit just trying to hold this in place squeeze that squeeze down a little bit alright and let's trim that tail and there we go we've got the clasp that is nice and secure now we have our finished bracelet I'm going to show you the length of this bracelet real quick so you'll know whoops you know what this crimp bead I want to that is a little bit off the cover so it covered it that's a little bit off so what you can do is you can go in with your pliers and shape it a little bit it's very soft metal I'm happier with that okay so here we go so this bracelet I'm going to put this tab here that's gonna go into the clasp measures about almost six and a half inches long and on my wrist that fits plenty fine if you want to make it a little bit longer you can add more cushion settings or you can just add more of the pearls and the damming rounds and if we look over at this end here I'll show you how much each segment measures so if you consider the cushion stone and the little settings the little pearls in between to be one segment at there's about 3/4 of an inch so they'll give you a good idea of how many of these you'd want to order at beadaholique.com if you wanted to make this a longer bracelet so here is our finished piece is a what looks like a two strand bracelet although they we do have the double strands in the cushion stone settings using the 12 millimeter cushion stones by Swarovski with their settings with the little pearls and demi rounds between them and an elegant elements clasp if you enjoyed this video please do check out our other videos we have over a thousand of them for jewelry making at beadaholique.com and on YouTube you

You recently viewed

Clear recently viewed