Audio Transcript
Note: This audio transcript is auto-generated and may not be completely accurate.
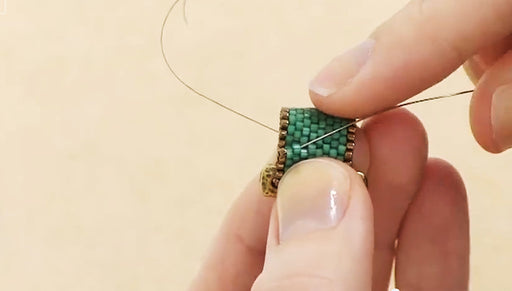
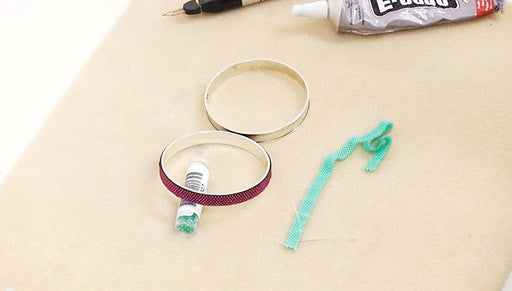
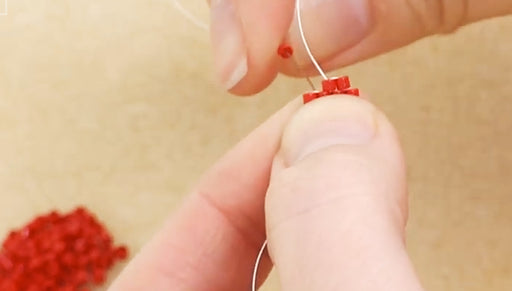
Hi this is Megan with Beadaholique.com and today I'm going to show you how to do decreases in flat peyote stitch and you can do this with even count peyote or with odd count flat peyote but I do suggest that if you don't know how to do odd count that you do you watch our video on how to do that before you try to do decrease I want to show you an example. Our design assistant Kat did this piece here and as you can see she's had to step down and decrease to get the shape that she wanted here and she's done odd count on this because its symmetrical and she needed it to go to a single point so I have an example here of what it looks like if you do this with even count and it's just not quite symmetrical, the point is going to be off to one side so the the center is actually here on this. So if you do odd count you get a point and if you do even count you'll get a point over to one side the way you do this is actually going to be pretty similar whether you're doing odd or even. I have this little piece here of odd count flat peyote and I've woven my way back around to where I would start my new row and because this isn't up row here, on the edges it's up, I'm just going to go ahead and place my bead this is easier to do starting with an up row odd count. It's gonna be depending on how many rows you doing whether it's odd or even it's going to be a little bit of experimentation there's not really a very exact precise formula, I'm going to show you how do you get around to place your needle where you want it so to do a decrease on this row here instead of doing a bead on the edge like normal. In normal peyote you put the bead right here but I want to decrease there, so instead I'm going to weave back through much like you do for odd count peyote when you're trying to get your bead on the end. I'm just going to go down to that next row, go up diagonal through two beads, skip down a row and then go up diagonally through those two beads back to the edge pull that tight. The red should squeeze right between the beads and if you're using a smaller thread you really won't see it as much. I'm just using the thicker thread so you can see what I'm doing and now we're going to go through those two edge beads to position your thread and needle where you want it because you want this nice diagonal line here and you're gonna want to place your next bead here and you don't have to of course do decreases on both sides. You can make it as symmetrical, however you need to do it to achieve the shape that you're going for. I'm just showing how to do a decrease on both sides right now so now we want to stop here because you can see we've got a nice diagonal line going so you wanna just, when you've gone as far as you want, stop don't add any more beads, you're gonna do the same process of weaving your thread in to get back up here to continue. So just step down a row, weave up diagonally through the two beads, go down a row flip around so I can grab it a little better if your thread gets kind of stuck you don't have to go through two beads at a time you can go through one and then the next we just went diagonally through those two beads and I'm going to go backup and into your top row here and now my needle is positioned in the next row along the decrease there complete the row until you come to the end when I decrease on the side too, your gonna stop there and do exactly the same weave in to get where you wanna be and then here I've woven to a point, so I'm going to add my last bead in and I like to just weave right back down. When I do go to a point down the edge to make that nice and firm and then just go ahead and weave in and tie off your ends like you usually would we do have a video on how to do that, if you're not familiar, so this is how you're gonna do exactly this if you're doing odd count and you want to come to a point but you don't have to do decreases on every side or on every row here you can see what Kat's done is she's decreased for a couple of rows and then she stepped it up and didn't do a decrease for one row and it made it more of a elongated point it would have been more of an gradual slope if she hadn't done that so a really handy way to do it is to get a piece of graph paper and you can find really easily with an online search you can find peyote stitch graph paper blank for free and you can just kind of fill out or plan ahead what kind of shape you're going to do and just take your decreases where you need to do them and just do a standard peyote stitch where you don't want to decrease you can get pretty much any shape you want and I do also want to mention that it is possible to do increases in peyote but I find it personally easier to just start at the widest point and go down. So unless you're going to have a piece that's going to go up and down a lot it's usually easier to just start at the widest point and do decreases because I find them a lot easier than increases. Go to www.beadaholique.com to purchase beading supplies and to get design ideas!