How to Complete a Decore Kit

SKU VID-0380
Designer: Julie Bean
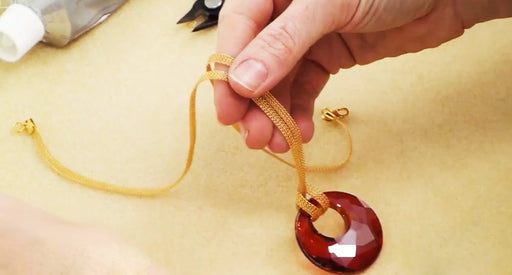
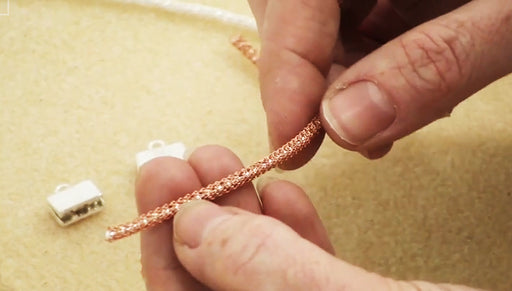
There are lots of wonderful designs of Decore jewelry kits and this video takes you step by step through one of them so you can see what the instructions look like, how the ingredients are packaged, and how to mix the clay.
Audio Transcript
Note: This audio transcript is auto-generated and may not be completely accurate.
Hi, this is Julie with beadaholique.com I want to show you a Decore kit if you're familiar with Decore clay it's an epoxy clay and they've come up with these wonderful kits which have everything you need to complete the featured project which here is a ring and I just wanna open it up with you and do this project so you can see what's involved with these kits and what you'll be getting. So when you flip it over you'll see that it looks like all the information is in Japanese but it's not Once you've actually open it up you'll see it's been translated you've got your photo here to follow you'll also have a photo in the actual instructions as well and then when you open it up you'll see you've got the clay that you're gonna need. It has two colors. It has a rose and a white It's got part A and part B included for both and it's actually already measured for you you'll know if you work with epoxy clays in the past you have to have equal parts of A and B and they've already done that for you. Now this has two different colors of crystal chatons included for you as well and then the ring finding. So you've got everything you need except for an applicator and so I've got a magic pic right here and I'm going to use it to apply my chatons Sometimes you'll find little toothpicks with wax on the end those work great as well. There's a variety of different products out there I'm using the magic pic. I just wanna open this up This is the twin flower ring and it's got all these great instructions. It's really quite easy to follow at the top it shows you what you have included and then it starts to tell you what to do It tells you to mix part A and part B for 3 to 4 minutes and then I can tell that we're gonna start here with the rose color. So I'm just gonna mix rose color and you have about an hour work time before it starts to get really hard so allow yourself to relax, have fun, go about this and just enjoy. Normally with the epoxy clay you're going to use gloves. This is such a small amount it's gonna be okay just to use your fingers. I think it be a little too hard with gloves. So rose A and B just gonna open it up and just going to rip the actual packaging, it'll be easier to get it out now I'm working on a beading mat which does have fibers in it. So I've taken a post-it note which is clean, put my little clay on it so I don't get any of the fibers in the clay squish them together I'll do this for 3 to 4 minutes until all the striations are gone As you can see we now have a nice uniformed color we're ready to go to the next step in the instruction so you can see it shows you here that we've got the blank ring form right here with the big flower on top. It says we need to add the clay and it's gonna go ahead and equal this. So we need to fill all these little holes with the rose-colored Decore clay. To do that I'm going to pinch off a little bit at a time and fill the little cavities Almost done. I just have the center flower to go as you can see it didn't actually take that much clay. I have quite a bit left over. So if you have another project handy you'll only use that within an hour. So I've filled all the little recesses and I'm trying to shape it. I'm trying to make it so that it doesn't go too far out of the line of the finding. That part is now done. I need to look at the directions and it's telling me and I need to add my rose chatons. It's telling me to do it from the outside in. So if you can see in this diagram it's saying I need to do them along the outside in each petal and then fill the interior and I do that for all of them Got the two colors of crystals I'm gonna go ahead and open up the rose one and put them on my little note pad so I can see them. I've got my magic a pic. So whatever you're using that's great. You just need something that's going to pick up a crystal and be able to put it into the clay one crystal placed. You wanna push enough that the outer edge of the chaton is just barely underneath the clay edge and that way it will hold. These are small so they can be a little tricky just going to work my way around It's up to you. You can put as few or as many of these as you want The clay is self hardening. It's gonna harden on its own overnight. You don't need to bake this You also don't need to add adhesive to glue the chatons to the clay because it's sticky I'm going to go back in and reinforcing it and pushing in my crystal down into the clay a little bit more now I'm gonna trim up the side as well and now I'm going to go on to the other pedals and to the centers so I finished the pink flower I actually wanna go back and I want to make sure that all my crystals are set properly. So I go back and reinforce because they tend to move around a little bit when you're working with it and putting other crystals in and squishes the clay around size. Wanna make sure that they're okay That one is done. Now I wanna go do the other flowers the white flower. It's same exact process. But what you do need to do is go make sure you wash your hands before you touch the white because if you've already touched the pink there's probably a little bit of residue left on your hands Do that, then go ahead and we're gonna put the white clay on. Now do the same process with the white clay. Mix up Part A and Part B for 3 to 4 minutes and apply it to the setting I just finished my ring. I wanna show you I actually tried two different techniques on this one I did the pink ones where it showed more of the finding itself. I used a little bit less clay and fewer of the chatons and then for the white one I made it a little bit puffier You don't really see the finding below and I used more crystal Either way works. There's enough in the kit for you to do whichever option you like and as you can see it does, it looks just like the picture when it is finished and the instructions are really easy to use. Everything's included all you'll need is a little applicator to apply the chatons I don't recommend using your finger for them. If it was a really big one you could but you'll need more of a precision tool. So I hope you enjoyed this and I hope that it gives you a better understanding of the Decore Jewelry kit. Go to www.beadaholique.com to purchase beading supplies and to get design ideas!

You recently viewed

Clear recently viewed