Note: Components and tools listed within this INSTRUCTIONS box and the printer-friendly PDF, if available, may have been discontinued since
this project was published. Refer to the PURCHASE COMPONENTS and TOOLS AND OTHER SUPPLIES sections for current availability.
- Begin by making the pendant. Follow the directions on the collage transfer sheet to apply the butterfly image to the inside of the back of the pendant. Usually, sealing the image with a water-based sealant is recommended, but since this image is on the inside of the pendant, you can forego this step if you wish. If you are going to seal the image, we recommend using Nunn Design Permanent Sealant (XTL-1032). Set the pendant aside until the image is completely dry before moving on to the next step.
- Once the transfer image is dry, you must lay out your black border crystals. Carefully place the Austrian crystal Jet rhinestones next to each other around the perimeter of the inside of the pendant. This is just to make sure they fit properly and to get the spacing correct before gluing them in place.
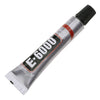
- Now that all of the rhinestones are where you want them, you may begin gluing them down. Working in a well-ventillated area, glue the border rhinestones in place using a tiny amount of E6000 on the back of each. To apply the glue, use either a toothpick or a piece of wire. Set the pendant aside and allow the glue to dry for at least ten minutes.
- When the glue on the border rhinestones has had time to set, you can now glue the Vintaj pendant in place. Pick a few spots on the back of the Vintaj pendant to apply the E6000. Do not use too much, rather just enough to hold the brass piece in place on the back of the glass locket pendant.
- After the Vintaj piece is glued in place on the back of the pendant, you must now apply the fire opal rhinestones to each of the blank circular areas. Set the pendant aside to dry for at least twenty four hours before wearing.
- To create the chain, you are going to link together one of each color of 4mm round Austrian crystals with and antiqued silver diamond cut out bead between each, and at either end of this chain of beads. First, cut seven pieces of silver craft wire at three inches long each. Create the beginning of a wrapped wire loop at one end of a piece of wire. Before you finish the wrapping, thread the loop through the very last link at one end of your two foot long piece of chain. Finish wrapping the loop. Onto this piece of wire, thread an antiqued silver diamond cut out bead and make another wrapped loop. Linking together the wire loops the way you joined the first bead to the end of the chain, join the following wrapped wire loop segments to that first bead segment in this order: the olive green 4mm Austrian crystal round, another antiqued silver diamond cut out bead, the jet black 4mm Austrian crystal round, another antiqued silver diamond cut out bead, the hyacinth AB 4mm Austrian crystal bead, and another antiqued silver diamond cut out bead.
- Before you join the last wrapped wire loop to the other end of the chain to create an endless loop, thread the chain through the loop on the top of the glass pendant. After you have done this, you can now thread the final loop through the last link at the other end of the chain and finish wire wrapping the loop. Trim off excess wire.
WHAT YOU'LL NEED: (scroll down for purchase options)
- PND-7244 - Vintaj Natural Brass Fastenables Perennial Laurel Flower Stamping 32mm (1)
Project uses 1 piece. You will need 1 package.
- SWF-41212 - Austrian Crystal, Round Flatback Rhinestone SS12 3mm, 50 Pieces, Jet
Project uses 36 pieces. You will need 1 package.
- XTL-9511 - Nunn Design Transfer Sheet Butterflies & Birds For Scrapbook -Fits Patera
Project uses 1 piece. You will need 1 package.
- WNT-2430 - Beadsmith Tarnish Resistant Silver Color Copper Wire 24 Gauge 30 Yards (27.4 Meters)
Project uses 2 feet. You will need 1 package.
- SWC-0443 - Austrian Crystal, 5000 Round Beads 4mm, 12 Pieces, Olivine AB
Project uses 1 piece. You will need 1 package.
- SWC-0415 - Austrian Crystal, 5000 Round Beads 4mm, 12 Pieces, Jet
Project uses 1 piece. You will need 1 package.
- BMB-5173 - Antiqued Silver Plated Diamond Cut Out 4mm Round Beads (100)
Project uses 4 pieces. You will need 1 package.
- CHA-9655 - Antiqued Silver Plated Cable Chain 2.2mm Bulk By The Foot
Project uses 2 feet. You will need 1 package.
- XTL-1054 - E6000 Industrial Strength Glue Adhesive (0.18 fl oz)
Project uses 1 piece. You will need 1 package.


 Earn Reward Points with your purchase of project components or tools.