How to Make a Kumihimo Chain Necklace

SKU VID-1124
Designer: Julie Bean
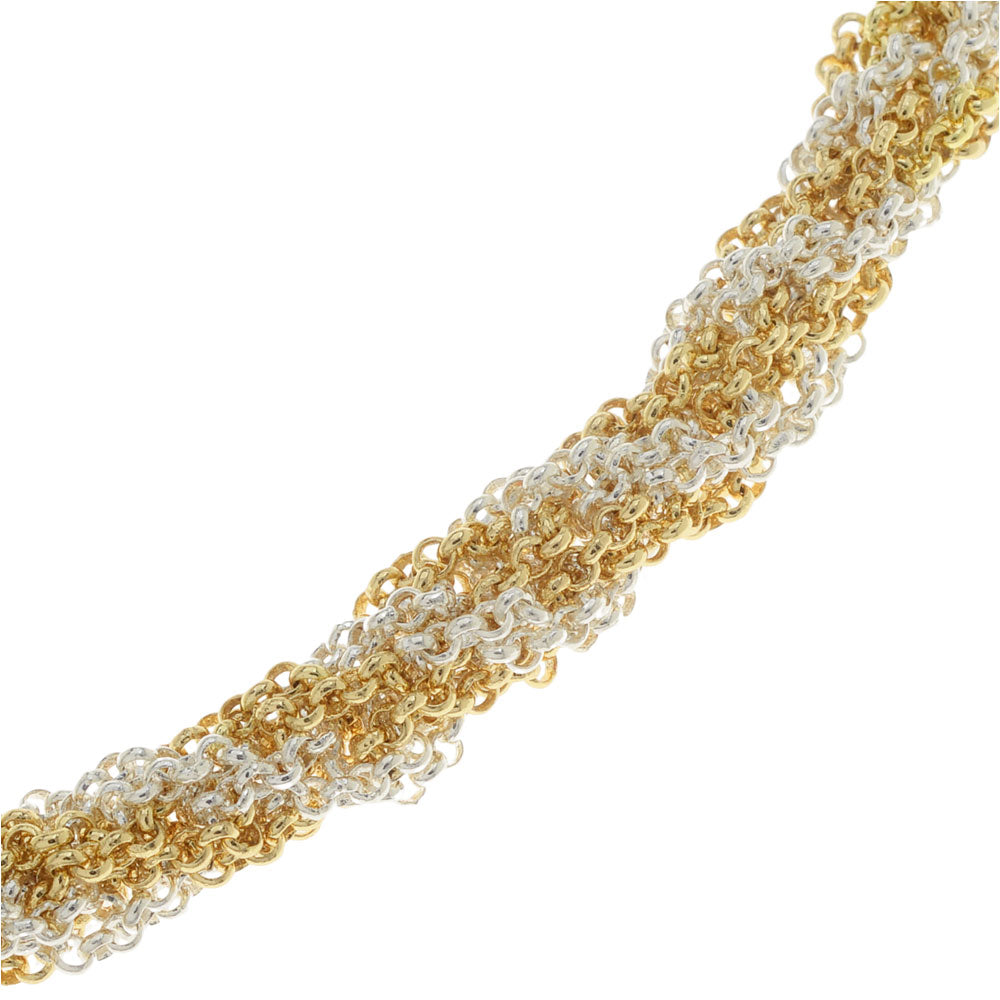
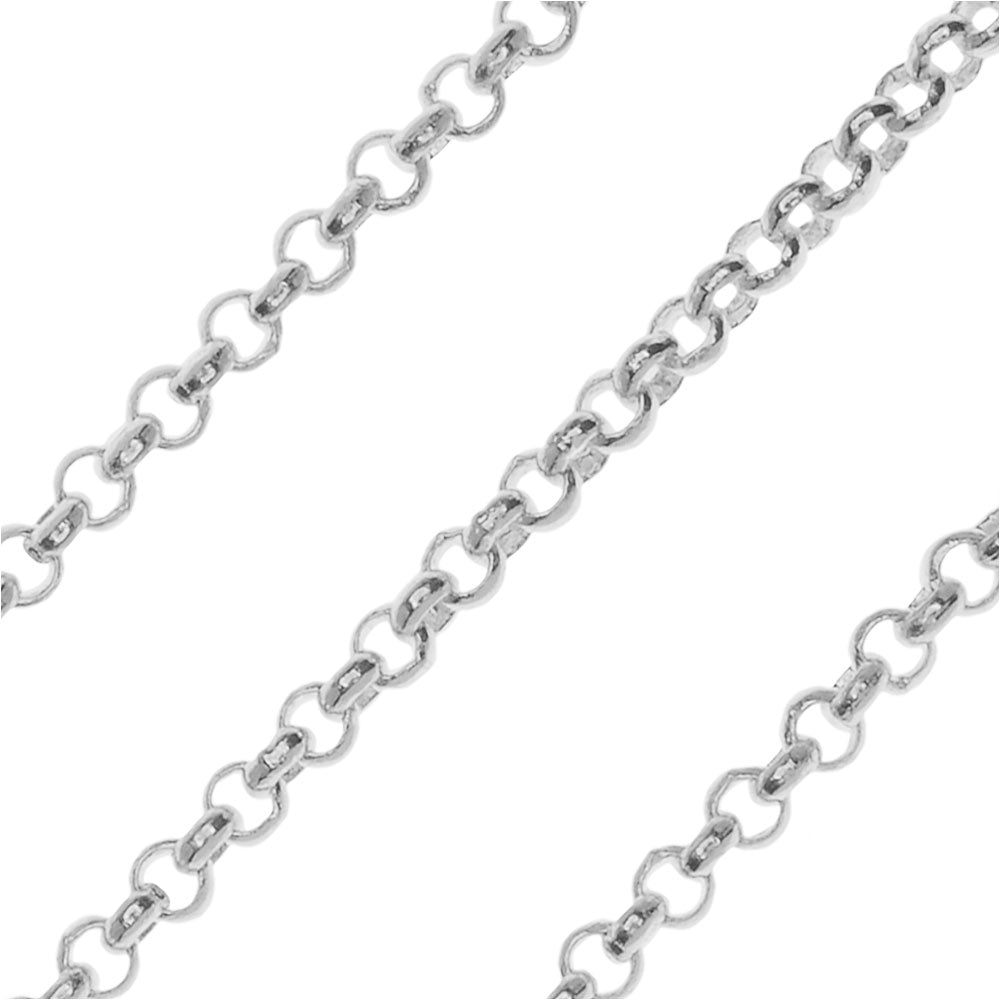
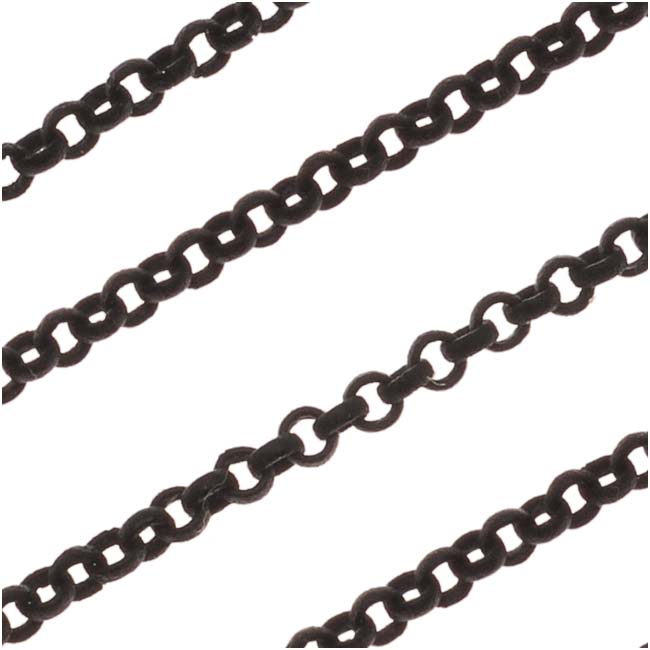
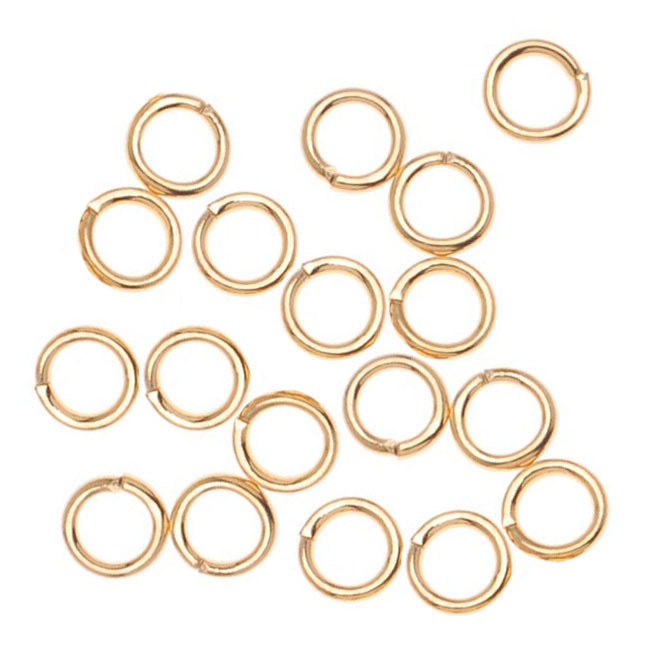
In this video see how to make a kumihimo braid using chain. The braiding technique is the same as for standard 8-warp kumihimo but you will start and finish your braid in a way that is unique to using chain. Also see how to turn your braid into a necklace.
Audio Transcript
Note: This audio transcript is auto-generated and may not be completely accurate.
Hi, this is Julie with beadaholique.com i'm oh using chain this has been on my to-do list at least three years now probably four and I finally figured out how to do it so here is the finished piece and you see that this is a kumihimo braid and we use some Rolo chain size two millimeter I'm going to teach you how to do that and up here we finished the ends with some wire wrapping and then we just use some more Rolo chain and connected it to a lobster clasp so again that's a finished piece I'm going to show you how to do it so what you're going to need you're going to need chain I am using Rolo chain size two millimeter in two different colors and I'm going to use the black one here because I thought it would be really easy to see in the video you're going to need eight feet of two different colors of course if you want all to be the same color you'll just need 16 feet total you're going to need some wire I'm using artistic wire I'm using 24 gauge then to finish it off I've just got this little lobster clasp and to size four millimeter open jump rings so those are your supplies now in terms of tools you're going to need a ruler if you need a kumihimo disk as well as a Kumi weight you're going to need two pairs of chain nose pliers to open those jump rings a pair of round nose pliers or like I like to use wire looping pliers to make my loops and a pair of cutters and I want to show you so this started off the same amount of chain as you see here so in a second we're going to cut these into two foot increments but I want to show you how long I was able to achieve my braid so about 11 inches of Kumi braid when you start with 16 feet of chain broken out down into eight segments that are two feet long each if that sounds a little bit confusing just wait we're going to go step by step and is not going to be confusing in just a few minutes so let's begin so we're going to start by cutting our chain into two foot segments which is 24 inches I have a 15 inch ruler right here so I'm going to do 15 inches and another 9 which look at me 24 or 2 feet and cut it you can do longer if you like just make sure that your segments are the same length each if your chain kind of kinks up on you just kind of work it out and a little kink here or there is not a big deal because it's going to be moving as you are doing your weaving and those kinks will come out okay down to my last length and even though it should just be 2 feet because I've cut 6 feet already just double-check it'd be really a bummer if you did this whole project and you ended up with one chain that was too short so we're fine so now we're going to go ahead and connect all these guys together to begin with that's really the key so I want to show you something that I made literally three years ago plus this was a kumihimo braid with chain and I think we don't even carry this chain anymore I think it's been discontinued by the manufacturer but I had no idea how to start or finish this so I just wrapped wire around it and spin sitting on my desk for years because you don't want to finish your braid which looks lovely and then be like well what do you do with all this how do you finish it so you actually start by finishing your end or almost finishing your end I should say and to do that you're going to grab some wire anyone 910 inches of wire and we're going to place our chain via the end chain link onto the wire and you're going to go ahead and do two of one colors or two golds and then we're going to do two of whatever your alternating color is so we're going to do two blacks and then two golds and then your remaining two black this is what we've got slide them down so that you have a couple inches protruding out this end and then bring them together and crisscross your chains as tight as you can so that there's a nice little loop in there and then take the short tail and wrap it around the long tail and make a couple nice wraps and then trim your tail and if that's a little poke edge don't worry about it too much we're going to be able to trim this up later you can always go in and use a change of supplier to help with it alright so this is what we've got all our chains are connected with a nice long wire sticking out the end now we're going to take our kumihimo disk and we're going to put that wire through the center now we are going to start lining these up on the disk so if you're not familiar with how to use a kumihimo disk or even have seen one before you'll notice it's got these numbers around the edge and it's got four dots so you want the 32 dot to be at the top and the 16 dot to be closest to you and then in order to create a spiral pattern with kumihimo whether you're doing chain or textile you are going to put one color at the 8th and then that same color across at the 24 so because I know that's what I'm doing that means the black is going to be up top here and the other black is going to be closest to me and the gold and you see because we put these on alternating they're exactly where we want them to be so now just make sure that that's a little loop is in the center okay we're just poking these into the disc a little bit it's really a thick disc it's not really possible to yank those all the way in B just want them anchored and you want the center there we go and then these guys up here now if you're familiar with kumihimo you're probably wondering where are the bobbins you can do bobbins if you want there little plastic like clam shells that help to secure this I found with this length of chain it was super easy to do it without bobbins if you have longer chain you might want to consider bobbins but I was ok with that so I am going to go ahead and now take my Cooney weight and where I'm going to grasp it is just on the wire right up towards my wrappings and if it pulls off of there you can actually grab your wire wrappings you just want it to be stuck on there so it's going to be a little harder with me sitting down so I'm actually going to go ahead and stand up really quickly so you might hear my cheapest wiki chair I need to be standing doing this so these can hang all right so now we are going to begin our braiding it's the same technique now as what you've done before if you've familiarized are going to bring it up to the left side of your two strands up here and just anchor it in that little notch and now you're going to take the right one and bring it down to the right so left up to left right down to right and then you're going to rotate counterclockwise we're going to do the exact same thing so the one that's to the left of the twenty-four dot is going to go up to the left of the two strands that you already have here and the right one's going to go down and then rotate and that is all there is to it now one tip I did want to share with you when you are doing chain is you can go like this and just go like that don't just yank it like that kind of let it be loose for a second then just nicely pull it over and put it in its knotch and I am is tight but I'm not like super pulling it I hope that makes sense I'll make a little more sense as you get more of your weaving so yeah and just kind of let you loose in there for a minute and then letting it pull over the other strands and then rotating it kind of almost feels like what you do when you have beaded kumihimo how you let your bead drop in there is you're just kind of letting that flow a little bit um a little bit more gently than if you were just doing straight to me without beads or with just a plain strand of fiber so I'm going to do a little bit here on camera just so you can start to really see this braid develop now if you ever are going to pause with your comb you say you got to go make dinner or you got to go out whatever always end with three strands up top because I could put this down and I could come back to it and I would know oh those three strands are up top so I must just need to take my right strand and bring it down whereas if I left it just like this it might be a little challenging to figure out where you left off and where you need it to rotate okay so I wanna see if I've got any of the pattern developing yet okay not quite so I'm going to do a little bit more here on camera because I really want to have it so you can see that spiral before I go off camera and do the main length of it and then come back on camera to show you how to finish it and at the end I'm also going to share a tip on another way of finishing the ends if you don't want that wire wrap look it's the same technique left up right down rotate left up right down rotate okay let's see if I'm getting my spiral there we go so you're seeing how it's spiraling so we've got that nice gold going up here with the black in between so I'm just going to keep doing this same exact technique until I get to a point where I just have a little bit of the chain left at that point I'm going to stop and then tie it off so go ahead if you're following along with me and go ahead and do that and then we'll come back and I'll show you how to finish it off and then also how to turn it your piece of Coon came out into a wearable necklace this is where we're at now so it got a nice length of the braid and I stopped with my three up top I'll do a couple more on camera here just is probably what you've been doing at home if you're watching but I want to show you about when we get to the end here so see how much we have I don't want to go too much more than that because otherwise it might pull out but look at what's interesting and I find this happens every time I do chain kumihimo I end up with different links and I think it's just a tension issue I think some times I just pull a little bit tighter and other times I don't it happened with this one as well so that's just kind of interesting note is even though you started with the exact same lengths of chain you might end up with different links so I'm going to take my weight off at this point and now we need to finish this what we're going to do is we're going to take another length of wire and we are going to do some threading so I'm going to start right here and I'm just going to go through one chain link and then I may go through another chain link that's about at the same orientation so I'm just going across so now I've got two chain links anchored on there now I'm going to take actually know what I want to do I want to finish this because I know I'm stopping I want to go ahead and I just want to pull that down so I finished with that step okay so now I'm going to take my wire and thread it through another chain link so now I've got three on there this can get a little tricky just because our wire gauge is 24 gauge so it's pretty flexible but it's still you know it's still a stiff wire it's not like a piece of thread what you can even do is take your chain nose plier kind of help it go through and then pull it you want to get as close to your braid as possible when you're doing this part like I would think I'd rather go through if you can see it I can point out this chain link instead of this top once and I pull my wire out and see if I can get even closer it could be the same one I just went through well we're going to call it good you got enough length here so if you want it you can always trim if it gets a little kinky you can always trim your tail we just got two more there's one and there's two okay so this is one of the most important steps of this whole process that old adage measure twice cut once kind of the similar thing here double-check that you went through every single chain so there should be eight little loops so we've got the two black ones there we are definitely through this gold one or through that gold one through those two blacks and we are through those two Gold's pull your wire so that you have good maybe three inches on one end three four inches so you don't want this to slip off because we're not going to create our wrapped loop just yet so now we need to actually cut our chain so you don't want to cut the loop that's anchored to the wire of course you want to cut one above it again go very slow and make sure you're cutting the right link now they've got them all on there do the same thing you did when you started your project go ahead cross your wires as tight as you can and then wrap the shorter end this point my ends are pretty equal but wrap the shorter route and around a couple times and you can trim it this my friends is what we've got thus far and here we see that spiral he also knows there's a little bit of you know inconsistency because it's a little harder to do chain Kumi than regular Kumi so if you want to like try to smooth it all out so as a little more even wiggle it it's not going to come undone on you that will just help kind of spread out the chain a little bit I guess you could say because it's chain can get kind of stiff in places if you just wiggle it a little bit it's going to make it look more uniform okay there we go I do want to take a look at something real quick so I caught about ten inches instead of 11 inches out of this one and it's really just a tension situation so two feet equalled about 10 inches in this case in this case it equals 11 inches so if you're planning that you really want your focal part to be an exact length buy extra chain and just have a little bit left over and speaking of leftover chain it is this leftover chain that for this project where you're going to use to finish our necklace so if we bring the ruler so we've got 10 inches here let's say I wanted to make an 18 inch necklace the clasp will add about half an inch or so and I could choose if I want it to be black or if I want it to be gold I think I'm going to go gold so if this is 10 inches I want 18 inches I'll do 4 inches on each side okay so those are ready to go now the black ones ended up a little longer which was again interesting but it happens so there are longer bits we could have made it longer you can also just purchase the amount of chain lengths you want like say you know you want this to be a 36 inch necklace what this is a focal you'll just purchase a couple extra feet of chain now the way I finished this one here was with wrapped wire loops and I'm going to do the exact same thing on this one but you want to show you another option and that would be these guys so these are cord ends so and they have a little hole at the top so there's a couple different sizes here we have a ten and eight and a six and that number relates to the interior of the well and I think looking at this is going to be the eight that would work so if you want to finish it with one of these you would just put your wire through it and slip it over the top of your chain and then you'd create a wrapped wire loop on the outside but I really like it that I don't have to necessarily use a cord end with this chain Kulii every other type of Kumi you do so I'm going to go ahead finish it with my wrapped wire loops to do that I'm going to take my wire looping pliers and right above all my other wrappings I'm going to squeeze that makes half a loop for me pull it around rotate my pliers up to the top to finish my loop and now before I actually do my wrappings going to slip the end chain link of one of my cut pieces of chain into here okay let that slide in so that is very nicely anchored and now taking my chain nose pliers I'm going to hold that loop with the chain up top and I'm going to just create some wraps and I think with this particular design it would look very nice to have both neat wraps as well as messy wraps if you're a fan of that bird's nest style of rapping I think that would look actually really pretty on this - you could do as many or as few as you want just want to make sure it's nice and secure trim it tuck your tail in so it doesn't scratch you and that side is done and we're gonna do the exact same thing on the other side and this is a super long wire just going to cut a little bit off and other lengths of chain see cut one of those chain bits on there there we go okay holding it and my wrappings you okay we are almost done so now we just need to add the clasp so I'm going to do this little lobster and the jump rings so we're going to go to the top part of our necklace and we're going to go ahead and open a jump ring just going to grab both sides of it with our pliers and twist and I'll just attach it to the end chain link here and I will twist it back shut and that's going to be the jump ring that the lobster clasp will actually hook onto and then for this one we're just going to put this on the end and our lobster close it back up secure our necklace and we are done and then I pull the other one out for you to look at to then you can see all right so we've got the silver and gold and then we've got the black and gold so very different looks I think the chain though really pops here in this one you have a little bit more contrast and then of course here this is a little bit more blendy but it's really pretty mixed metal look and there's a coarse chains are available in all different finishes you can do antique bras you can do antique silver you can do whatever color you really want and then different styles of chain will work the same way just be cautious if you have a chain that has different size links within it so if it's got like little short links combined with long links you're going to have a hard time getting a really nice uniform look to your braid but if it's a chain like the Rolo chain where every link is the same it's going to be pretty easy to do this exact method so I hope you enjoyed this kumihimo technique video in this project and then we do on the beadaholique website have a ton more videos and projects showing you different ways of doing kumihimo I hope you enjoyed thanks for watching everyone you

You recently viewed

Clear recently viewed